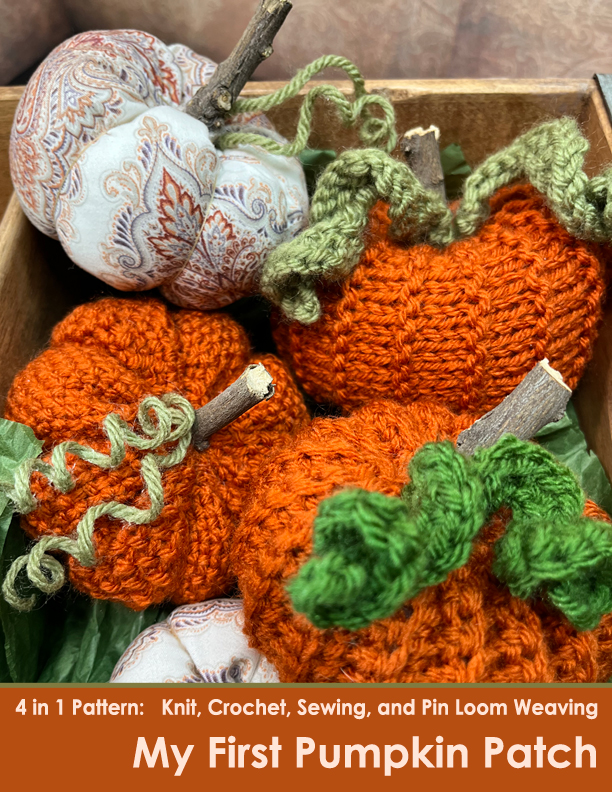
My First Pumpkin Patch Pattern

4 in 1 Pattern: Crochet, Knit, Sewing, Pin Loom Weaving

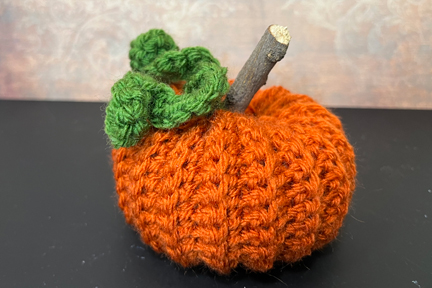
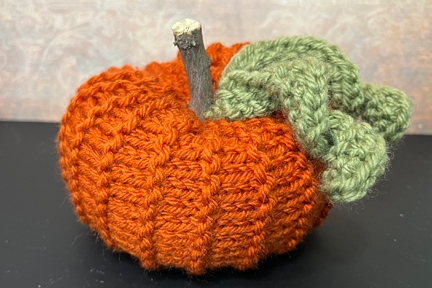
These aren’t the first pumpkins we’ve ever made. But maybe they are yours. And what better way to celebrate fall, harvest and Halloween than to make miniature squash? 

If you or someone you know are learning to knit, crochet, sew or pin loom weave, then these are the perfect projects. Each pumpkin is made from a rectangle that’s joined to create a cylinder which is shaped into a stunning miniature pumpkin.

These are fun and quick little projects and great stash busters. We used worsted weight (4) acrylic yarn for the knit, crochet and pin loom pumpkins. They would look equally adorable in most any yarn type. The fabric pumpkin was made with a 5″ x 10″ piece of material.

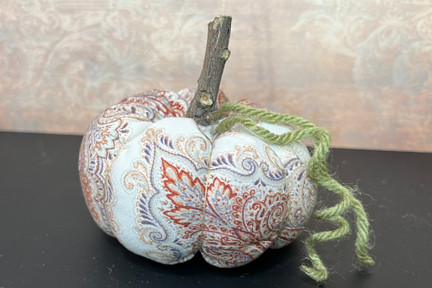
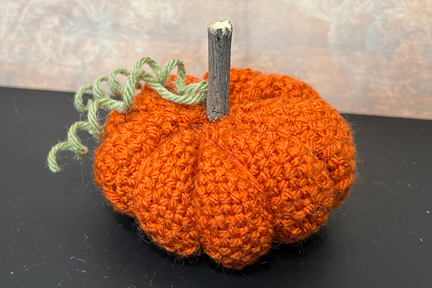
Each miniature pumpkin measures about 3 1/2″ wide by 3 1/2″ tall including stem (or there abouts).

Printer Friendly Version on Etsy

The printer friendly My First Pumpkin Patch Pattern is available in our Etsy Shop and includes a TON of extra helpful information and photos for beginner crafters.

Available now on Etsy.

Buy the pattern on etsy

My First Pumpkin Pattern Information

Below we’ll share with you a lot of information. You may be tempted to skip right over that and go right to the pattern…but take a quick second to review. I’m positive it will be helpful.

Supplies List for Beginner Pumpkin Pattern

The supplies you need are really minimal which makes this a great first project for new crocheters and knitters.

ALL PUMPKINS

  • Stuffing
  • Yarn Needle for sewing
  • Tree Branch 2″ long
  • Scissors
  • Pencil (optional for making curly q’s)
  • Spray Starch (optional for making curly q’s)

CROCHET PUMPKIN

  • Yarn: Worsted Weight (4)
  • Crochet Hook: H/8/5.00mm or size recommended on yarn label

KNIT PUMPKIN

  • Yarn: Worsted Weight (4)
  • Knitting Needles: 5.00mm or size recommended on yarn label

PIN LOOM WEAVING PUMPKIN

  • Yarn: Worsted Weight (4)
  • Pin Loom: 4” Square
  • Weaving Needle: 5”

SEWING PUMPKIN

  • Fabric: 10” x 5”
  • Thread & Needle
  • Sewing Machine (optional)

Share the Love

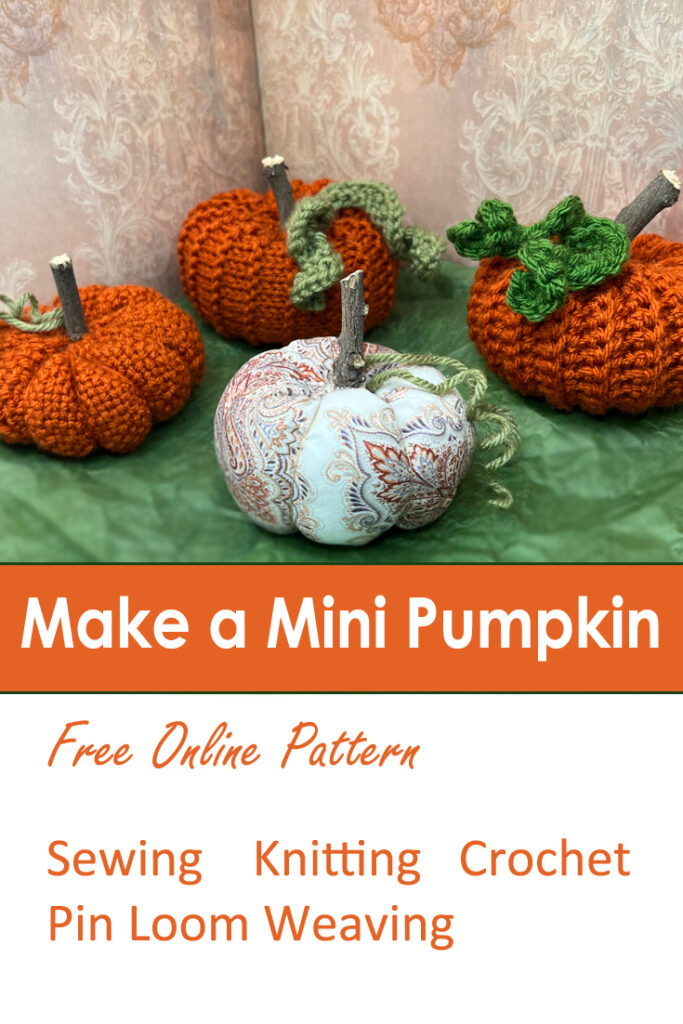
Share the Love, Pin one of these photos to Pinterest.

knit, crochet, sew, pin loom weave a pumpkin

Printable Version Packed Full of Photos

There’s just too much information to put on the blog. For just a couple bucks, you can print the step-by-step tutorial from Etsy. Here’s what’s included in the My First Pumpkin Patch Tutorial on Etsy:

We love bringing you fun and festive designs. Consider purchasing this or other patterns as a way to help us keep you in stitches.

Get the Pumpkin Patch Pattern on Etsy.

Buy the pattern on etsy

How to Read a Knit or Crochet Pattern

Patterns can get rather long, because pattern writers want to be clear and concise. But sometimes using more words rather than less can make reading a pattern more challenging. So, abbreviations are used. A lot of information can be given in a small amount of space. Here are the abbreviations you’ll see in the patterns below.

Crochet Pattern Abbreviations

  • blo = back loop only
  • ch = chain
  • sc = single crochet

Knit Pattern Abbreviations

  • k = knit
  • kfb = knit front and back (for Curly Q only)
  • p = purl

Pattern Notes

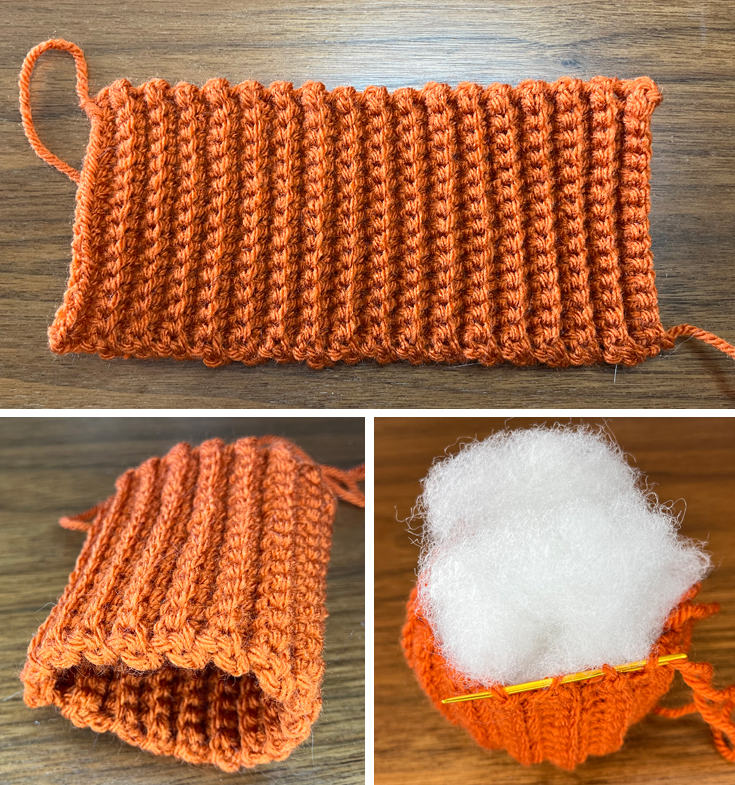
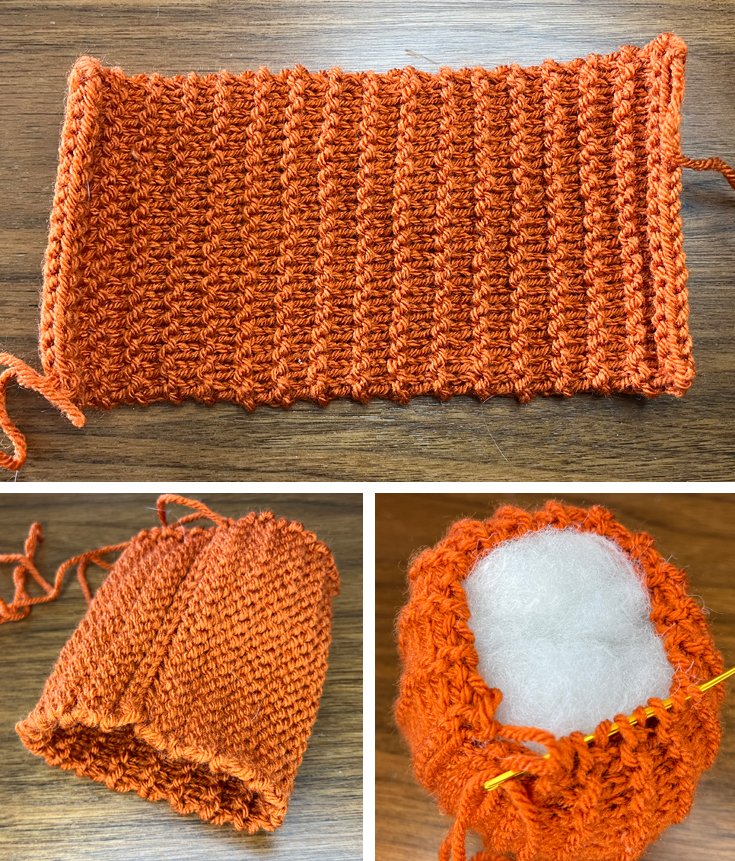
  • You will crochet or knit a rectangle then join the first and last rows. Then cinch the sides to create your pumpkin shape.

My First Crochet Pumpkin Pattern

With Orange or color desired

Ch 16

Row 1: Sc in 2nd ch from hook and each ch across. (15)

Rows 2-34: Ch 1, turn. Work in blo: sc across.

Finish off, cut yarn and leave a long tail for sewing.

Fold project in half so Row 34 is aligned with the foundation chain. Join with whip st through the back loop of row 34 and both loops of the foundation chain, repeat across to form a cylinder.

With an 8” length of orange yarn, sew a running stitch through the ends of Rows 1-34 on one end of the pumpkin and cinch tight. Tie a knot and weave in ends. This creates the bottom.

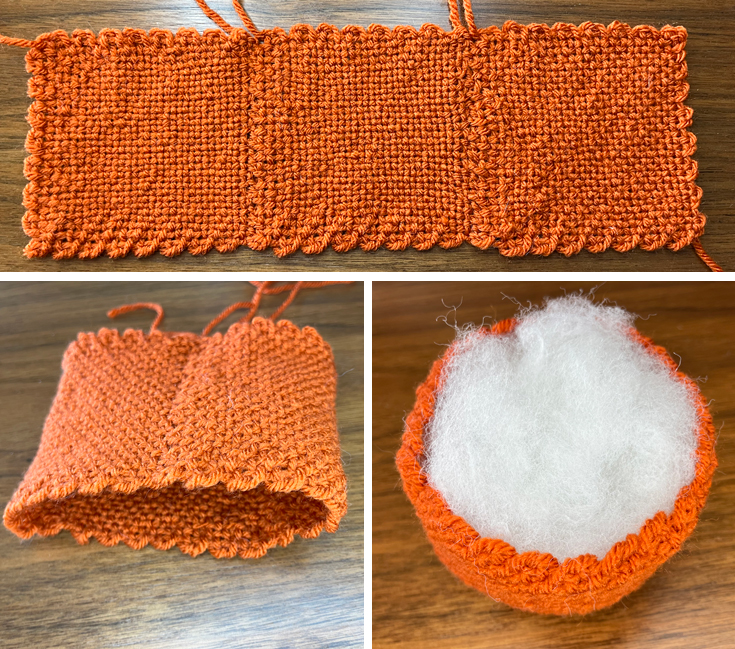
These are just a few of the photos you’ll find in the Step-by-Step Pumpkin Patch Tutorial in our Etsy Shop.

Stuff pumpkin lightly.

With 20″ length of orange yarn, sew a running stitch through the other ends of Rows 1-34 and cinch tight (insert a twig before closing). Tie a knot. Do not cut yarn. This creates the top.

The pumpkin may look like a round ball. To squish it into more of a pumpkin shape, use the tail from cinching and run the needle down the center of the pumpkin near the stem to the center of the bottom of the pumpkin. Pull tightly. This should force the center of the pumpkin to shorten. Insert the needle a few millimeters away, and pass the needle back up from the bottom to the top in the middle near the stem. You may need to do this a couple of times near the stem. Weave in ends.

More Halloween Patterns

Before you begin stitching your pumpkins, we want to invite you to check out these fun Halloween patterns to crochet and pin loom weave. Stitch costumes, treat bags, cup cozies and more.

Halloween Patterns on our Etsy Shop.

Buy the pattern on etsy

Crochet Curly Q Pattern

Green (Make 2)

Ch 13
Row 1: 2 Sc in 2nd ch from hook and 2 sc in each ch across. (Working 2 sts in each ch will cause the ch to curl.) Finish off, cut yarn leaving a tail for sewing (24). You may need to twist the cord a little to help the stitches all line up and curl correctly.

Sew to top of pumpkin near stem. Weave in ends.

My First Knit Pumpkin Pattern

With Orange or color desired

Cast on 20

Rows 1, 3 & 4: K across, turn. (20)

Row 2: P across, turn.

Repeat Rows 1‐4 until piece measures 9 inches (approx 17 repeats).

Bind Off

Fold project in half so last row is aligned with the cast on row. Join with whip st across.

Using an 8” strand of orange yarn, sew a running stitch through the ends of the Rows 1-68 and cinch tight. Tie a knot and weave in ends. This creates the bottom.

Stuff pumpkin lightly.

These are just a few of the photos you’ll see in the Step-by-Step Pumpkin Patch Pattern in our Etsy Shop.

With a 20″ length of orange yarn, sew a running stitch through the other ends of Rows 1-68 and cinch tight (insert a twig before closing). Tie a knot but do not cut yarn. This creates the top.

The pumpkin may look like a round ball. To squish it into more of a pumpkin shape, use the tail from cinching and run the needle down the center of the pumpkin near the stem to the center of the bottom of the pumpkin. Pull tightly. This should force the center of the pumpkin to shorten. Insert the needle a few millimeters away, and pass the needle back up from the bottom to the top in the middle. You may need to do this a couple of times near the stem. Weave in ends.

Ready for Christmas?

More holiday fun awaits. Crochet, pin loom and sew fun items for Christmas, too. We have ornaments, pillows, home decor, gift bags and more.

Check out these Christmas Patterns in our Etsy Shop.

Buy the pattern on etsy

Knit Curly Q Pattern

Green (Make 2)
Cast on 16
Row 1: K across, turn. (16)
Row 2: Kfb of each st across. (32)
Bind Off
Sew to top of pumpkin near stem. Weave in ends.

My First Sewing Pumpkin Pattern

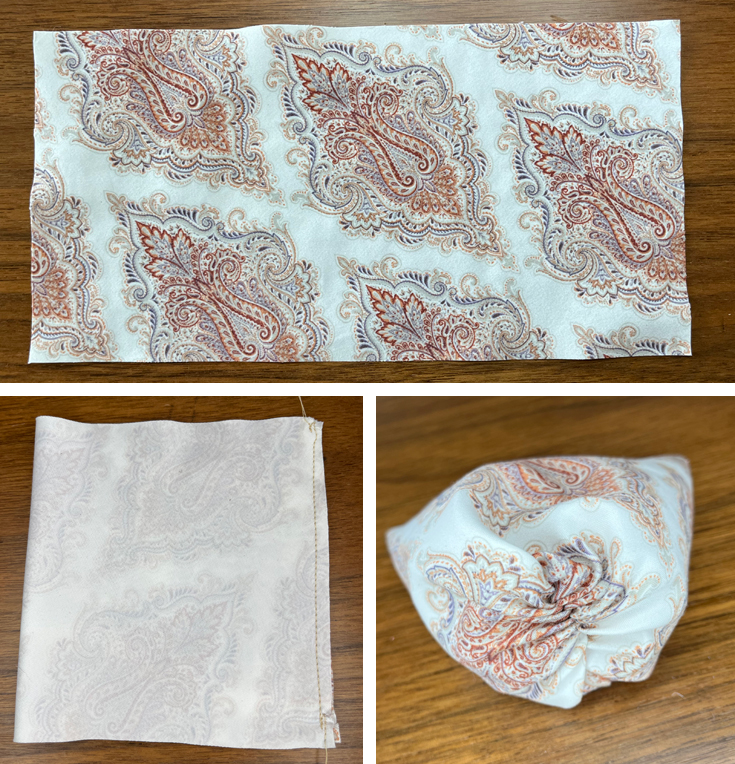
Cut fabric on the bias 5” tall x 10” wide.

Fold fabric in half with right sides together so it’s 5” x 5”. Sew the side opposite the fold with a straight stitch (on sewing machine) or running stitch (hand sewing).

With needle and thread and fabric still folded in half, hand sew a running stitch along one of the open ends through both layers. Cut thread leaving a long tail at beginning and end. Repeat about 1/8” from the first sewn line so you have two parallel lines of running stitch.

Pull the tails to cinch closed. Knot the thread. This is the bottom of the pumpkin.

Turn work right side out. Stuff pumpkin lightly.

These are just a few photos you find in the My First Pumpkin Patch Pattern on our Etsy Shop.

As before, sew running stitches around the unfolded fabric on the other opening sewing through one layer. Pull the strands adding a stem before cinching closed completely.

With needle and thread (and additional strands as needed), create ribs along sides of Pumpkin. Knot thread to bottom of pumpkin. Run thread outside the pumpkin from center bottom to center top then pass needle down through center of pumpkin back to bottom. Pull to desired tightness to create a rib. Do this where fabric is joined to help hide the join. Then repeat several times around to create additional ribs.

Beginner Friendly Sewing Patterns

beginner friendly sewing patterns

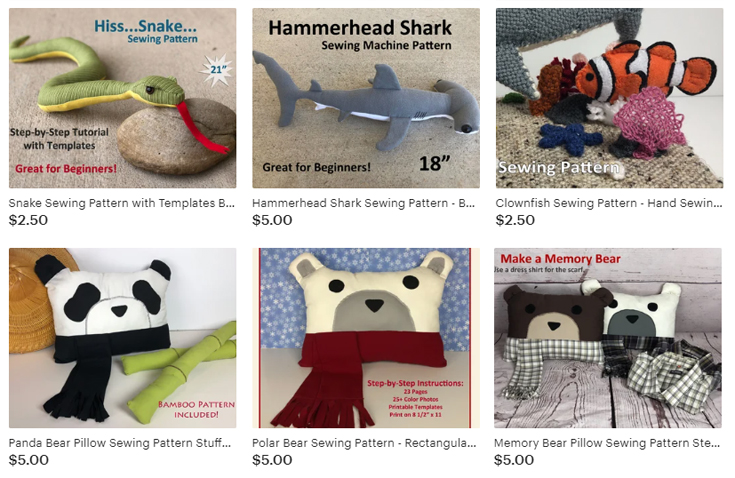
If you are new to sewing, here are some really fun step-by-step sewing patterns with traceable templates! You read that right. All of these patterns are step-by-step tutorials with pictures. The bear pillows make great memory bears…they are so cute and huggable. If you want something with a bit of attitude, the snake and hammerhead are sure to intimidate.

Check out the beginner friendly sewing patterns in our Etsy Shop.

Buy the pattern on etsy

No Sew Curly Q

With Green yarn

  1. Wrap a pencil with yarn leaving a tail on both ends for attaching to the pumpkin later.
  2. Spray liberally with spray starch so the yarn is soaked through. Turn pencil to spray both sides. Allow to dry completely.
  3. Remove from pencil. Cut in half.
  4. Use a yarn needle to sew to pumpkin near stem. Weave in ends.

My First Pin Loom Pumpkin Pattern

Orange

  1. Plain weave (3) 4″ squares.
  2. Lay them out to be 1 square tall by 3 squares wide. Join with whip stitch.
  3. Join the 4” ends together with whip stitches so you have a ring that’s 1 square tall x 3 squares around.
  4. Cut a strand of yarn to 8″ length. Sew a running stitch through each of the loops along one end making sure to go through all the loops on all three squares. Cinch closed. Tie a knot and weave in ends. This is the bottom of the pumpkin.
  5. Stuff pumpkin lightly.
  6. Repeat step 4 on the top with a strand of yarn that’s 24” long, cinch tightly (insert a twig before closing). Do not cut yarn.
  7. Using tails from step 6 and additional strands of yarn as needed, create ribs along sides of Pumpkin. Run yarn outside the pumpkin from center bottom to center top then pass needle down through center of pumpkin back to bottom. Pull to desired tightness to create a rib. Do this where each pin loom square is joined to help hide the joins. Then repeat in between each join to create additional ribs.

These are just a few of the photos you see in the My First Pumpkin Patch Pattern in our Etsy Shop.

Gnomes to Pin Loom Weave

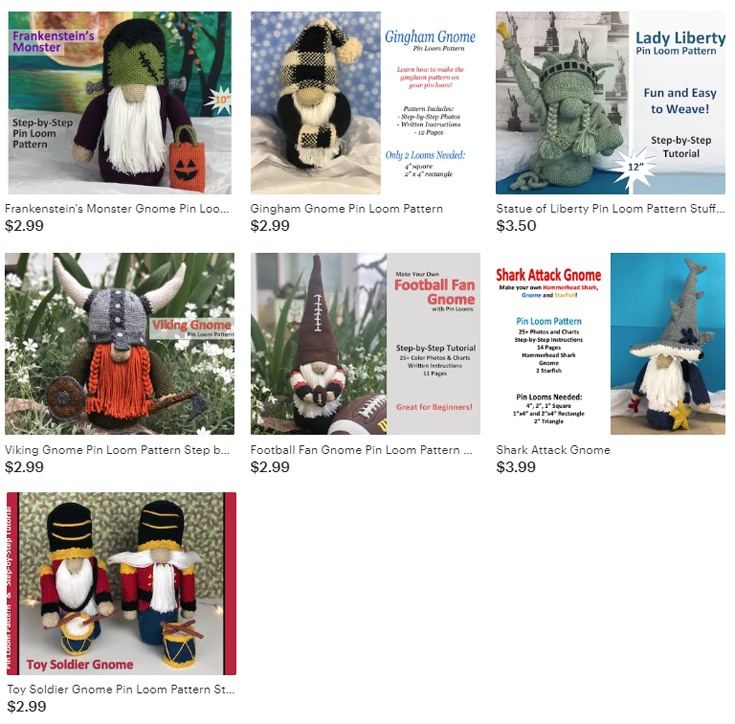
Gnomes for every occasion…pin loom them all! These are ALL step-by-step tutorials with pictures and written instruction. These are great for fans of football, sharks, Halloween, and the Nutcracker! More are coming so be sure to visit the Etsy Shop.

Learn more about Pin Loom Gnomes on our Etsy Shop.

Buy the pattern on etsy

Pin Loom Curly Q

Follow directions above for No Sew Curly Q.

Get the Pumpkin Patch Pattern on Etsy

Get the print friendly version of the 4 in 1 Pumpkin Patch Pattern on our Etsy Shop. It encourages us to keep producing fun and festive patterns for crochet, knit, sewing and pin loom weaving.

My First Pumpkin Patch Pattern on Etsy.

Buy the pattern on etsy

Vote in Witchy Twins Face Off with Anne Geddes

Vote in the Twins Face Off Crochet Design Challenge with Anne Geddes Baby

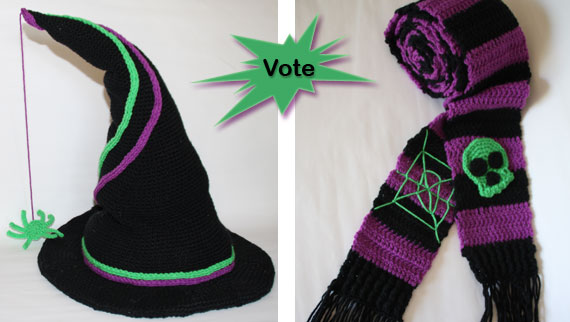
For this Twins Face Off crochet challenge we used Anne Geddes Baby yarn. It’s up to you to choose, which crocheted Witch Accessory you like better. After you vote below, scroll down to enter the giveaway for your chance to win 4 skeins of Anne Geddes Baby from Red Heart and a copy of both crochet patterns.

Giveaway ends September 21, 2015 at midnight.

Twins Face Off Witch Hat and Scarf

Left: Witch Hat with Dangling Spider    Right: Extra Long Striped Scarf with skull and spider web applique. See more photos.

crochet witch accessories

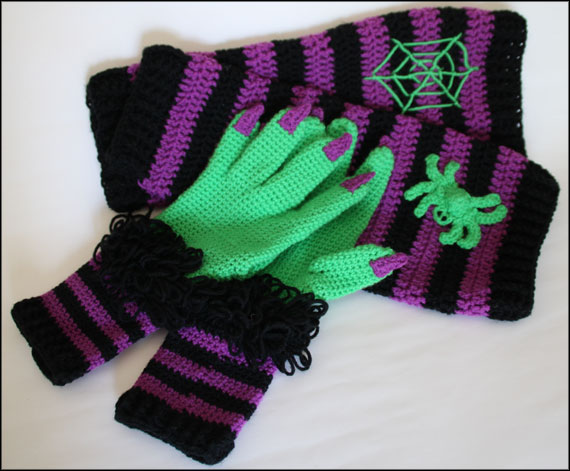
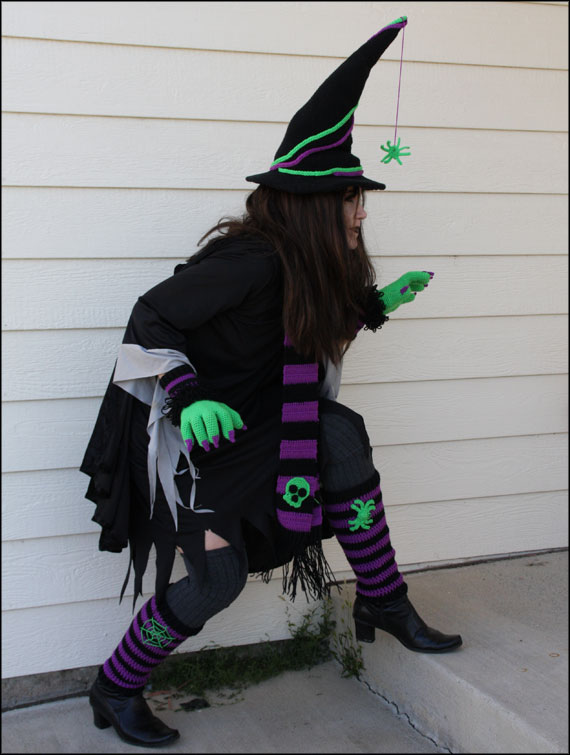
The hat and scarf were designed this month to coordinate with some gloves and leg warmers that we crocheted earlier this year. See more photos of the Witch Way, This Way crochet pattern.

The vote is annonymous, so vote with confidence.

Vote

[poll id=”11″]

Enter Anne Geddes Baby Giveaway

US & Canada Only

a Rafflecopter giveaway

Twins Face Off – Anne Geddes Baby Sneak Peek

Sneak Peek of Twins Face Off Crochet Design Challenge with Anne Geddes Baby

Last week we announced that we would be doing a Twins Face Off using Anne Geddes Baby yarn by Red Heart. This month is a little different. We are using the following items as our inspiration piece:

Witch Goves and Leg Warmers

These little pretties are our inspiration for this month’s challenge. Deborah had worked up the witch gloves and leg warmers using Anne Geddes Baby yarn a few months back. Now we’re using them to inspire us for more Halloween fun.

Next week we’ll share photos of the finished projects and ask you to vote for the design you like better. We’ll also be giving away prizes.

  • 1 place: 4 skeins of Anne Geddes Baby yarn and both crochet patterns;
  • 2nd place: both crochet patterns.

See you next week when we open up the voting and giveaway!

Witch Way pattern on Etsy: Here

Pork Chop Pig Crochet Pattern

Hunting for Bacon?

Whether you need more bacon in your life or want to go on a boar hunt, this crochet pattern is PETA approved!

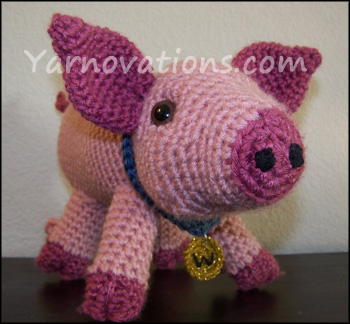
pig with collar

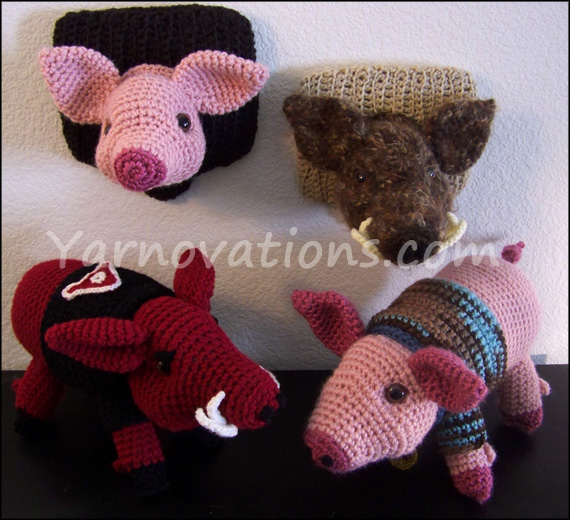
This pig can be accessorized with a sweater and a medal. He can be Wilbur from Charlotte’s Web, or a trophy piece for the hunters out there. We even made it in red for the Razorback fans!

I made several of the mounted pig heads for my students after we read Animal Farm. They loved them!

Pig Crochet PatternBe sure to download the free accessories pattern for the fun variations.

Pork Chop Pattern on Etsy

Pork Chop crochet pattern.

Pork Chop accessories pack (sweater, medal, Razorback).

Ball and Chain Crochet Pattern

Ball and Chain Crochet Pattern

Ball and Chain Crochet Pattern

Do your burdens feel like the old ball and chain?

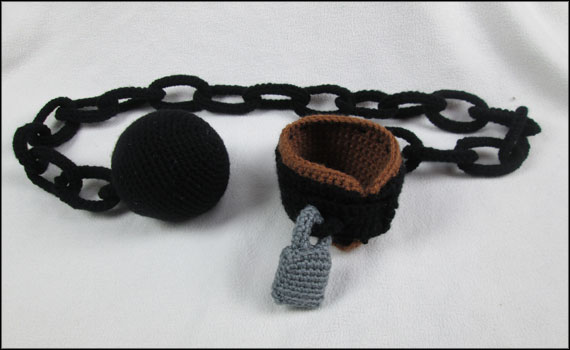
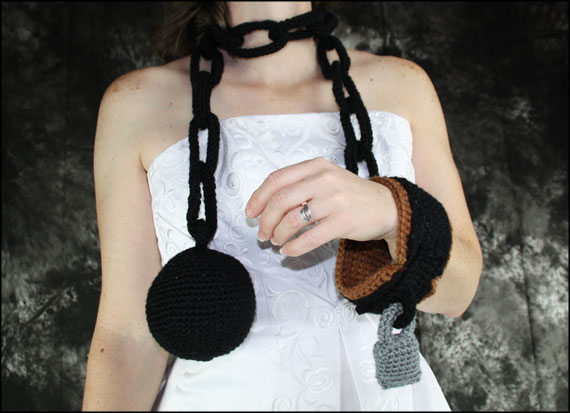
We couldn’t resist having a little fun with the many references to the ball and chain. This is a funny gift to give at a bridal shower (yes, we have done that). It’s also a fun prop for use in plays like “A Christmas Carol” for the ghost of Christmas past.

Ball and Chain Wedding

Whatever your burden, this ball and chain was designed with comfort in mind. It has a faux leather lined cuff for when your burden seems extra heavy to carry.

Pictured above, the scarf is 5′ long. Add more or less links to change the length.

Ball and Chain pattern available on Etsy.
Available in the Store

This Ball and Chain crochet pattern is available in the store.

Crochet Football Newborn Outfit Crochet Pattern

Crochet Football Newborn Outfit & Team Hats for the Whole Family – Crochet Pattern

Newborn-Football-Photo-prop-crochet-pattern

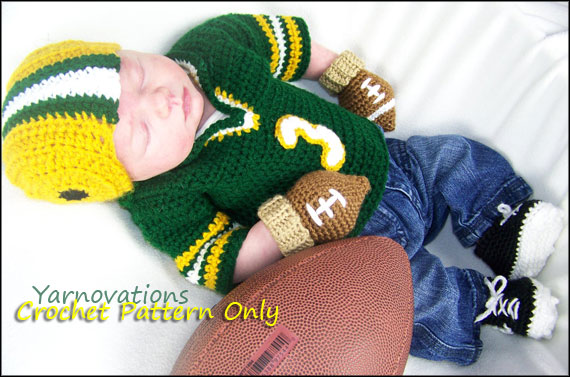
Hey football fans! Newborns score big with this newborn football outfit. This PDF ebook also includes hats for the whole family…so everyone can get into the game!

The Football Set crochet pattern ebook is now available in the store.

Football Set pattern available on Etsy.
Pattern includes:

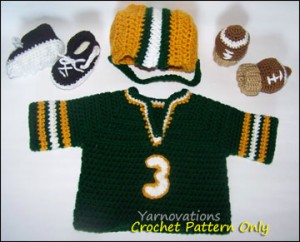
  • Newborn Helmet
  • Newborn Football Mitts
  • Newborn Cleats Booties
  • Newborn Jersey Sweater
  • 5 Beanie Hat Sizes – 3 mos to adult men
  • 3 Jersey Sweater Sizes – newborn to 24 mos
  • Number Appliques: 1, 2, 3

Newborn-Football-Outfit-Crochet-PatternNewborn Football Outfit

With a newborn in the family, we couldn’t resist crocheting a newborn photo prop to celebrate football season. And you know how it is…once we made some mitts, we couldn’t resist making some booties. Then we thought…if the little guy is really going to get into the game, he needs a helmet and jersey, too!

So, the newborn football outfit is born. But we couldn’t even stop there. We wanted to get the whole family involved.

Football-Team-HatsFootball Beanies – Hats for the Whole Family

Football is a fall and winter sport…and for lots of teams, you need a hat when you go to the game.

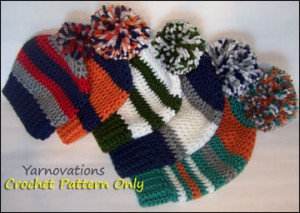
The pattern includes striped beanie hats for ages 3 mos to adult men.

Mix and match the colors to match your favorite teams.

And there’s more.

Football-Jersey-Baby-SweatersFootball Jersey – Sweater for Newborn to 24 mos.

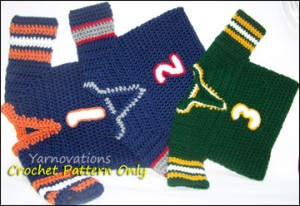
We’ve included instructions for making the jersey (sweaters for babies) newborn to 24 mos. Crochet the number of your favorite player or the birth order of the child wearing the sweater.

We’ve included instructions for the numbers 1, 2 and 3.

Football Set – Available Now in the Store

The Football Set is now available in the store as a PDF.

Football Set pattern available on Etsy.
The pattern includes written instructions, lots of photos, checkboxes to mark your progress, supplies list and more.

Available in the Store

Soldier Christmas Wreath – Crochet Pattern

Soldier Christmas Wreath – Crochet Pattern

Soldier Christmas Wreath

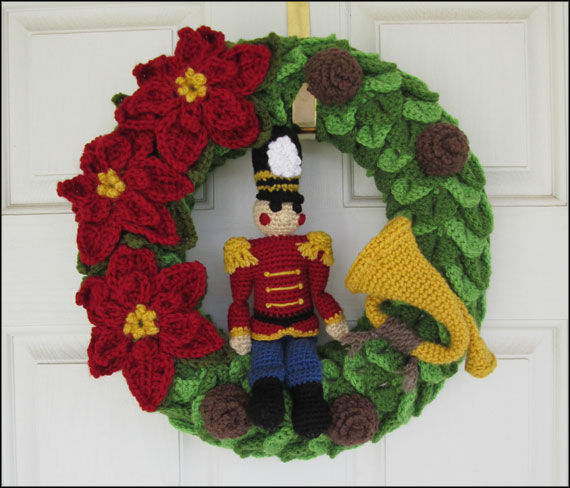
The wait is over. Deborah’s award winning Soldier Christmas Wreath is now available as a crochet pattern!

Crochet your own award winning wreath. It will look adorable on your front door, on the living room wall or even on the front grill of your car (although the poinsettia’s may wilt in the weather – and really, after all the work you put into the wreath…perhaps inside the car would be better)!

This crochet pattern includes all the elements you see including:

  • Crocodile Stitch Wreath Cozy
  • Toy Soldier
  • Poinsettia
  • Bugle
  • Pine Cone

The Soldier Christmas Wreath was made with Lion Brand, Vanna’s Choice yarn. The vivid primary colors do a fabulous job of capturing the spirit of the Christmas season.

Soldier Christmas Wreath – In the Store

Get the pattern and learn more about the Soldier Christmas Wreath in the store.

Soldier Christmas Wreath available on Etsy.

Available in the Store

Bridal Shower Gift – Crochet Handcuffs

Bridal Shower Gift – Crochet Handcuffs

Bridal showers are a great time to gift practical items for  kitchen and bath to a soon to be wed young couple. It’s also a fun time to embarrass them with items a bit more playful like lingerie and toys.

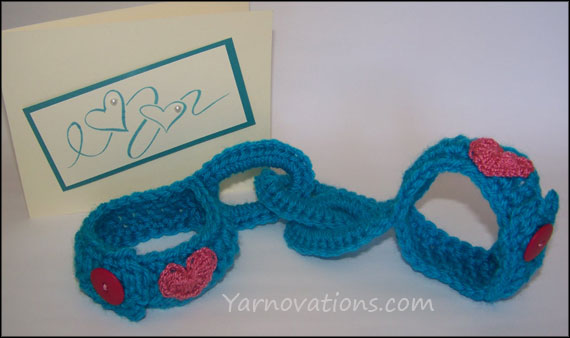
love slave handcuffs

I crocheted the bride-to-be a pair of handcuffs (using a similar color to one in the upcoming wedding) in addition to getting her something from her registry.

I also stamped a card and wrote a suggestive message inside…which I encouraged the bride-to-be to read to out loud to everyone (we can’t miss the opportunity to embarrass her a little!):

Dear Bride,

I crocheted you something you can use to make him your LOVE SLAVE.

Enjoy!

PS: They are adjustable in case you want to be the slave to his love.

FREE Crochet Patterns for Handcuff and Hearts

The free crochet patterns for these are found in a couple older blog posts:

  • Handcuffs (pictured above: Vanna’s Choice in Aqua and  J/10/6.00mm hook)
  • Heart – (pictured above: Bernat Handicrafter Cotton Thread (5) in Rosy Rose and a 3.5 mm steel hook)

Enjoy, you young lovers!

Flower Yard Picks

Crochet Flower Yard Picks – Beautiful Mother’s Day Bouquet

Flower Yard Picks

Photo by Red Heart

These crochet flowers are bright, cheerful and fun!

The pattern for these lovelies is free at RedHeart.com. This is the first design we’ve created for Red Heart. The flowers use Red Heart Super Saver yarn.

The stems are crocheted as cozies around chopsticks making these perfect as yarn bombs in friends’ gardens or in floral arrangements.

They would be wonderful “Thinking of You” gifts as well as birthday and Mother’s Day gifts. You could also stick a pen in the stem and create a bouquet for your office!

One row of the leaves are crocheted around chenille fuzzy sticks (pipe cleaners) which allow them to be shaped.

Create a bouquet of only one type of flower or create an assortment with this pattern.

The pattern includes several flowers:

  • Carnation
  • Daffodil
  • Daisy / Black Eye’s Susan
  • Iris

Get the Free Pattern at Redheart.com

We’ve taken some photos of each type of flower. Let’s take a closer look:

Carnation – Crochet Flower

carnation yard picks

The carnation is crocheted in a technique similar to wiggle crochet meaning rows of crochet are worked on top of a grid.

Daffodil – Crochet Flower

daffodil yard picks

The design of the stem allows the flower to face forward like a real daffodil!

Daisy – Crochet Flower

daisy yard picks

Change the colors and this could be a Black Eyed Susan or Gerber Daisy!

Iris – Crochet Flower

iris yard picks

The petals naturally drape like a real iris! Some petals drape down and others up.


Sock Monkey Toys and Gifts Crochet Pattern

Sock Monkey Toys and Gifts Crochet Pattern

Sock Monkey Toys and Gifts

Hey all you Sock Monkey lovers out there….we’ve done it again. We’ve created some toys and cozies that you are gonna love and brought them all together in one set.

Mini Sock Monkey

This mini sock monkey is the perfect size for carrying around with you wherever you go. He can be made into a key chain, a backpack buddy or even an office accessory.

Sock Monkey Christmas Ornament

The sock monkey ornament takes on the shape of a traditional Christmas ball, but with the face of sock monkey! He loves hanging on the tree!

Sock Monkey Applique

The sock monkey applique is the perfect size for sewing to bags, scarves, hats and more. We’ve sewn it to a cozy…making it a fun gift idea!

Trio of CoziesSock Monkey Cozies

We love cozies. This pattern includes two unique designs in three sizes each. There are directions for mason jars, mugs and tapered cups/glasses! That’s six cozy patterns!

There are two delicious recipes, too! You can make monkey bread in the morning and banana pudding for dessert in the evening!

Sock Monkey Toys and Gifts – Available in the Store

The Sock Monkey Toy and Gift Set is available in the store.

Sock Monkey Toy and Gift Set also available on Etsy.

Available in the Store

That’s 9 crochet patterns and 2 recipes! See the store for more details.