Administrative Professionals’ Day Gift Idea
Administrative Professionals’ Day Gift Idea

Administrative Professionals Day

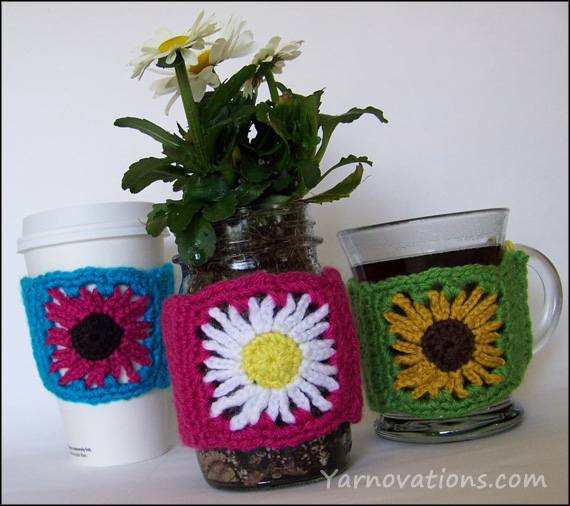
We’ve create a fun gift idea for Administrative Professionals’ Day. It’s colorful and cheerful and will look adorable on your Admin’s desk. (Of course, this is a cute gift idea for other special days like Mother’s Day or birthdays. This would also be a fun “just because” gift for a gardening friend…just sayin’).

Flowers were a traditional present back in the day when I was receiving gifts for Secretaries Day. Now that it’s called Administrative Professionals’ Day, I still think flowers make the perfect gift. But this mason jar planter with a crocheted cozy adds a new twist to the gift! Love it!

Administrative Professionals’ Day Gift Idea – Mason Jar Planter
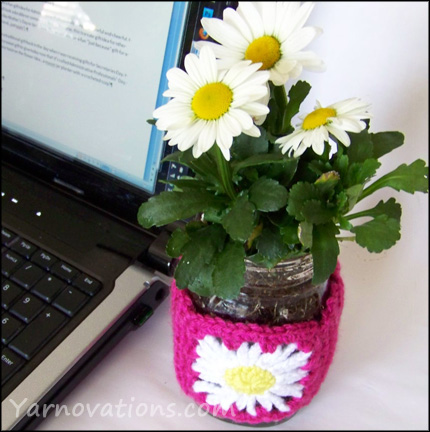
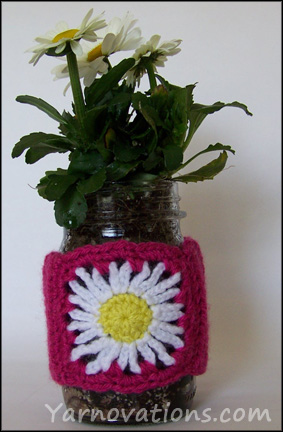
Daisy Mason Jar with ComputerFor those Administrative Professionals who love flowers, you simply can’t go wrong with a mason jar planter! We’ve used daisies in our jar…which could be transplanted right from the jar into the garden. Annuals or herbs would be nice alternatives.

SUPPLIES:

  • 1 mason jar
  • 1 plant or herb
  • A few rocks or glass beads
  • Potting soil
  • Charcoal (optional)

A note about container gardening:

Charcoal is often used in container gardening to cut down on bacteria. It is also an additive that helps plants thrive. Please note that charcoal used in gardening is not the same as charcoal used for grilling. Visit your local gardening center for charcoal to use in container gardening. Charcoal is only needed for those plants that will be staying in the jar long term.
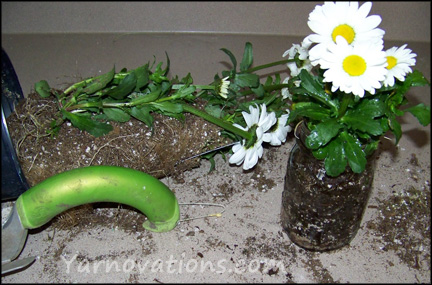
Container Gardening

DIRECTIONS:

  1. Place 1” of rocks or glass beads in bottom of jar.
  2. Place ½” of charcoal on top of rocks (optional).
  3. Fill jar with dirt and flower.
  4. Water the plant just enough that water reaches the bottom of the jar but does not pool.

Administrative Professionals’ Day Gift Idea – Daisy Mason Jar cozy
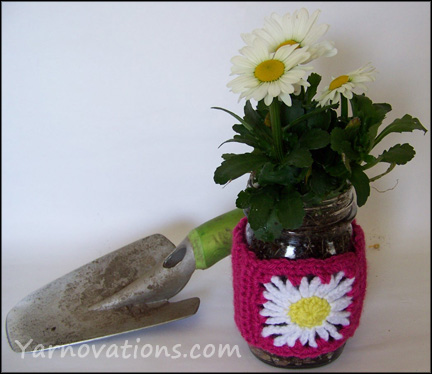
Mason Jar PlanterThe potted plant is a beautiful Administrative Professionals’ Day gift item all by itself. We think a colorful daisy cozy will add more pizzazz to the gift…and this cozy doubles as a cup cozy!

This project is a great way to use up your yarn stash. We’ve used Vanna’s Choice. She has lots of bright and beautiful color options.

Skill Level: Easy

Techniques Used: Crochet in Rows and Rounds.

Stitches Used: Chain, Single Crochet, Half Double Crochet

SUPPLIES:

  • Vanna’s Choice Yarn: RASPBERRY, RADIANT YELLOW, WHITE
    (Yellow Flower: CHOCOLATE, MUSTARD, FERN)
    (Pink Flower: AQUA, RASPBERRY, ESPRESSO)
  • Crochet Hook: C,F,H
  • Yarn Needle

COZY INSTRUCTIONS

Crochet Mason Jar CozyRadiant Yellow

Hook: F

Ch 3

Rnd 1: 12 hdc in 3rd ch from hook. Join with a sl st. (12)

Rnd 2: Sc around. Join with a sl st. (12)

Finish off and weave in ends.

Attach White to any st.

Use Hook: C

Rnd 3: Ch 14. Sl st in same st from Rnd 2 (14th ch from hook). Sl st. (corner petal made) *Ch 9, sl st into same st from Rnd 2 (9th ch from hook). Sl st.* Twice. (2 petals made). Ch 14. Sl st in same st from Rnd 2 (14th ch from hook). Sl st. (corner petal made) *Ch 10, sl st into same st from Rnd 2 (10th ch from hook). Sl st.* Twice. (2 petals made). Repeat from beginning to make a total of 12 petals. Sl st into base of 1st petal made. Finish off and weave in ends. (164)

Note: The ch-9 petals are the top and bottom of the flower.

Attach Raspberry around corner petal (Ch-14 space). Attach it to the corner that has two ch-9 petals to the left.

Use Hook: F

Rnd 4: Work sc, ch 1, sc around corner petal. Ch 2. *2 sc around next petal, ch 2.* Twice. Repeat from beginning 3 more times to work around flower. Join with a sl st. (52)

Rnd 5: Work sc, ch 1, sc in ch-1 corner space. Skip a st. *3 sc around ch-2 space, skip 2 sts* 3 times. Repeat from beginning to work around the flower.
Join with a sl st. (48)

Use Hook: H

Row 6: Sl st into ch-1 space. Ch 2 (count as 1st st), turn. 10 hdc, hdc dec (into sc and ch-1 space). (12)

Row 7-23: Ch 2 (count as first st), hdc across. (12)

Finish off and weave in ends.

Join ends with whip st across.

More Cozies in Store

coffee cup cozy patterns ebookLove this daisy cozy? There are more seasonal, holiday and just for fun cozies in the store in our Crochet Cup Cozy eBook. We’ve created an entire collection with 28 designs one ebook.

Looking for the cup and mug version? They’re in the ebook.

Each design in the ebook has instructions to fit Mugs, Cups and Mason Jars. Every design has a delicious recipe or fun craft.

All 3 daisies pictured at the beginning of this post are in this ebook! AND the ebook includes 4 new designs – Dracula, Vampire, Mummy and Blue Jeans.

Available in the StoreRead more about the set:

Blog: Coffee Cup Cozy Collection

Store: Coffee Cup Cozy Collection

Happy Easter – Bunnies, Bunnies and More Bunnies

Our Bunny Cup Cozies Have Proliferated – Just in Time for Easter!

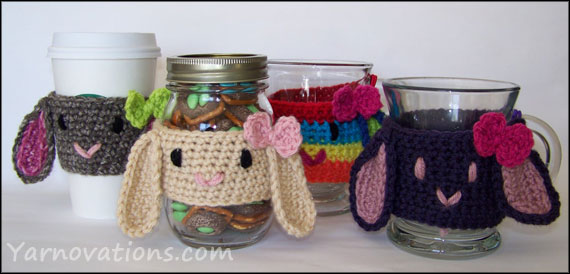
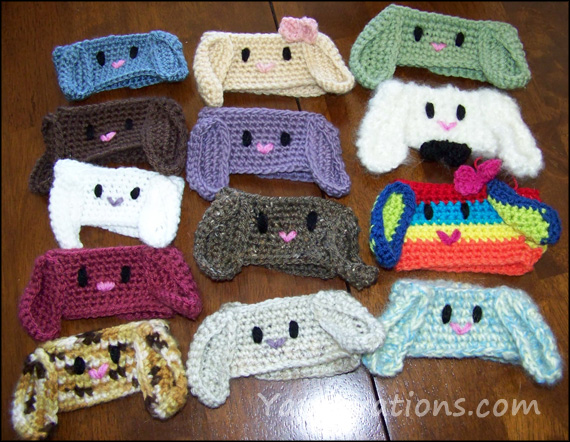
Bunnies are known to multiply rapidly. And our cup cozies are no exception. Our 4 bunny cozies have turned into a multitude of bunnies!

lots of bunny cozies

bunny bracletInstead of using wine charms at our Easter gathering, we created cup cozies! Not only were these a cheerful table decoration, they also helped people identify their drinks!

The cozies are cute as bracelets and sleeve catchers, too!

This crochet bunny is a free pattern as part of our mason jar series. We love it!

Hoppy Easter!

Dirt and Worms Recipe with Leaf Cozy for Earth Day

Dirt and Worms Recipe with Leaf Cozy – an Earth Day Activity

This Dirt and Worms Recipe is a delicious way to celebrate a lot of special days. It is particularly scrumptious for Earth Day, but would be a fun snack for the first day of Spring or Fall, April Fool’s Day, or any rainy day when worms appear from the ground. It’s kid friendly to make and to eat!

Dirt and Worms Recipe

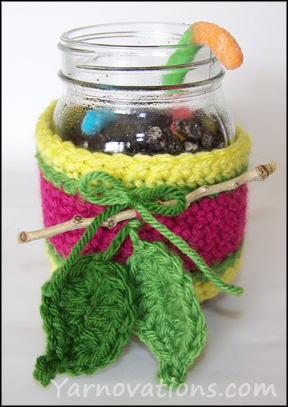
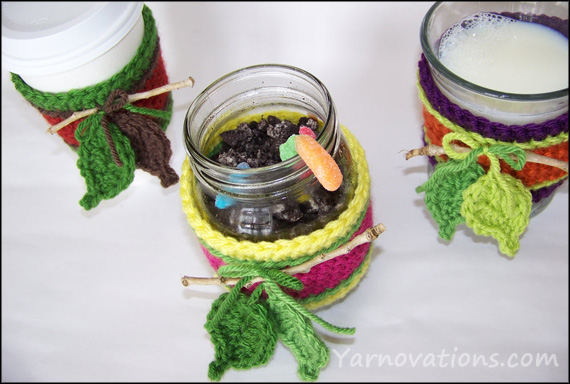
To further dress up the snack, we’ve crocheted a twig and leaf cozy. Change the colors to match the special holiday you’re celebrating. Use bright colors for Spring or Earth tones for Fall. Earth Day calls for the use of recycled yarn…in any color!

Let’s start with the snack. While it sets up we can crochet a leaf cozy.

Dirt and Worms Recipe

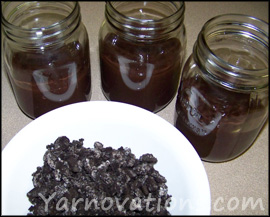
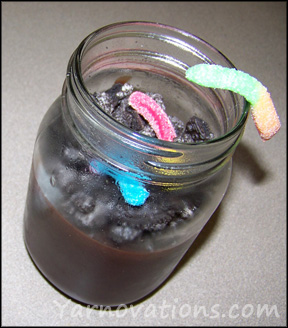
dirt and worms in mason jarOur versions of the Dirt and Worms Recipe is a chocolate lovers delight. We’re not diluting the pudding with whipped cream. We want a nice rich dark chocolate colored dirt. This is a quick and simple recipe for kids in the kitchen.

Supplies:

  • 1 – 5.9 oz Instant Pudding and Pie filling – Chocolate (Jello Brand pictured)
  • 3 cups cold milk
  • 1 package Oreo cookies (Double Stuffed pictured)
  • 1 package gummy worms (sour worms pictured)
  • 3 Mason Jars

Pudding and Oreo CrumblesDirections:

  1. Mix pudding according to box.
  2. Pour approximately 1 cup of pudding into each mason jar.
  3. Set aside (or refrigerate if needed) to setup – refrigerate if not using right away.
  4. Place 9 Oreo cookies (3 per serving) into resealable bag and crush with rolling pin or hammer.
  5. Just before serving pudding, sprinkle Oreo crumbs on top of pudding and top with gummy worms.

Earth Day Activity – Crochet Leaf Cozy

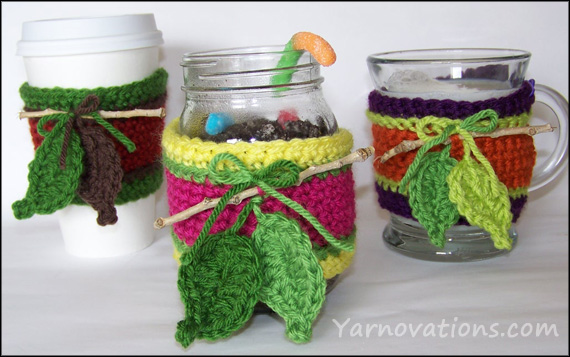
Leaf CozyThis leaf cozy is a cute Earth Day activity. Not only is the cozy fun to crochet, but the twig and crocheted leaves are a great reminder of how awesome our planet is. Using recycled yarn makes this an earth friendly activity. Using this cozy instead of disposable coffee cup sleeves is also earth friendly.

This is a great stash buster…which is very earth friendly. We’ve used Vanna’s Choice. There really are too many colors to choose from! We reigned ourselves in with only three cozies.

Skill Level: Easy +

Stitches Used: Chain, slip stitch, single crochet, half double crochet, double crochet

Techniques Used: Crochet in Rows, Crochet in the Round, Crochet in Back Loop, Crochet in Both Loops

Supplies:

  • Vanna’s Choice: RADIANT YELLOW, RASPBERRY, FERN, KELLY GREEN
  • (Autumn Cozy: Kelly Green, Brick, Chocolate)
  • (Fall Cozy: Eggplant, Terracotta, Fern, Radiant Lime)
  • Mason Jar
  • Twig (4” Length)

Leaf Cozy Instructions

Radiant Yellow

Hook: H

Ch 34, join with a sl st.

Rnd 1: Sc around. (34)

Rnd 2: Sc around. Join and change color to Fern with a sl st. (34)

Rnd 3: Sc around. Join and change color to Raspberry with a sl st into back loop of first st made in this Rnd. (34)

Rnd 4: Work in back loops only. Sc around. (34)

Rnd 5-8: Work in both loops. Sc around. (34)

Rnd 9: Work in both loops. Sc around. Join and change color to Fern with a sl st. (34)

Rnd 10: Sc around. Join and change color to Radiant Yellow with a sl st into back loop of first st made in this Rnd. (34)

Rnd11: Work in back loops only. Sc around. (34)

Rnd 12: Work in both loops. Sc around. (34)

Sl St. Finish off and weave in ends.

Insert twig under any st of Rnd 9.

leaf cup cozies

Leaf Instructions (make 2)

One Fern and One Kelly Green (or colors desired)

Hook: H

Ch 7

Rnd 1: 3dc in 3rd ch from hook (count first two as the first dc), 2 dc in next st, hdc, sc, sl st in last st, ch 3, sl st in third ch from hook. Continue working on the other side of the foundation ch. Sl st in the firs st, sc, hdc, 2 dc in next st, 4 dc in last st. Join with the first dc of this Rnd. (one leaf made)

Finish off leaving a long tail for attaching to cozy.

Attach to twig by tying a bow with the tails from the leaves.

More Cozies in Store

coffee cup cozy patterns ebookLove this leaf cozy? There are more seasonal, holiday and just for fun cozies in the store in our Crochet Cup Cozy eBook. We’ve created an entire collection with 28 designs one ebook.

Looking for the cup and mug version? They’re in the ebook.

Each design in the ebook has instructions to fit Mugs, Cups and Mason Jars. Every design has a delicious recipe or fun craft.

All 3 leaf cozies pictured at the beginning of this post are in this ebook! AND the ebook includes 4 new designs – Dracula, Vampire, Mummy and Blue Jeans.

Available in the StoreRead more about the set:

Blog: Coffee Cup Cozy Collection

Store: Coffee Cup Cozy Collection
Russian Tea Recipe and Crochet Radioactive Cozy

Russian Tea Recipe and Crochet Radioactive Cozy

There are many Russian Tea Recipes, but this is my all time favorite. My mother calls it Spiced Tea, but at craft shows it is referred to as Russian Tea. And because I have a sweet tooth, I like this really sweet blend.

Russian Tea Recipe

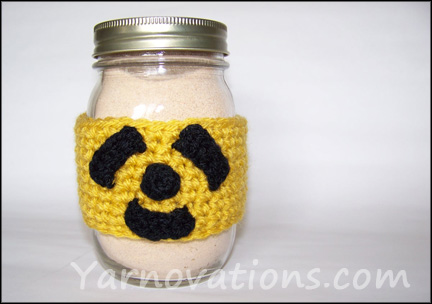
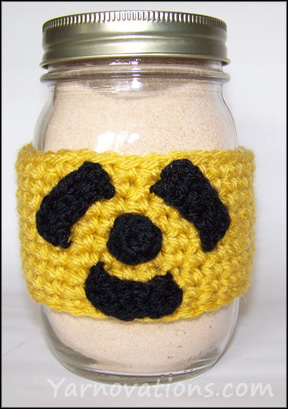
We’re packaging this tea in a mason jar which is perfect for gift giving. Since it’s loaded with sugar, the crocheted cozy with the radioactive symbol on it is definitely fitting! This cozy would be perfect for any “toxic” drink (tea, coffee, hot chocolate) or food (bean or split pea soup).

Let’s start with the Russian Tea. Then you can enjoy a cup while you crochet the radioactive cozy!

Russian Tea Recipe

This Russian Tea Recipe has been in the family for years. So I’m not sure who to credit for this particular combination (if you know, please leave me a comment below). You can adjust the sweetness of your tea by adding more or less to your cup of hot water.

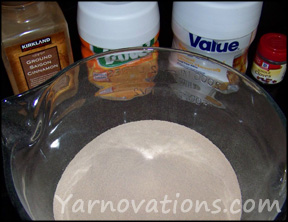
Russian Tea Ingredients MixedThis spiced tea is a cross between hot apple cider and orange juice. Yum!

Ingredients:

  • 1 cup Instant sweetened lemon tea
  • 1 cup Tang
  • ½ to 1 ½ teaspoon cinnamon
  • ¼ teaspoon cloves

Directions:

  1. Mix all ingredients together in a bowl.
  2. Store in mason jar.

Serving:

  1. Add 3 teaspoons to 1 cup boiling water (adjust quantity to desired sweetness).

Crochet Mason Jar Cozy with Radioactive Symbol

If you like your beverage a little stronger than most, the radioactive symbol is the perfect image for your cup cozy! It’s also a cute way to adorn a gift for April Fools Day (April 1)…just sayin’.

Crocheted Radioactive Cup CozyThis is a quirky and delightful way to use up your yarn stash. We’ve used Vanna’s Choice. Use Mustard or Radiant Yellow for a traditional cozy or try a Radiant Lime to represent the radioactive material inside your cup or mason jar!

Skill Level: Intermediate

Stitches Used: Chain, slip stitch, single crochet, no foundation chain double crochet

Techniques Used: Crochet in the Round

Supplies:

  • Vanna’ Choice Yarn: MUSTARD, BLACK
  • Mason Jar

Jar Cozy Instructions

Mustard

Hook: H

Ch 34, join with a sl st.

Rnd 1-9: Sc around. (34)

Join with a sl st. Cut yarn; weave in end.

Radioactive Symbol Instructions

Center Circle Instructions

Black

Hook: C

Ch 3

Rnd 1: 7 hdc in 3rd ch from hook. Join with a sl st. (7)

Finish off leaving a long tail for sewing.

Outer Semi-circle Instructions (make 3)

Black

Hook: C

Ch 4

Row 1: Ncfdc in 4th ch from hook, 3 ncfdc, Ch 3. Sl st in base of dc. (5)

Finish off leaving a long tail for sewing.

Assembly Instructions

Pin then sew Radioactive symbol to cozy. Weave in ends.

More Cozies in Store

coffee cup cozy patterns ebookLove this radioactive cozy? There are more seasonal, holiday and just for fun cozies in the store in our Crochet Cup Cozy eBook. We’ve created an entire collection with 28 designs one ebook.

Looking for the cup and mug version? They’re in the ebook.

Each design in the ebook has instructions to fit Mugs, Cups and Mason Jars. Every design has a delicious recipe or fun craft.

The ebook includes 4 new designs – Dracula, Vampire, Mummy and Blue Jeans.

Available in the StoreRead more about the set:

Blog: Coffee Cup Cozy Collection

Store: Coffee Cup Cozy Collection

Crochet Bunny and Easter Snacks for Kids

Crochet Bunny and Easter Snacks for Kids

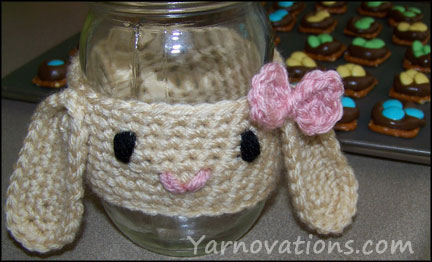
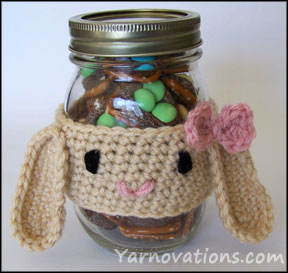
A crochet bunny is the perfect accent for a mason jar full of Easter snacks for kids.

crochet bunny

It’s a strange phenomenon that the Easter bunny lays eggs. But who are we to question such a thing. We’re having fun with it and the kids will too. They’ll have a blast making and eating these chocolate snacks.

Let’s start with the Easter Snacks for kids because the chocolate will need time to cool and harden before it can be placed in the mason jar for storage (assuming you and the kids don’t eat them all first!).

Easter Snacks for Kids

If you’re looking for fun Easter snacks for kids…this is an easy and delicious one! It’s great for kids of any age.

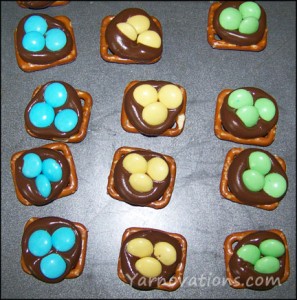
easter snacks for kidsSo, we present to you…Easter eggs in a nest. It looks a bit like a bird’s nest. In fact, both birds and rabbits have their young in a nest. Rabbits build their nests in the dirt. The chocolate makes the eggs look like they are nestled in the dirt…so, we’re calling this snack an Easter Bunny Nest.

Ingredients & Supplies:

  • 1 bag rectangular pretzels (Snyder’s of Hanover Butter Snaps)
  • 1 bag Hershey’s Kisses
  • 1 bag M&M’s – Easter colors
  • 1 cookie sheet

kisses on pretzelsDirections:

  1. Preheat oven to 175°.
  2. Spread pretzels flat on cookie sheet (about 50 of them).
  3. Unwrap and place one kiss centered on each pretzel.
  4. Bake for 7 minutes to soften Kisses.
  5. Immediately press 1 to 3 M&M’s into each Kiss to form nests.
  6. Allow to cool and harden for a couple of hours.

Note: Young children will only be able to place 1 M&M in the nest. Older children can place 2 or more in each nest.

FYI: I Googled “Easter Snack” and found this snack on Jamy Fisher’s website. Thanks, Jamy for sharing!

Crochet Bunny for Easter

For Easter (and bunny lovers everywhere) we have a crochet bunny mason jar cover. This is adorable as a cup cozy, too. We’re showcasing it as a cute (and delicious) gift idea for the holidays. One that the kids can get involved with as well.

crochet bunny in four color combinations

This is a great stash buster. We’ve used Vanna’s Choice. The colors can be as soft and neutral as a real bunny or as bright and colorful as your heart desires.

Skill Level: Easy

Stitches Used: Chain, slip stitch, single crochet, double crochet

Techniques Used: Crochet in Rows & Rounds, Increase

Crochet Bunny Supplies:

  • Vanna’s Choice Yarn (Worsted Weight – 4)
    BEIGE, BLACK, PINK
    (Brown Bunny: Taupe Mist, Rose Mist, Radiant Lime, Black)
    (Purple Bunny: Purple, Dusty Rose, Raspberry)
    (Rainbow Bunny: Scarlet, Radiant Lime, Radiant Yellow, Radiant Orange, Colonial Blue, Aqua, Raspberry, Black)
  • Crochet Hook: H / 8 / 5.00mm
  • Yarn Needle for Sewing
  • 1 Mason Jar

Crochet Bunny Instructions

Beige

Ch 34, join with a sl st.

Rnd 1-9: Sc around. (34)

Join with a sl st. Cut yarn; weave in end.

EAR INSTRUCTIONS (make 2)

Beige

Ch 9

Rnd 1: Sc in 2nd ch from hook. 6 sc. Work 3 sc in last st. Turn to other side of foundation ch. 6 sc, sc inc in last st. (18)

Rnd 2: *Sc inc, 8 sc* twice. (20)

Rnd 3: *2 sc inc, 8 sc* twice. (24)

Rnd 4: 2 sc inc, 3 sc, 2 sl st. Leave remaining sts unworked. (9)

Finish off leaving a long tail for sewing.

So, we present to you…Easter eggs in a nest. It looks a bit like a bird’s nest. In fact, both birds and rabbits have their young in a nest. Rabbits build their nests in the dirt. The chocolate makes the eggs look like they are nestled in the dirt…so, we’re calling this snack an Easter Bunny Nest.BOW INSTRUCTIONS

Pink

Ch 9

Rnd 1: Dc in 4th ch from hook. Sc, sl st, sc, dc, ch 2, sl st in last st. Turn to other side of foundation ch. Ch 2, dc, sc, sl st, sc, dc, ch 2, sl st into last st. (12)

Finish off leaving a long tail for sewing.

ASSEMBLY INSTRUCTIONS:

  1. Embroider “V” shaped Nose across Rnd 4 with Pink.
  2. Embroider two Eyes across Rnds 6 & 7 with Black.
  3. Sew Ears 2 sts away from each eye on Rnd 9. Fold ear a bit at top if desired.
  4. Sew Bow to top of Ear as desired.

More Cozies in Store

coffee cup cozy patterns ebookLove this bunny cozy? There are more seasonal, holiday and just for fun cozies in the store in our Crochet Cup Cozy eBook. We’ve created an entire collection with 28 designs one ebook.

Looking for the cup and mug version? They’re in the ebook.

Each design in the ebook has instructions to fit Mugs, Cups and Mason Jars. Every design has a delicious recipe or fun craft.

All 3 bunnies pictured at the beginning of this post are in this ebook! AND the ebook includes 4 new designs – Dracula, Vampire, Mummy and Blue Jeans.

Available in the StoreRead more about the set:

Blog: Coffee Cup Cozy Collection

Store: Coffee Cup Cozy Collection
Cozy for Chinese New Year!

Twins in ChinaHappy Chinese New Year

Happy Chinese New Year! This festive holiday has a special place in our hearts because Yarnovator, Deborah, lived in China for five years.

Deborah was a 5th grade teacher at an international school in Kunming, China. While there she enjoyed her first hand experiences of Chinese New Years well wishes, gift giving, loud celebrations with fire crackers, beautiful displays of flowers and fancy red and gold signs and lanterns.

Though not Chinese New Year, we are pictured right at the Dragons Gate. We are touching the top of the gate for luck. Deborah is on the left and I, Dana, am on the right.

Chinese New Years follows the lunar calendar so the date changes each year. In 2013, Chinese New Year is February 10. This is the year of the snake.

Chinese New Year – Plum Blossom Cozy

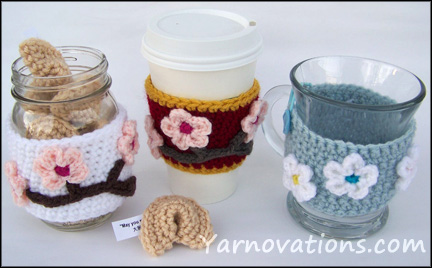
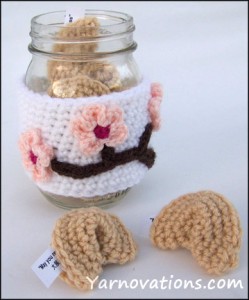
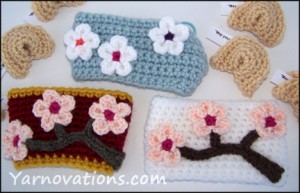
The plum blossom is a beautiful flower from the Chinese plum tree. It is in bloom during the Chinese New Year. That was our inspiration for our jar cozy. Below is the pattern for the jar cozy on the left crocheted in White with Soft Pink blossoms.

Chinese New Year

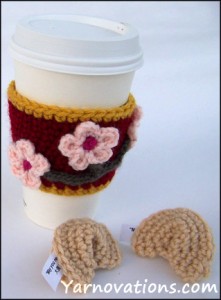
This is another great stash buster. The cozies are crocheted using Vanna’s Choice. Vanna’s color selection is great. The white cozy looks simple yet beautiful. The red cozy captures the vibrant colors found at Chinese New Year’s decorations.

Chinese Cozy Supplies:

  • Vanna’s Choice Yarn:
    WHITE, CHOCOLATE, RASPBERRY, SOFT PINK
    Chinese Option: Cranberry, Mustard, Taupe, Raspberry Soft Pink
    Straight Flower Option: Silver Blue, White, Raspberry, Aqua, Radiant Yellow, Radiant Orange, Eggplant
  • Crochet Hook: H, D
  • Yarn Needle for Sewing
  • Pint Size Mason Jar

NEW YEARS COZY INSTRUCTIONS:

white cozy and fortunesJar Cozy Instructions :

White

Hook: H

Ch 34, join with a sl st.

Rnd 1-12: Sc around. (34)

Join with a sl st. Cut yarn; weave in end.

Plum Blossom Flower Instructions:
(make 3)

Raspberry

Hook: D

Ch 2

Rnd 1: 5 sc in 2nd ch from hook. (5)

Join and change color to Soft Pink with a sl st.

Rnd 2: *Ch 2, 2 dc in same st, ch 2, sl st into same st. Sl st into next st* 5 times.

Finish off leaving a long tail for sewing, weave in all other ends.

cozies and cookies flatBranch Instructions:

Chocolate

Hook: D

Ch 14

Row 1: Sl st in 2nd ch from hook. 4 sl st. Ch 9, sl st in 2nd ch from hook, 3 sl st. Ch 10, sl st in 2nd ch from hook. Working back to start of ch, 14 sl st, 5 sc, 3 hdc.

Finish off leaving a long tail for sewing, weave in all other ends.

Assembly Instructions:

  1. Pin then sew branch to cozy.
  2. Sew plum blossoms to cozy. Sew down the middle of the flower to get a nice 3D effect.
  3. Weave in ends.

Chinese New Year – Fortune Cookie?

making cookies and coziesWe’re mixing our cultures with this jar cozy. The traditional Chinese New Years gift would be a red envelope of money (i.e. $8 for luck…or increments of $8).

But in the USA, when many people think of Chinese good fortune, they think of forutne cookies. So, we’re crocheting some fortune cookies and stuffing them with Chinese New Years wishes.

To further mix our traditions, we’ll put 8 fortune cookies in the mason jar! If you pass these around at the dinner table and there are some left over…that’s a sign of abundance…a good sign for the coming year!

Fortune Cookie Supplies:

  • Vanna’s Choice Yarn:
    BEIGE
  • Crochet Hook: H
  • Printed fortunes (see options below)
  • Yarn Neeedle for Sewing

Crochet Fortune Cookie Instructions:

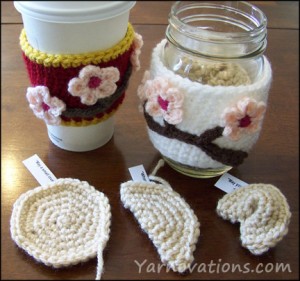
chinese cozy and cookiesBeige

Hook: H

Ch 2

Rnd 1: 6 sc in 2nd ch from hook. (6)

Rnd 2: Sc inc around. (12)

Rnd 3: *Sc, sc inc* around. (18)

Rnd 4: *2 sc, sc inc* around. (24)

Rnd 5: *3 sc, sc inc* around. (30)

Rnd 6: *4 sc, sc inc* around. (36)

Finish off leaving a long tail for sewing.

Fold circle in half and whip stitch a little more than half closed…leave a hole so you can stuff the cookie with a fortune.

Fold the two ends together and whip stitch in the folded position.

crochet fortune cookie

Chinese New Year Wishes:

In addition to wishing friends and family a Happy New Year, below are some additional wishes for luck and prosperity. These make great “fortunes” for the crocheted fortune cookies above. Sayings are from Wikipedia 2/1/2013 and Welch, Patricia Bjaaland, p. 22

“May your wealth [gold and jade] come to fill a hall”
金玉滿堂Jīnyùmǎntáng

“May you realize your ambitions”
大展鴻圖Dàzhǎnhóngtú

“Greet the New Year and encounter happiness”
迎春接福Yíngchúnjiēfú

“May all your wishes be fulfilled”
萬事如意Wànshìrúyì

“May your happiness be without limit”
吉慶有餘Jíqìngyǒuyú

“May a small investment bring ten-thousandfold profits”
一本萬利Yīběnwànlì

“May your happiness and longevity be complete”
福壽雙全Fúshòushuāngquán

“When wealth is acquired, precious objects follow”
招財進寶Zhāocáijìnbǎo

A Glimpse into China

Just for fun, we thought we would share a couple of photos we took while in China. Deborah was an excellent tour guide and showed me several National Wonders of China.

Below left is the Great Wall of China. To the right are life size Terracotta Warriors.

Great Wall of China and Terracotta Warriors

Near Kunming, China is a lovely place called the Stone Forest. This is a beautiful place for hiking with tall pillars of rock and many beautiful formations.

Stone Forest Pair

Wishing you a happy and prosperous Chinese New Year!

More Cozies in Store

coffee cup cozy patterns ebookLove this plum blossom cozy? There are more seasonal, holiday and just for fun cozies in the store in our Crochet Cup Cozy eBook. We’ve created an entire collection with 28 designs one ebook.

Looking for the cup and mug version? They’re in the ebook.

Each design in the ebook has instructions to fit Mugs, Cups and Mason Jars. Every design has a delicious recipe or fun craft.

All 3 plum blossoms pictured at the beginning of this post are in this ebook! AND the ebook includes 4 new designs – Dracula, Vampire, Mummy and Blue Jeans.

Available in the StoreRead more about the set:

Blog: Coffee Cup Cozy Collection

Store: Coffee Cup Cozy Collection
Chocolate Peppermint Cookie Recipe & Heart Cozy

Chocolate Peppermint Cookie Recipe with Valentine Jar Cozy

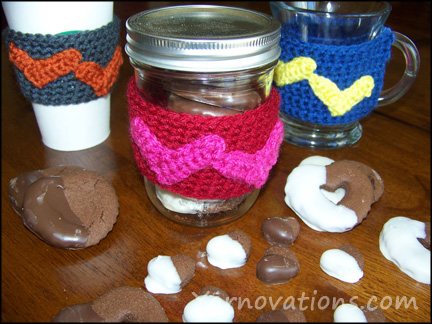
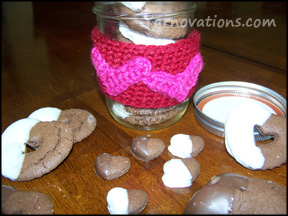
The heart shaped chocolate peppermint cookie recipe is so delicious…you may need to make a double batch! Wrap the mason jar with this Valentine cup cozy and you’ve got yourself a sweet minty gift!

chocolate peppermint cookie recipe and jar cozy

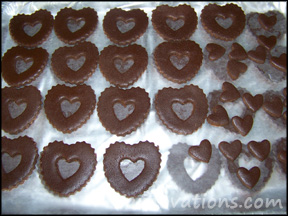
We used a Linzer cookie cutter  (you know, the cutter that makes jelly filled cookies). Check the seasonal/holiday aisle at your local craft store. Or, if you’re seeing this after Valentine’s Day, you may need to check the cake decorating aisle.

Fortunately or unfortunately, my hubby doesn’t like peppermint. So, this was a happy heart day to me…and my sister…and my parents…and my neighbors. Everyone else seems to like peppermint.

Let’s start with the cookie recipe. It needs to bake and cool and stuff.

Chocolate Peppermint Cookie Recipe

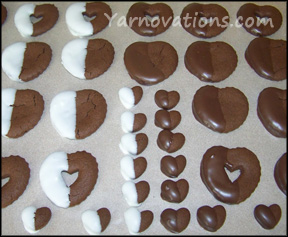
frosted cookiesThis chocolate peppermint cookie recipe makes crisy and crunchy cookies. They don’t raise too much in the baking which allows them to keep their shape. I found that the cookies with shapes cut out of the center hold their heart shape better than the ones that are solid hearts.

And if you do cut out a heart shape from the middle…you can bake those mini hearts for bite size minty treats!

INGREDIENTS & SUPPLIES:

Peppermint Chocolate Coookie:

  • 1 ¼ cup flour
  • ½ cup unsweetened cocoa powder
  • ½ teaspoon baking soda
  • ¼ teaspoon baking powder
  • ¼ teaspoon salt
  • 6 Tablespoons butter softened
  • 1 cup sugar
  • 1 egg
  • ¾ teaspoons peppermint extract
  • 1 Wilton Linzer Cookie Cutter

Mint Chocolate for Dipping

  • 12 oz. chocolate – white or chocolate flavor
  • 3/8 teaspoon peppermint extract
  • Wax paper

cookie doughDIRECTIONS:

  1. Wisk together flour, cocoa, baking powder, baking soda and salt. Set aside.
  2. In electric mixer, beat butter, egg, sugar and ¾ teaspoon peppermint extract together.
  3. Add flour mixture and beat until well blended. Dough will be crumbly.
  4. Kneed dough on counter top. Roll out dough to about 1/8” thickness. Cut out cookie shapes. If shapes stick to counter, lift with a spatula. Lay on cookie sheet (separate with wax paper if needed) and refrigerate for 2 hours.
  5. Bake on ungreased cookie sheet at 350° for 10 minutes. Cool on a wire rack.
  6. Melt chocolate in microwave at 30 second increments until it can be stirred smooth. Do not over cook.
  7. Stir in 3/8 teaspoon peppermint extract.
  8. Dip one side of the cookie into chocolate. Lay on wax paper to dry and harden.
  9. Store in mason jars!

Double Heart Cozy for Jar of Chocolate Peppermint Cookies

Crochet your special Valentine a whimsical jar cozy. This fits a Starbucks coffee cup, too, so he (or she) will be able to carry your love with him (or her) on the go!

Valentine Heart CozyThe double heart cozy is quite simple and whips up in a jiffy. It’s designed to fit a pint size mason jar…which is the perfect size for storing chocolate peppermint cookies! Yum.

Stash buster! This is a great project to make with your remnants. We are using Vanna’s Choice. This line has a lot of great complimentary colors from which to choose.

Skill Level: Easy

Stitches Used: chain, single crochet

Techniques Used: increase, crochet in the round

Materials:

  • Vanna’s Choice Medium Worsted (4)
    CRANBERRY, RASPBERRY
  • Crochet Hook: H and F
  • Mason Jar

COZY INSTRUCTIONS:

Cranberry

Hook: H

Ch 34, join with a sl st.

Rnd 1-10: Sc around. (34)

Join with a sl st. Cut yarn; weave in end.

PAIRED HEARTS INSTRUCTIONS:

Raspberry

Hook: F

Ch 7

Row 1:Sc in 2nd ch from hook. 4 sc, sc inc. (7)

Row 2:Ch 1, turn. Sc inc, sc across. (8)

Row 3:Ch 5, turn. Sc in 2nd ch from hook. 3 sc. 3 sl st in Row 2. (7)

Row 4:Turn. Skip sl sts. 3 sc, sl st. (4) (First Heart Made)

Row 5:Ch 8, turn.

Rows 6-9:Repeat Rows 1-4

Finish off leaving a long tail for sewing.

Pin then sew hearts to cozy.

More Cozies in Store

coffee cup cozy patterns ebookLove this heart cozy? There are more seasonal, holiday and just for fun cozies in the store in our Crochet Cup Cozy eBook. We’ve created an entire collection with 28 designs one ebook.

Looking for the cup and mug version? They’re in the ebook.

Each design in the ebook has instructions to fit Mugs, Cups and Mason Jars. Every design has a delicious recipe or fun craft.

All 3 hearts pictured at the beginning of this post are in this ebook! AND the ebook includes 4 new designs – Dracula, Vampire, Mummy and Blue Jeans.

Available in the StoreRead more about the set:

Blog: Coffee Cup Cozy Collection

Store: Coffee Cup Cozy Collection

Cake in a Jar Recipe and Crochet Cupcake Cozy

Turtle Cake in a Jar Recipe and Crochet Cupcake Cozy

This turtle cake in a jar recipe is extremely rich and moist. Truth be told…I don’t really like cake….but I request this chocolatey deliciousness every year for my birthday. It is so rich, you will definitely need a tall glass of white milk to go with it.

cake in a jar recipe

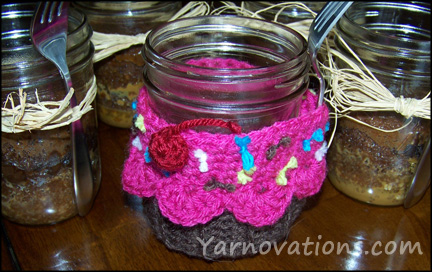
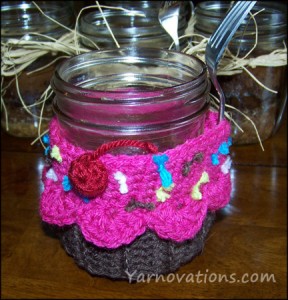
Speaking of birthdays, we’re dressing up this jar with a crochet cupcake cozy! It’s perfect for any special occasion where cupcakes are served (like birthdays). Cakes in a jar for everyone with the person of honor getting a snazzy cupcake cozy as well.

Let’s start with the cake and wrap it up with a crocheted cozy.

NOTE: We are not canning cake…simply serving cake in jars.

Turtle Cake in a Jar Recipe

INGREDIENTS AND SUPPLIES:

  • 1 Betty Crocker Super Moist Milk Chocolate Cake Mix
  • 14 oz. Caramels
  • 1 cup Evaporated milk
  • ½ cup chocolate chips
  • 8 pint size canning jars

DIRECTIONS:

step two of cake1. Preheat oven to 350°.

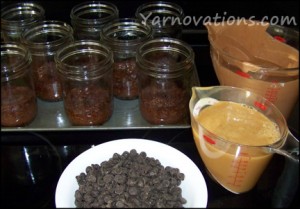
2. Grease all sides of inside of jar with cooking spray. Spread jars evenly on a cookie sheeet (for ease of taking them in and out of the oven.)

3. Mix cake batter according to cake mix directions.

4. Pour 1/4 cup of batter into each jar. Wipe away any batter that’s on the sides of the jar.

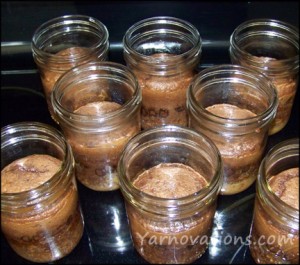
5. Bake for 20 minutes or until done. Remove from oven and set aside while you prepare the rest of the ingredients.

6. Melt Caramels and milk together in a pot on low temperature, stirring constantly.

baked cake7. Pour 1/4 cup of caramel and milk mixture into each jar.
8. Sprinkle 1/8 cup of chocolate chips into each jar.

9. Pour 1/4 cup of batter into each jar. Wipe away any batter that’s on the ides of the jar.

10. Bake for 25 minutes or until done.

11. Allow to cool completely before serving.

NOTE: To learn about canning foods, visit the National Center for Home Food Presevation. Read why the University of Georgia does not recommend canning (preservation) of cakes.

Cake in a Jar Crochet Cupcake Cozy

Now we’re ready to crochet a cupcake cozy for the cake in a jar. Bright colors work great for this project. This is a great stash buster, too. We’ve used a colorful selection of Vanna’s Choice.

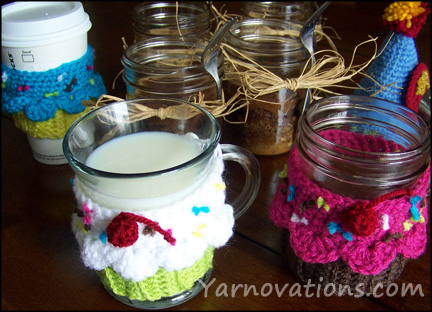
3 Cupcake Cozies

In addition to being fun for birthdays, a cake in a jar makes a tasty gift idea for teacher, women’s retreats, bridal showers and more. The cupcake cozy can even be used as a coffee cup sleeve!

SUPPLIES:

  • Pint size canning jar
  • Vanna’s Choice Yarn: Medium Worsted Weight (4)
    CHOCOLATE, RASPBERRY, RADIANT LIME, RADIANT YELLOW, AQUA, CRANBERRY, WHITE
  • Crochet Hook: H, F
  • Yarn Needle

COZY INSTRUCTIONS

Chocolate

Hook: H

Ch 8

Row 1: Hdc in 3rd ch from hook. Hdc across. (6)

Row 2-22: Ch 2, turn. Hdc in back loops only across. (6)

Row 23: Turn to side of Rows 1-22. Work 34 sc across. (34)

Row 24: Fold cozy in half and join Row 22 to foundation ch with sl st across. (6)

Finish off and weave in ends.

CUPCAKE INSTRUCTIONS

cupcake close upRaspberry

Hook: H

Attach Raspberry to any st.

Rnd 1: Ch 1, sc around. Join with a sl st. (34)

Rnd 2: Working in the back loop only, sc around. (34)

Rnd 3-5: Working in both loops now and until specified, sc around. (34)

Rnd 6: 33 sc, sl st. (34)

Finish off leaving a long tail for sewing.

Attach Raspberry to any front loop of Rnd 2. Hold your work so that the Raspberry is closest to you and the Chocolate  farthest away from you. This way the shell st you are about to work will lay flat.

Rnd 7: Working in the front loop only: Ch 2, 5 dc in same st, *skip a st, sl st, skip a st, 6 dc in next st* Eight times. skip a st, sl st into base of ch 2. (62)

Finish off and weave in ends.

CHERRY INSTRUCTIONS (make 2)

Cranberry

Hook: F

Ch 2

Rnd 1: 8 hdc in 2nd ch from hook. (8)

Rnd 2: Sc around. (8)

Sl st. Finish off leaving a long tail for sewing.

ASSEMBLY INSTRUCTIONS

  1. Pin then sew cherry to cupcake. Pull tail out the top. Tie a knot about 1 ½” away from cherry. Trim yarn at knot. This represents the cherry stem.
  2. Tie little knots of yarn around the cupcake to represent sprinkles. Ours are Radiant Yellow, Radiant Green, Aqua, White, and Chocolate. Trim to desired length.

More Cozies in Store

coffee cup cozy patterns ebookLove this cupcake cozy? There are more seasonal, holiday and just for fun cozies in the store in our Crochet Cup Cozy eBook. We’ve created an entire collection with 28 designs one ebook.

Looking for the cup and mug version? They’re in the ebook.

Each design in the ebook has instructions to fit Mugs, Cups and Mason Jars. Every design has a delicious recipe or fun craft.

All 3 cupcakes pictured above are in this ebook! AND the ebook includes 4 new designs – Dracula, Vampire, Mummy and Blue Jeans.

Available in the StoreRead more about the set:

Blog: Coffee Cup Cozy Collection

Store: Coffee Cup Cozy Collection

Tuxedo Chocolate Covered Almonds Recipe & Crochet Jar Cozy

Tuxedo Chocolate Covered Almonds Recipe & Crochet Jar Cozy

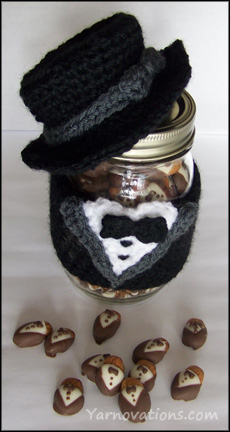
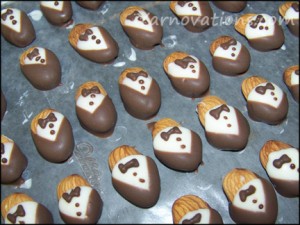
Tuxedo Chocolate Covered Almonds Recipe and Recipe CozyWe’ve cooked up this Tuxedo Chocolate Covered Almonds recipe with coordinating Tuxedo Jar Cozy…’cause it’s party time!
And we have a video! (below the recipe)

It’s a little nutty, but we love these tuxedo almonds. They’ll definitely dress up your special occasions. They’re perfect for New Year’s Eve parties, Weddings, Anniversaries or any event where you want to impress your guests.

Let’s start by covering the almonds with chocolate…so they can cool while you crochet.

Tuxedo Chocolate Covered Almonds Recipe

INGREDIENTS:

  • 16 oz Whole Natural Almonds (unsalted)
  • 12 oz Almond Bark – Chocolate
  • 12 oz Almond Bark – Vanilla

DIRECTIONS:

Line a cookie sheet with parchment paper.

1st Step – Vanilla Shirts

Melt 4 oz of Vanilla Almond Bark in microwave (stirring every 30 seconds). Holding an almond at the widest end, dip into Vanilla Almond Bark. Scrape excess off back. Lay on parchment paper to cool and harden. Make as many as desired.

2nd Step – Chocolate Jackets

Almonds Dressed UpMelt 4 oz of Chocolate Almond Bark in microwave (stirring every 30 seconds). Holding the Vanilla coated almond at the widest end, dip the side edge of the almond into the Chocolate Almond Bark, turn and dip the other side edge. Scrape excess off back. Lay on parchment paper to cool and harden.

3rd Step – Bow Ties and Buttons

Melt 4 oz of Chocolate Almond Bark in microwave (stirring every 30 seconds). Pour Chocolate Almond Bark into a sandwich bag (to act as a cake decorating icing bag). Twist bag to lock chocolate into corner. With scissors, cut off a tiny bit of the corner (as small as you can). Squeeze bag and practice making bow ties and buttons on a scrap of parchment paper. When you are happy with the look, create bow ties and buttons on the almonds.

Cool for a couple of hours (in refrigerator if needed).

tuxedo almonds step by step photo

Creating Bow Ties

How to Make a Bow TieLightly squeeze bag as you create bow tie following the arrows. Stop squeezing at the bottom of the right most arrow. As you pull up and away from the almond, move the bag toward the start of the bow tie (top left).
Creating Buttons

Do no squeeze bag. Simply tap bag to surface of almond and pull straight up. This should leave a dab of Chocolate.

Video: Tuxedo Chocolate Covered Almonds
Click the image below to watch

If you’re having trouble seeing it here, check out Tuxedo Chocolate Covered Almonds on YouTube. The crochet pattern for the snazzy tuxedo jar cozy is below.

The Tuxedo Chocolate Covered Almonds Jar Cozy

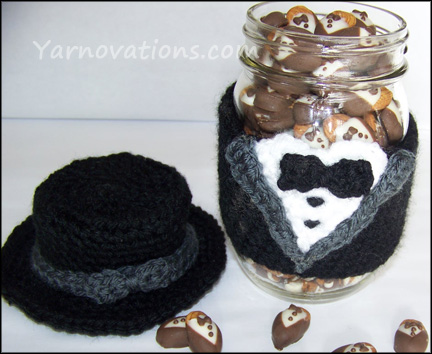
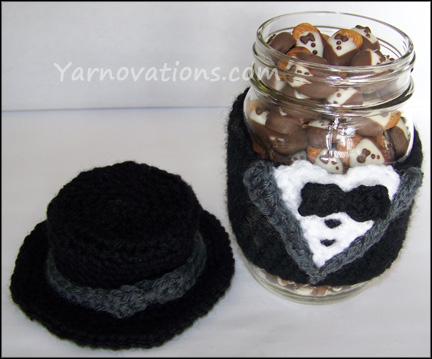
Now you need a tuxedo jar cozy for the chocolate covered almonds. These are fun to crochet and will jazz up any party or gift. Crochet a top hat for an extra touch of class!

The cozy and hat are crocheted in the round. The shirt details are crocheted separately and sewn on…as is the hat ribbon.

This is a great stash buster. We are using Vanna’s Choice yarn because we think the Charcoal Grey looks snazzy next to the Black and White.

SUPPLIES:

  • 1 Pint size canning jar
  • Vanna’s Choice: Medium Worsted Weight (4)
  • BLACK, WHITE, CHARCOAL GREY
  • Crochet Hook: H, F
  • Yarn Needle

TUXEDO COZY INSTRUCTIONS:

Tuxedo Crochet Jar Cozy

Black

Hook: H

Ch 34, join with a sl st.

Rnd 1-12: Sc around. (34)

Join with a sl st. Finish off and weave in end.

WHITE SHIRT INSTRUCTIONS:

White

Hook: H

Ch 2

Row 1: Sc in second ch from hook. (1)

Row 2: Ch 1, turn. Sc inc. (2)

Row 3: Turn. Sc inc twice. (4)

Row 4: Turn. Sc inc, 2 sc, sc inc. (6)

Row 5: Turn. Sc across. (6)

Row 6: Turn. Sc inc, 4 sc, sc inc. (8)

Row 7: Turn. 3 sc, 2 sl st, 3 sc. (8)

Row 8: Turn. Sc inc, 2 sc, 2 sl st, 2 sc, sc inc. Finish off leaving a long tail for sewing. (10)

Sew white shirt to the front of the cozy with row 8 sticking out above the top of the cozy.

TUX LAPEL INSTRUCTIONS:

Charcoal Grey

Hook: F

LEFT LAPEL

Ch 13

Row 1: Dc in fourth ch from hook, dc inc, 3 hdc, 3 sc, 2 sl st, ch 1. (11)

Finish off leaving tail for sewing.

Pin then sew over the left edge of the white Shirt and on the cozy.

RIGHT LAPEL

Ch 13

Row 1: Dc in fourth ch from hook, dc inc, 3 hdc, 3 sc, 2 sl st, ch 3. (14)

Finish off leaving tail for sewing.

Pin then sew right lapel over the right edge of the white shirt with the last 3 ch stitches sewn vertically to represent the jacket opening.

TIE & BUTTONS INSTRUCTIONS:

Black

Hook: H

Ch 6

Row 1: Sc in second ch from hook, 4 sc. (5)

Row 2: Turn. Sc across. Finish off. Cut yarn leaving a long tail for sewing. (5)

Using tail, wrap yarn around the middle of the tie and pull tight. Secure with a knot. Sew tie to white shirt below the sl sts on row 7. Weave in ends.

Whip stitch two buttons below bow tie with black yarn. Weave in ends.

TOP HAT INSTRUCTIONS:

Tuxedo and Hat Crochet PatternBlack

Hook: H

Ch 2

Rnd 1: 8 sc in second ch from hook. (8)

Rnd 2: Sc inc around. (16)

Rnd 3: *1 sc, sc inc* around. (24)

Rnd 4: *2 sc, sc inc* around. (32)

Rnd 5: *3 sc, sc inc* around. (40)

Rnd 6: Work in back loops only. *3 sc, sc dec* around. (32)

Rnd 7-12: Work in both loops. Sc around. Add more rounds for a taller top hat. (32)

Rnd 13: Work in front loops only. *3 sc, sc inc* around. (40)

Rnd 14: Work in both loops. *4 sc, sc inc* around. (48)

Rnd 15: *5 sc, sc inc* around. (56)

Rnd 16: *Sc inc, sc, sc inc, 3 sc* 3 times, 7 sc. Repeat from beginning. (62)

Add more rounds for a larger bill.

Finish off and weave in end.

TOP HAT RIBBON INSTRUCTIONS:

Charcoal Grey

Hook: H

Ch 34

Rnd 1: Join with a sc. Sc around. (34)

Join with a sl st. Finish off and weave in ends.

TOP HAT BOW INSTRUCTIONS:

Charcoal Grey

Hook: H

Ch 6

Row 1: Sc in second ch from hook, 4 sc. (5)

Row 2: Turn. Sc across. (5)

Finish off leaving a long tail for sewing.

Using tail, wrap yarn around the middle of the tie and pull tight. Secure with a knot.

Sew tie to Top Hat Ribbon.

Slide Ribbon on Top Hat. Secure if needed.

More Cozies in Store

coffee cup cozy patterns ebookLove this tuxedo cozy? There are more seasonal, holiday and just for fun cozies in the store in our Crochet Cup Cozy eBook. We’ve created an entire collection with 28 designs one ebook.

Looking for the cup and mug version? They’re in the ebook.

Each design in the ebook has instructions to fit Mugs, Cups and Mason Jars. Every design has a delicious recipe or fun craft.

The ebook includes 4 new designs – Dracula, Vampire, Mummy and Blue Jeans.

Available in the StoreRead more about the set:

Blog: Coffee Cup Cozy Collection

Store: Coffee Cup Cozy Collection


Free Crochet Santa Hat Pattern

Free Crochet Santa Hat Pattern

santa hatThis free crochet Santa hat pattern is festive and fun. It’s one-size-fits-all, fitting both men and women! Per my husband’s request, we crocheted ours in green. (Caution: someone called him a Grinch because his hat is green!)

This hat is perfect for office parties, wearing at school and even as a warm winter hat! Crochet in red for a traditional look or go wild and crazy with an untraditional color that makes you feel the most jolly.

Santa (and the Grinch) wears a red and white hat. Elves wear green and white or green and red hats.

Free Crochet Santa Hat Pattern Details

The ribbed brim on this free Santa Hat pattern makes the hat naturally adjust to various sizes of heads. Though designed for a man (with 23” head), I’m often seen around town wearing this hat.

The pattern is worked from the bottom up in half double crochet with decreases each round.

Add a 3” pom pom to the top and you’re ready for Christmas!

Free Crochet Santa Hat Pattern Available Now

Just in time for the holidays! The free crochet Santa hat pattern is available in the store or on the Free Crochet Patterns page.

Ho, ho, ho….and Merry Christmas!

FREE Patterns