Denim and Fabric Basket Sewing Pattern Collection

Sew your own gorgeous basket with this fun and easy Denim Basket sewing pattern PDF.

It’s a beginner friendly sewing pattern with step-by-step instructions and photos. Traceable templates are included for a denim basket (or fabric basket) that measures 10″ wide x 6″ long x 6 1/2″ tall.
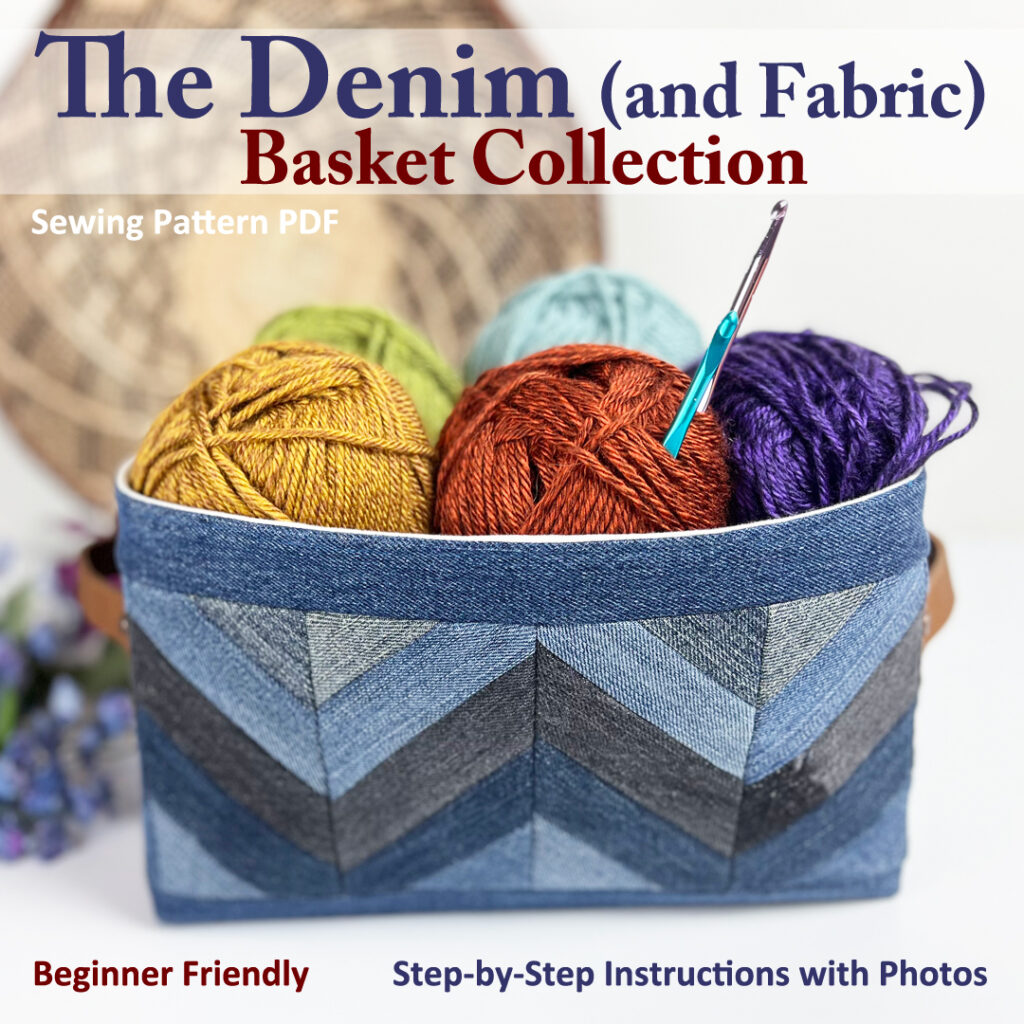
About The Denim Basket (Fabric Basket) Pattern

This denim basket sewing pattern is FULL of helpful information making it great for new and experienced sewists alike. Here’s what’s in the basket sewing pattern:

  • 1 basket pattern: 10″ wide x 6″ long x 6 1/2″ tall
  • 2 lining options: sewn in or sewn separate
  • 3 handle options
  • 6 fabric designs
  • Traceable templates
  • 40 pages
  • 70+ photos
  • Beginner Friendly
  • Step-by-Step instructions

You can build your own fabric design, or sew a basket with a solid piece of material.
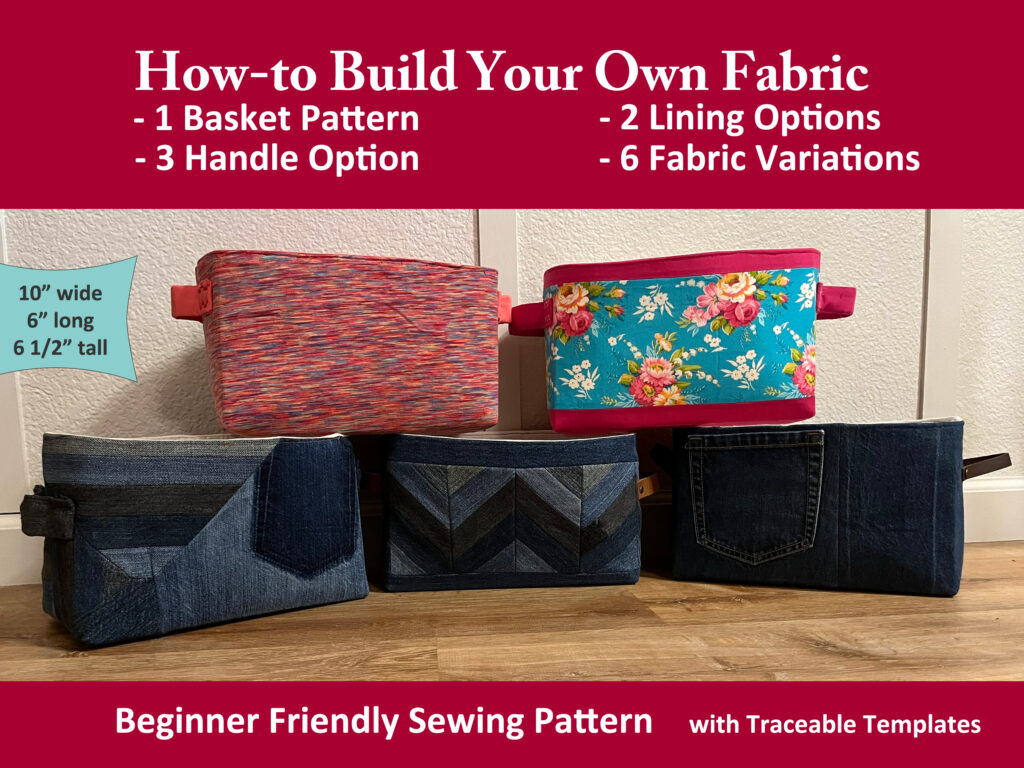
denim basket and fabric basket options in this beginner friendly sewing pattern

What material do you need to make a denim basket?

You only need 1 pair of children’s jeans to make a denim basket. However, we used 5 pairs for the chevron because we wanted different shades of blues and black material. You can use any denim you have on hand to make the denim baskets. If you want a basket with a pocket on the front, we recommend children’s jeans as the small size pocket is a perfect fit. Don’t have denim, check out your local second hand store for a pair or two.

What material do you need to make a fabric basket?

If you want to sew a basket from fabric, you have even more options. You can buy new fabric or use material you have on hand such as clothing and bed linens. This is a great time to upcycle fabrics that are worn or neglected or have a stain or two (just cut around those bad spots). The second hand store is also a great resource because you can browse all the clothing departments (children, men’s women’s) as well as the linens. We recommend cotton fibers for new sewists.

How much material is needed to sew a denim basket?

The denim basket and fabric basket each require 3 layers of fabric.

  • Layer 1: The outside fabric (such as denim or cotton)
    (2) pieces at least 12″ x 17″
  • Layer 2: The inside lining fabric (such as muslin or cotton)
    (2) pieces at least 13″ x 17″
  • Layer 3: The stabilizer (ultra firm – fusible or non-fusible)
    (1) piece at least 20″ x 24″

You’ll also need thread to match your fabric.

The Denim Basket / Fabric Basket Sewing Pattern PDF

You’ll also need the Denim Basket Sewing Pattern. It’s available in our Etsy Shop.

Now available on Etsy.

Buy the pattern on etsy

1 Basket Pattern – 6 Fabric Designs

Even though there is only 1 size basket in this pattern, we show you how to create 6 unique fabric designs. So it’s really 6 patterns in 1!

Basket measures: 10″ wide x 6″ long x 6 1/2″ tall.

The 6 fabric designs included in the denim basket sewing pattern are as follows. Keep in mind that this is in addition to a solid fabric basket design:

  • Chevron
  • Quadrant
  • Pocket Front
  • Stripes
  • Wide Stripe
  • Scrappy
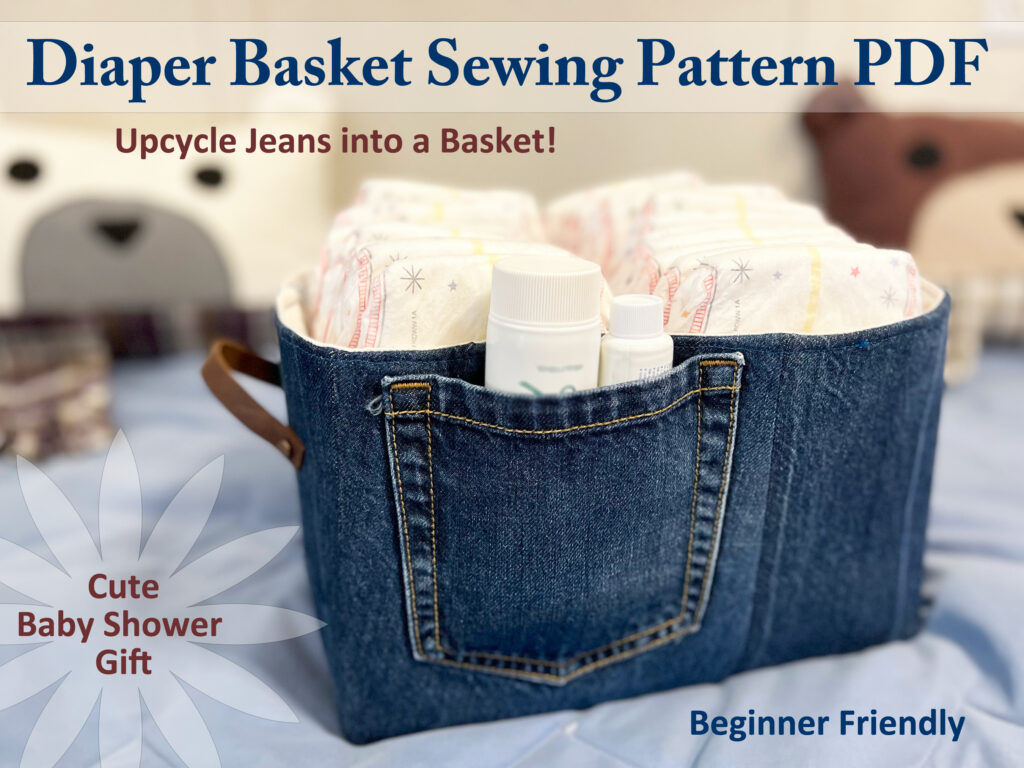
Denim Basket with pocket used as baby diaper basket

Uses for Denim Basket (Fabric Basket)

This 10″ x 6″ basket size is really quite convenient. It will help you get organized and help your house feel neat and tidy. We’ve used these baskets as:

  • Baby Diaper Basket
  • Baby Shower Gift
  • Paperless Towel Basket
  • Book Storage
  • Bathroom Storage
  • Christmas Basket
  • Laundry Room Storage Basket
  • College Dorm Room Storage Basket
  • And more…

Pin Our Picture to Pinterest

Share the love. Pin our pictures to Pinterest.
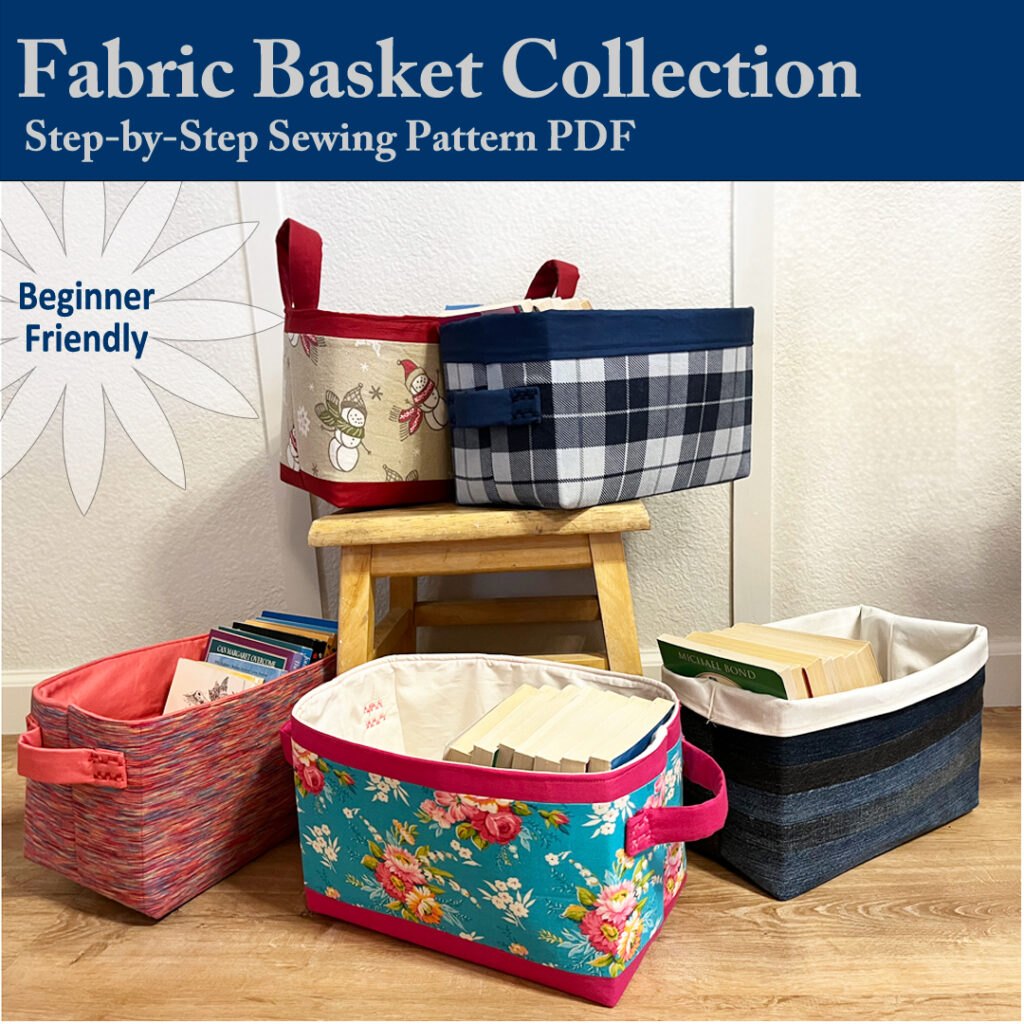
Buy the Denim Basket and Fabric Basket Sewing Pattern on Etsy.

We had a lot of fun sewing basket after basket. You will, too. The Denim Basket Sewing Pattern is available in our Etsy Shop.

Available now on Etsy.

Buy the pattern on etsy

Crochet Mother’s Day Gift

Happy Mother’s Day, Mom!

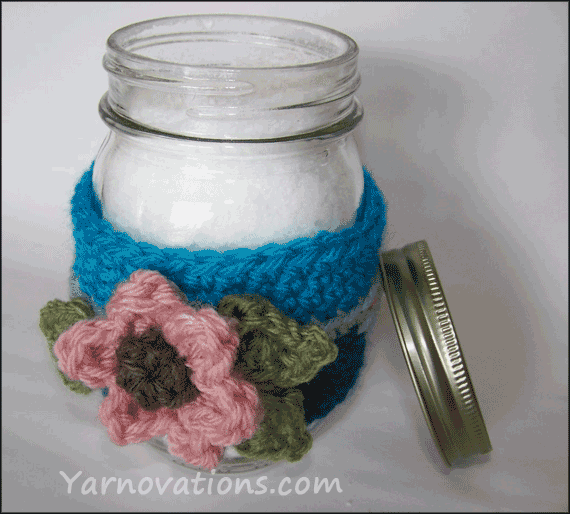
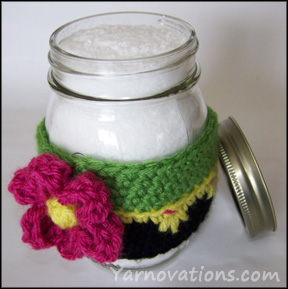
We celebrated Mother’s Day a week early…so I can reveal the mason jar cozy I made for her jar of bath salts.

mothers day bath salts

This cozy follows the FREE pattern on our post: How to make bath salts and a crochet flower cozy. This Mother’s Day cozy was crocheted with Vanna’s Choice yarns with a strong emphasis on teal colors to coordinate with my mother’s bathroom.

Colors used – Vanna’s Choice:

  • Pink
  • Silver Blue
  • Dusty Green
  • Taupe
  • Sapphire
  • Aqua

flower and leaf mason jar cozyThe bath salts are super easy to make. The recipe and the directions for the flower cozy are free on the post: How to make bath salts and a crochet flower cozy.

For this particular cozy, I added leaves. The pattern for those are below:

CROCHET LEAF PATTERN:

Hook: H

Ch 5

Rnd 1: Dc inc in 3rd ch from hook. Sc inc, sl st. Ch 2. Turn to other side of foundation Row. Sl st, sc inc, 3 dc in last st. Join with sl st. Finish off leaving a long tail for sewing.

That’s it. Make three (or as many as desired).

Wishing a Happy Mother’s Day to our mom and yours.

Enjoy!


How to Make Bath Salts and a Crochet Flower Cozy

How to Make Bath Salts and a Crochet Flower Cozy

how to make bath salts

Learn how to make bath salts and pamper yourself (and your mom). Store the crystals in a mason jar and wrap it with a fun crochet flower cozy. This is a beautiful Mother’s Day gift idea. (Mom, if you’re reading this…I guess you know what you’re getting for your special day!)

The bath salts are surprisingly simple to make. We’ll start with them because you’ll want them to be completely dry before storing (otherwise the salt may get clumpy).

How to Make Bath Salts

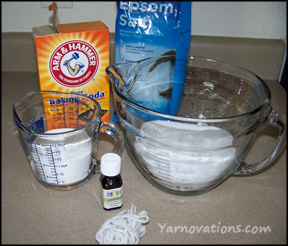
bath salts ingredientsAs I mentioned, learning how to make bath salts is easy. The hardest part is figuring out what scent you want! Think about who the bath salt is for. If it’s for you, do you like floral? Do you want something relaxing or energizing? Do you like a lot of scent or just a hint of it?
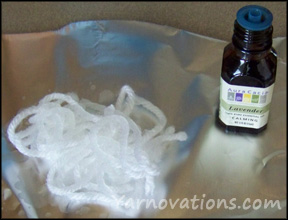
Essential Oils are available in natural grocery stores. The bottles will list their scent as well as their characteristics. Some will even list whether they work well in a bath. Common scents include: peppermint, lavender, rosemary, eucalyptus and orange.

Scented Bath Salts Ingredients:

  • 2 cups Epson Salts
  • 1/2 cup Baking Soda (optional)
  • Essential Oil (as desired)
  • Scraps of Yarn
  • Aluminum foil
  • Cookie sheet

Note: Sea Salt can be used in exchange or in addition to Epson Salt. Table salt cannot be used.

Baking soda is a skin softener and is an optional ingredient. It can be used in equal parts to the salt.

scented yarnScented Bath Salts Directions:

  1. Mix salt and baking soda together.
  2. Sprinkle several drops of Essential Oil onto scraps of yarn. Stir yarn through bath salt mixture to desired strength of scent.
  3. Repeat Step 2 if needed.
  4. Line cookie sheet with aluminum foil. Spread salt mixture onto cookie sheet to dry.
  5. Periodically stir salts. Allow to dry completely (overnight).
  6. Store in mason jar.

How to Make a Crochet Flower Cozy for Mason Jar of Bath Salts

mothers day gift ideaThis crochet flower reminds me of the annual tradition my family had of planting flowers in my mother’s yard on Mother’s Day. That tradition was the inspiration for this cozy.
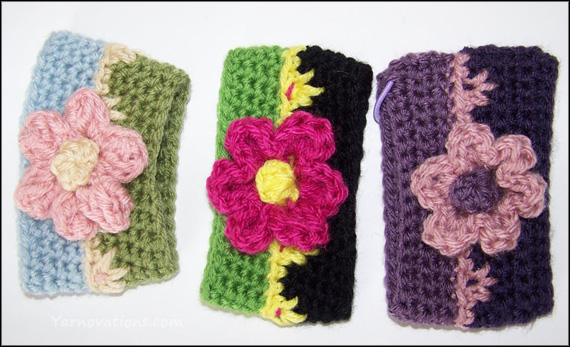
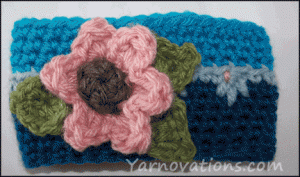
This crochet flower can be sewn directly to the cozy or affixed with a pin (something like a coiless pin would work well). Using a pin will allow the flower to be removed and used to decorate other things.

This is a great stash buster project. We’ve used Vanna’s Choice yarn (medium worsted weight). We love her blend of bright colors and pastels.

Skill Level: Intermediate

Stitches Used: Slip Stitch, Single Crochet, Double Crochet, Treble Crochet

Technique Used: Crochet in the Round. Cluster Stitch

Note: Replace the cluster stitch with a single crochet and this Intermediate pattern would be rated Easy.

CROCHET FLOWER SUPPLIES

  • Vanna’s Choice: Black, Raspberry, Radiant Yellow, Fern
    (Pastel: Pink, Silver Blue, Dusty Green, Beige)
    (Purples: Dusty Rose, Dusty Purple, Purple)
  • Crochet Hook: H
  • Yarn Needle

COZY INSTRUCTIONS

Cluster Stitch Instructions:

Cluster Stitch: Insert hook into next stitch (the current working stitch), YO, draw through stitch, YO, pull through one loop on hook, insert hook in the stitch one row below and one stitch back, YO (pulling yarn from the inside of the project), pull through stitch, YO, pull through one loop on hook, insert hook two rows below the current working stitch  (pulling yarn from the inside of the project), YO, draw through stitch, YO, pull through one loop on hook, insert hook in the stitch one row below and one stitch ahead of the current working stitch (pulling yarn from inside the project), YO, pull through stitch, YO, pull through one loop on hook, YO, pull through all five loops on hook. *Note, the next working stitch is under the last YO.

Black

Ch 34, join with a sl st.

Rnd 1-4: Sc around. (34)

Rnd 5: Sc around. Change color to Radiant Yellow with sl st. Ch 1. Finish off Black and weave in ends. (34)

Rnd 6: 2 sc, *cluster st, 3 sc* around. End with 3 sc. Change color to Fern with sl st. Ch 1. Finish off Radiant Yellow and weave in ends. (34)

Rnd 7: Working in the back loop only, sc around. (34)

Rnd 8-9: Working in both loops now and throughout, sc around. (34)

Rnd 10: 33 sc, sl st. Finish off and weave in ends. (34)

With 12” length of Raspberry yarn, embroider a small stitch into the center of the cluster st.

cozies flat

FLOWER INSTRUCTIONS

Center

Radiant Yellow

Ch 3

Rnd 1: 5 dc in third ch from hook. (Count ch-3 as first dc). (6)

Rnd 2: Working in back loops only, sc around. Finish off leaving a long tail for sewing. (6)

Attach Raspberry to the front loop of any stitch of Rnd 2.

Rnd 3: Work the following stitches in the front loop of each stitch around, (sc, dc, trc, dc, sc). Finish with a sl st in the first sc made. Finish off and weave in end. (6 petals made)

Sew flower to cozy.

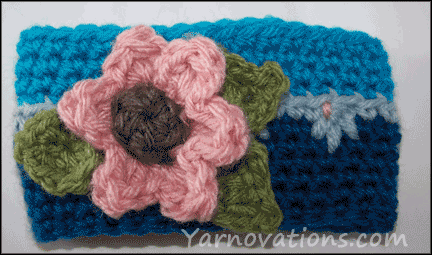
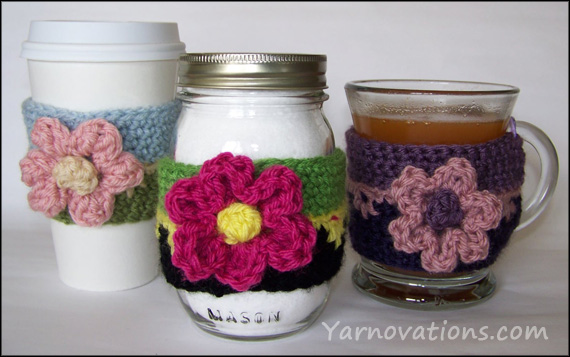
flower and leaf mason jar cozyNote: Turn the edges of the flower under for a puffy looking flower (as seen in the pastel cozy on the far left). Or leave ends of Rnds out for a layered look (like the two on the right).

UPDATE: I recently added leaves to this cozy. You can get the pattern to the leaves on the Crochet Mother’s Day Gift post.

More Cozies in Store

coffee cup cozy patterns ebookLove this flower cozy? There are more seasonal, holiday and just for fun cozies in the store in our Crochet Cup Cozy eBook. We’ve created an entire collection with 28 designs one ebook.

Looking for the cup and mug version? They’re in the ebook.

Each design in the ebook has instructions to fit Mugs, Cups and Mason Jars. Every design has a delicious recipe or fun craft.

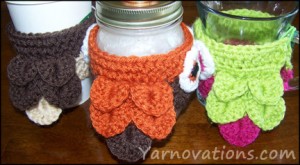
All 3 flowers pictured at the beginning of this post are in this ebook! AND the ebook includes 4 new designs – Dracula, Vampire, Mummy and Blue Jeans.

Available in the StoreRead more about the set:

Blog: Coffee Cup Cozy Collection

Store: Coffee Cup Cozy Collection

Mason Jar Soap Dispenser with Crochet Owl Cozy

Mason Jar Soap Dispenser with Crochet Owl Cozy

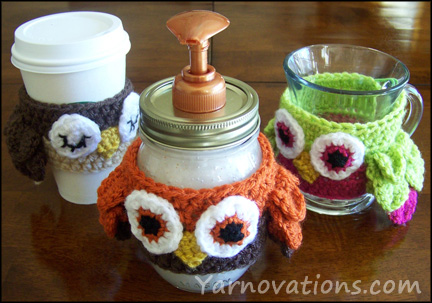
mason jar soap dispenserIt’s a hoot making this mason jar soap dispenser with crochet owl cozy! This woodland creature makes washing hands fun. Those great big eyes won’t miss a thing.
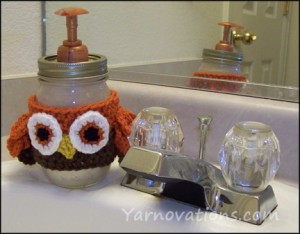
Dirty hands can spread germs. So take a few squirts of soap from this wise owl and wash that grime away.

This fun soap dispenser is great for bathrooms or kitchens. Crochet the cozy in colors that coordinate with your home décor.

Let’s start with the mason jar soap dispenser…and get our hands clean before we start on the crochet owl.

Mason Jar Soap Dispenser How-to

mason jar soap dispenser with crochet owl cozyWe’re taking the easy way out…and creating a mason jar soap dispenser from an existing soap dispenser. Its best if you select your yarn colors first…then you can bring them to the store to help select a dispenser pump in a color that will coordinate well.
SUPPLIES:

  • 1 pint size canning jar with lid
  • 16 oz liquid soap
  • 1 soap dispenser (we used Softsoap® brand)

TOOLS:

  • Knife and cutting board
  • ½” drill bit and drill
  • Clamp
  • Scrap wood
  • Paper, pencil and Scissors
  • Hammer and nail
  • Metal file
  • Glue Gun

soap dispenser lidDIRECTIONS:

  1. Trace the flat lid on a piece of paper. Cut out the circle you just traced with scissors. Fold the paper in half twice to find the center of the paper.
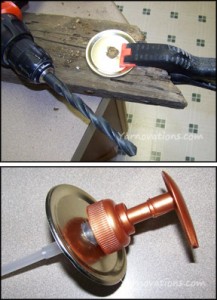
  2. Place the paper on top of the lid and clamp to a piece of scrap wood. With hammer and nail, put a small hole in the center of the lid.
  3. Remove the paper and reclamp the lid to the scrap wood. Drill a ½ inch hole into the center of the lid. You may need to move the drill around a bit to make the hole slightly bigger than ½ inch.
  4. If there are any sharp edges around the hole, sand down with a metal file.
  5. Remove the pump from its original dispenser and wash and dry it. Test to see if it fits into the hole in the lid. If not, repeat steps 3 & 4 as needed.
  6. Place lids and pump onto jar to make sure the parts fit. If the pump is too tall, cut the base of the stem off at the same angle using a knife and cutting board. You only want to cut off as much as needed to get the stem to almost touch the base of the mason jar.
  7. You may need to secure the pump to the lid. To do so, insert pump into lid and turn to the bottom side. Use glue gun to adhere pump to lid.
  8. Pour liquid soap into mason jar. Attach lid. Pump the dispenser several times until soap starts to come out of it.
  9. Wash hands…you’re good to go!

Mason Jar Soap Dispenser Owl Cozy

So you’ve finished your mason jar soap dispenser. Now it’s time for the crochet owl cozy!

This is a fun little project that you can whip up in an evening. It’s a great stash buster, too. We used Vanna’s Choice because she’s got so many fun colors that work beautifully for a girl or boys room.

crochet owls

SUPPLIES:

  • Vanna’s Choice Yarn: Worsted Weight (4)
    Chocolate, Terracotta, Mustard, Black, White
    (other combos: Chocolate with Beige; Radiant Lime with Raspberry)
  • Crochet Hook: J / 10 / 6.00 mm
  • Crochet Hook: H / 8 / 5. 00 mm
  • Crochet Hook: F / 5 / 3.75 mm
  • Yarn Needle

COZY INSTRUCTIONS:

Chocolate

Hook: J

Ch 32, join with a sl st.

Rnd 1: Ch 1 (do not count as a st), hdc around. Skip the ch 1; join with a sl st. (32)

Rnd 2-3: Ch 1, hdc around. Skip the joining stitch and the ch 1, join with a sl st. (32)

Finish off. Cut yarn; weave in end.

Attach Terracotta to the back loop of any stitch.

Rnd 4: Work in back loops only. Ch 1, hdc around. Skip the ch 1, join with a sl st. (32)

Rnd 5-6: Work in both loops. Ch 1, hdc around. Skip the join and the ch 1, join with a sl st. (32)

Finish off, weave in end.

WING INSTRUCTIONS (make 2):

crochet wings

Chocolate

Hook: J

Ch 8

Row 1: Dc in 4th ch from hook (count first three ch as the first dc), 4 dc. (6)

Row 2: Turn. 5 dc down the post of the 3rd dc, ch 1, 5 dc up the post of the next dc, skip a dc, sl st in the top of the last st. (1 crocodile stitch made)

Finish of, weave in end.

Attach Terracotta to the last st made.

Row 3: Ch 4, turn. Dc in 4th ch from hook, work 6 dc across the top of Row 2, work a ncfdc in the last st, 2 nfdc. (11)

Row 4: Work 5 dc down the post of the 3rd dc, ch 1, work 5 dc up the post of the next dc, skip a st, sl st in the front loop of the next st, skip a st, 5 dc down the post of the next st, ch 1, work 5 dc up the post of the next st, skip a st, sl st in the last st. (2 crocodile stitches made)

Row 5: Ch 3, turn. Work 10 dc across. (11)

Row 6: Repeat row 4.

Finish off leaving a long tail for sewing.

EYES INSTRUCTIONS (make 2):

Black

Hook: F

Ch 2

owl in bathroom

Rnd 1: 6 sc in 2nd ch from hook. Join with a sl st. (6)

Finish off, weave in end.

Attach Terracotta any stitch.

Rnd 2: Sc inc around. Join with a sl st. (12)

Finish off, weave in ends.

Attach White to any st.

Rnd 3: *Hdc, Hdc inc* around. Join with a sl st. (18)

Finish off leaving a tail for sewing.

BEAK INSTRUCTIONS:

Mustard

Hook: J

Ch 4

Row 1: Sc in 2nd ch from hook, 2 sc. (3)

Row 2: Turn, sc the first and second stitches together, sc the second and third stitch together. (2)

Row 3: Turn, sc dec. Finish off. Cut yarn leaving a tail for sewing. (1)

Turn the foundation ch down under the beak.

ASSEMBLY INSTRUCTIONS:

  1. Sew Eyes on Rnds 2-4 so they are touching or as desired. Weave in ends.
  2. Sew Beak centered below and touching the Eyes.
  3. Sew Wings just above the unused front loops. Sew up to the stitch next to the Eyes and 8 other stitches. There should be about 5 or 6 unused loops in the back between the Wings.

More Cozies in Store

coffee cup cozy patterns ebookLove this owl cozy? There are more seasonal, holiday and just for fun cozies in the store in our Crochet Cup Cozy eBook. We’ve created an entire collection with 28 designs one ebook.

Looking for the cup and mug version? They’re in the ebook.

Each design in the ebook has instructions to fit Mugs, Cups and Mason Jars. Every design has a delicious recipe or fun craft.

All 3 owls pictured at the beginning of this post are in this ebook! AND the ebook includes 4 new designs – Dracula, Vampire, Mummy and Blue Jeans.

Available in the StoreRead more about the set:

Blog: Coffee Cup Cozy Collection

Store: Coffee Cup Cozy Collection

Knitted Dishcloth Patterns

Knitted Dishcloth Patterns

Surprise! We are happy to share some knitted dishcloth patterns with you. I know, a departure from our usual offerings. These are simple projects that are perfect for the beginner knitter….like us! This is the first knitting project we’ve put together for this blog!

Free Knit Dishies

The back story: When my teenage neighbors taught me (Dana) to knit, the first project they showed me was Grandmother’s Favorite dishcloth. Later, after getting the hang of how to knit and purl, I wanted to spruce up the dishcloths a bit. So, I sought out other patterns and even charted my own (the smiley face is my own creation)! So, here you go.

Knitted Dishcloth Patterns –Details About The Dishies

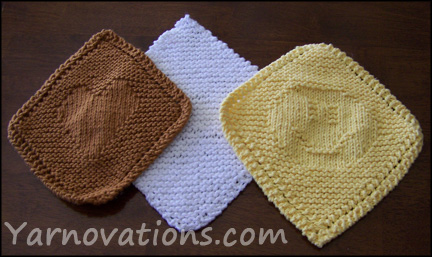
The knitted dishcloth patterns are free and come with three designs. Along with written directions, there are charts are for the dishcloths with patterns in their centers.

Skill Level: Easy

Materials: Cotton Yarn

Here’s what’s included:

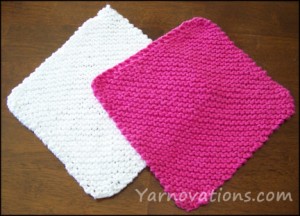
simple knit dishie1. Simple Knit Dishie

Perfect for the beginner. Pick up a beautiful variegated yarn and work up this simple knit dishie. It is knit on the diagonal using an increase and decrease and knit stitch.

A special thanks to my sister-in-law for sharing this with us. Thanks, Mary!

Measures 7 ½” square


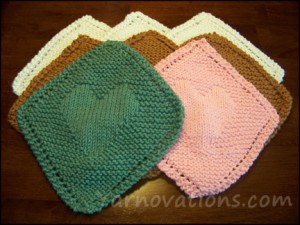
2. Heart in Grandmother’s Favorite Knit Dishie

heart dishieShare the love with a purled heart in Grandmother’s favorite dishie. People are impressed with this extra little touch. It takes a little extra time, but it’s chalk full of love and it shows.

The yarn over border also looks stunning when paired with the purled heart.

It looks best in solid yarns. It is knit on the diagonal using increase, decrease, knit and purl.

Measures 7” square


3. Smile on Grandmother’s Favorite Knit Dishie

smile dishieSpread cheer one dishie at a time with a fun twist on Grandmother’s Favorite. Kids will find dish duty more fun with this friendly dishie. Wait…so will adults!
It looks best in solid colored yarns. It is knit on the diagonal using increase, decrease, knit and purl.

Measures 7” square

Knitted Dishcloth Patterns – FREE Patterns

All three knitted dishcloth patterns are available in the store and on the Free Knitting Patterns page.

FREE Patterns

Feel free to print and share the patterns with friends and family.

Making these as gifts? Consider what color scheme your recipients would like. What color is their kitchen, for example. Or consider their personality. Would they prefer a white dishcloth so they can bleach it?

These fun and practical dishies will look beautiful and clean up nicely in any kitchen.

FREE Sachet Bag Crochet Pattern

sachet bagsFREE Sachet Bag Crochet  Pattern – Such Adorable Bags

Make your own Sachet Bags with this FREE Crochet Pattern and see what all the fuss is about. Why the new craze for sachet bags? Are they really all that special? Many people use them as soap savers. Do they really save on soap? Seeing is believing. Download the free pattern and see for yourself.

sachet iPod cozySoap isn’t the only thing these draw string bags are good for. They make great gift card holders! You can also use these as pouches for storing electrical devices such as an iPod and cell phones. These mini bags are most notably recognized as potpourri sachets and scented sachets or as wedding favors and bridal shower favors. These make great gift wrapping for smaller gifts like chocolates and jewelry. You’ll be so delighted with your sachet, you’ll come up with a lot of little uses for it.
FREE Sachet Bag Crochet Pattern – The Details

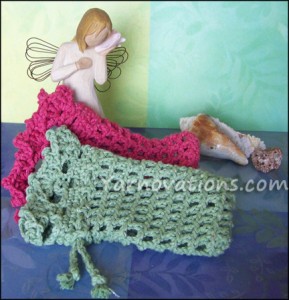
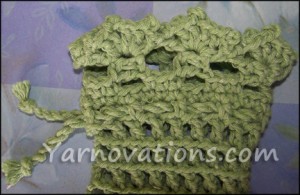
crown edgingYour sachet bags will vary in size depending on the size hook you use. We used hook E with Red Heart Eco-Cotton yarn and our bags measure 2 3/4 inches x 6 inches.
Skill level: Easy

This bag is crocheted using the filet stitch (dc, ch 1 skip a st). It’s topped with a beautiful crown edge and tightens with a cord draw string. It’s simple yet elegant.

The pattern includes detailed written instructions (for the bag, crown edge and drawstring). It has lots of photos, materials list, gauge info, check box to mark your progress and more.

FREE Crochet Patterns

Free Patterns Page: Download the pattern from the FREE Crochet Patterns page.
Store: Add the Filet Sachet with Crown Edge Pattern Free to your cart in the Store.

FREE Sachet Bag Crochet Pattern – There’s More!

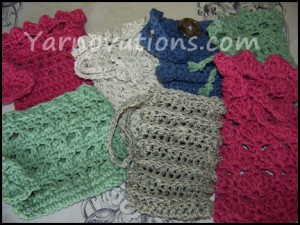
Caution: Sachet bags are addicting to make. We made one sachet and couldn’t stop. In our case, one bag led to seven! Here is a small sampling of them.

Crochet Soap Saver Collection

Blog: See all seven of the bags on our Crochet Soap Saver Collection blog post
Store: Also available in the store at Crochet Sachet Soap Saver Collection.

Etsy: Crochet Sachet Soap Saver Collection

This set has a nice blend of both feminine and masculine designs. Check out the bonus Mary Jane style Wash Mitt. It’s perfect for liquid soap users!

Mary Jane Wash Mitt

Mary Jane Wash Mitt – Fun and Practical

Mary Jane style Wash MittMary Jane shoes and slippers are wildly popular. Bath time has been totally inspired by her, too!
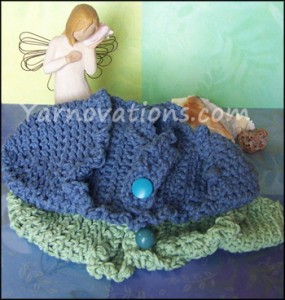
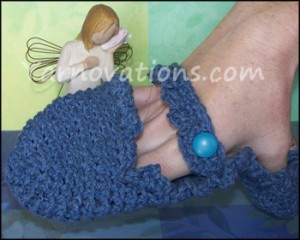
Where the toe box might be, we’ve got a pocket for your fingers. Where the heel might be, we’ve got a pocket for the thumb. And nothing says Mary Jane like a fun strap with faux button. We’ve got one of those to. It runs across the back of your hand to strap the Mary Jane Wash Mitt firmly in place.

The Bath Mitt is great for liquid soap lovers. You can use it in the bath, shower or keep it by your sink to use as your face scrubbie.

Mary Jane Wash Mitt – the Details

Mary Jane Wash Mitt two colorsWe dressed up this Mary Jane Wash Mitt by adding a bit of ruffle around the edge. Who doesn’t love a little extra frill?!
Skill Level: Easy

Really, this is a fun, quick and easy project. You can make three or more wash mitts with one skein of Red Heart Eco-Cotton Yarn. So this is fabulous last minute gift. It measures 4 1/2″ x 8″. We’ve included instructions on how to make it smaller for more petite hands.

The pattern includes detailed written instructions, lots of pictures, gauge info, materials list, check box for marking your progress, size info, abbreviation list and more.

Soap Saver CollectionBONUS: This pattern also includes 7 soap saver sachets! And they are all adorable. You can learn more about them on our crochet soap saver collection page.

Crochet Soap Saver Collection pattern on Etsy.

This is available now in the store. Your receipt will have a link to download the pattern. Buy the Mary Jane Wash Mitt pattern now and start crocheting right away.