Panda Doorknob Cozy

Panda Doorknob Cozy FREE on RedHeart.com

Photo: Red Heart

Photo: Red Heart

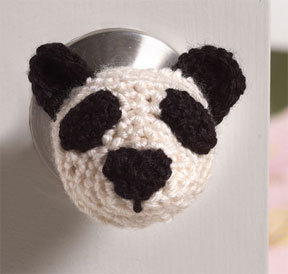
We’ve created a cute panda doorknob cozy for Red Heart and it’s FREE on their website!

This cozy is a fun accent to a child’s room and may act as a child proof cozy for toddlers!

The cozy was designed using Red Heart Soft yarn. This yarn is 100% acrylic and is surprisingly soft! We love using it because of how cozy it feels running through our fingers…and it’s washable!

Get your free Panda Doorknob Cozy at Redheart.com.


Soldier Christmas Wreath – Crochet Pattern

Soldier Christmas Wreath – Crochet Pattern

Soldier Christmas Wreath

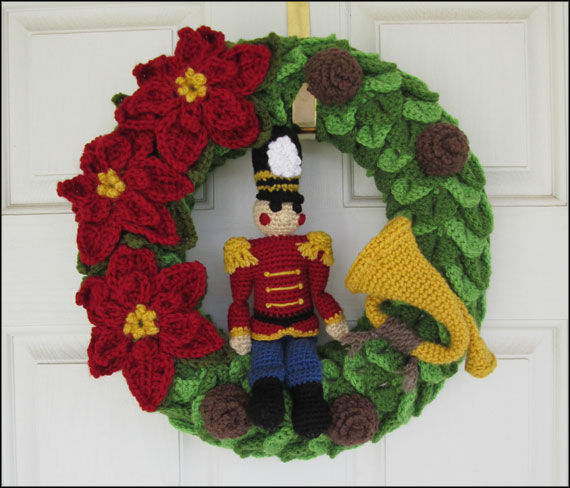
The wait is over. Deborah’s award winning Soldier Christmas Wreath is now available as a crochet pattern!

Crochet your own award winning wreath. It will look adorable on your front door, on the living room wall or even on the front grill of your car (although the poinsettia’s may wilt in the weather – and really, after all the work you put into the wreath…perhaps inside the car would be better)!

This crochet pattern includes all the elements you see including:

  • Crocodile Stitch Wreath Cozy
  • Toy Soldier
  • Poinsettia
  • Bugle
  • Pine Cone

The Soldier Christmas Wreath was made with Lion Brand, Vanna’s Choice yarn. The vivid primary colors do a fabulous job of capturing the spirit of the Christmas season.

Soldier Christmas Wreath – In the Store

Get the pattern and learn more about the Soldier Christmas Wreath in the store.

Soldier Christmas Wreath available on Etsy.

Available in the Store

VW Van Pillow – Free Crochet Pattern

VW Van Pillow – Free Crochet Pattern

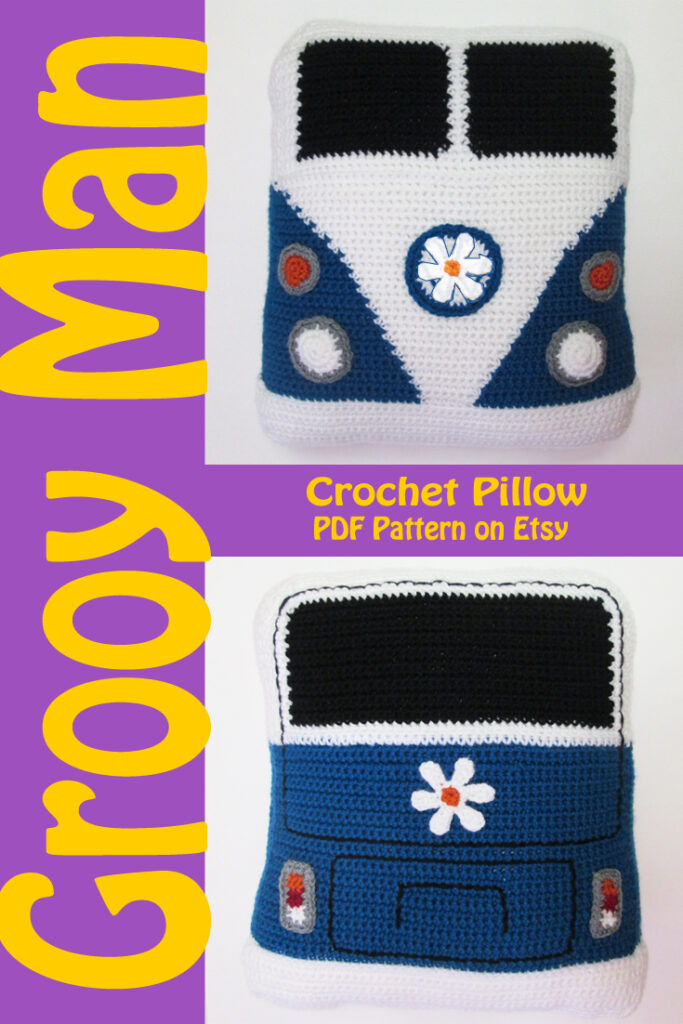
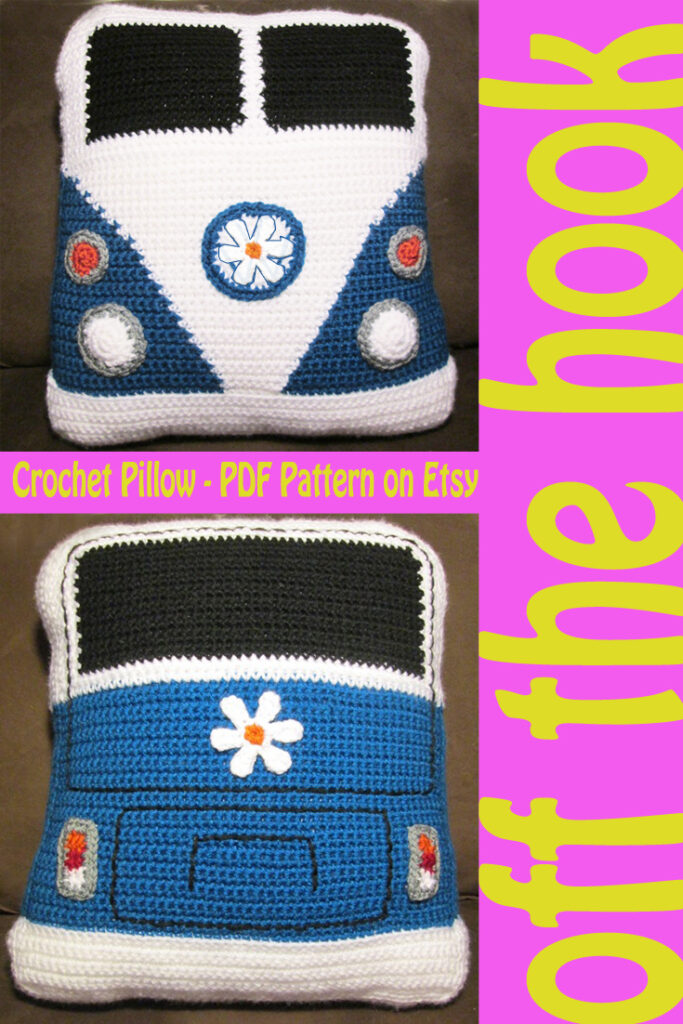
Love VW Van’s? Here’s our groovy interpretation on the campervan. We picked some of our favorite shapes for the lights and turn signals, etc. so this doesn’t match any particular model.

This free crochet pattern off the hook! It’s written in USA terms as a fair isle project so you’ll pick up and drop colors as you need them. Although it is a fairly easy project, the use of multiple colors per row can make it a tiny bit more challenging. But the majority of the project is single crochet, so crocheters of all experience levels will be able to tackle it.

PDF Download Available on Etsy

If you’d like the printer friendly version Groovy Campervan Pillow, it’s available in our Etsy Shop.

Available now on Etsy.

Buy Now on Etsy

Information Before You Begin the VW Campervan Pillow Crochet Pattern

Is this pattern right for you? We rate this as easy because it’s mostly single crochet worked in rows or rounds…but if you’ve never crocheted before, it may be challenging. If you know how to chain, slip stitch, single crochet, half double crochet and double crochet, then this is a piece of cake. Most of the project is worked in rows. The accent pieces are stitched in rounds. Here are some other stats:

  • Skill Level:        Easy 
  • Project Type:   Pillow
  • Size:                  13 1/2″ wide x 16″ tall
  • Gauge:              7 sc and 8 rows = 2″

Since this is a pillow, gauge isn’t super important. We used medium worsted weight (4) yarn and the size hook recommended on the label. We also used a smaller hook for the accent pieces like the lights, turn signals and flower.

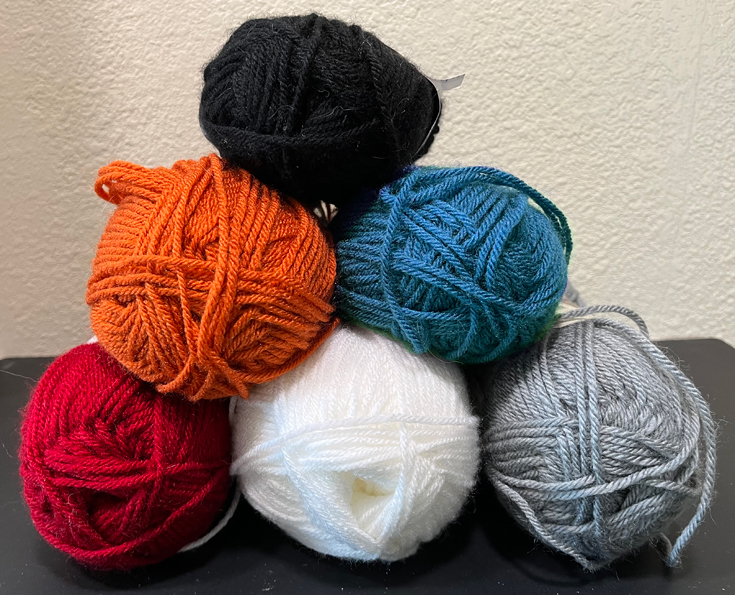
Belowis a quick picture of the colors of yarn used in this project. It’s amazing how a skein of yarn can be transformed into a huggable couch cushion. Or maybe this is going in your vehicle. We’ve had people tell us they made this for their kid’s college dorm room. This VW campervan is just so happy.

Here’s a list of items we used to make the pillow:

  • Yarn:      Lion Brand Vanna’s Choice  –Worsted Weight (4)
  •                BLACK  – 1 skein
  •                SAPPHIRE  – 2 skeins
  •                WHITE  – 1 skein
  •                SILVER GRAY  – 1 skein
  •                CRANBERRY – remnant
  •                TERRACOTTA – remnant
  • Hook:     J / 10 . 6.00 mm
  • Hook:    H / 8 / 5.00 mm
  • Needle: Yarn Needle for sewing
  • Stuffing

Crochet Abbreviations and Meanings

Almost all patterns are written with abbreviations to cut down on space. Here is the key to the abbreviations you’ll see in this VW Van Pillow Crochet Pattern:

  • Ch = chain
  • DC = double crochet
  • Dec = decrease; crochet two stitches together
  • Hdc = half double crochet
  • Inc = increase; work two stitches in the next stitch
  • Rnd = round; work in the round
  • Sc = single crochet
  • Sl st = slip stitch
  • St(s) = stitch(es)
  • *instructions* = repeat the instructions written between the ** the number of times indicated after the second *

There is no standard for pattern writing for crochet. This particular pattern may be a bit more brief than others you’ve seen.

How to Read the VW Van Pillow Pattern

Let me give you an example of how to read a row of this pattern. As you stitch it, you’ll really like it because you can get all the information you need with just a quick glance.

The pattern reads:

Row 12: Turn, 19 Sapphire sc, 9 White sc, 20 Sapphire sc.

How to work the row:

Row 12: Turn your work, pick up the Sapphire yarn from previous row, work 1 sc in each of the next 19 sts, drop the Sapphire yarn, pick up the White yarn from the row below, work 1 sc in each of the next 9 sts, drop the White yarn, pick up the Sapphire yarn from the row below, work 1 sc in each of the next 20 sts.

Wow, we sure saved a lot of space…and we “assume” all sorts of things with our condensed version. Check out the next section for tips and tricks.

Tips and Tricks to Fair Isle

If this is your first fair isle pattern, here are a couple of tips:

  • You do not cut the yarn after each row. Instead you drop it to use in the following row.
  • Always drop your yarn to the same side of the pillow. This will be the back of your work. You do this because there will be little “floats” of yarn. Particularly on sections where you pick up a color earlier or later than you did in the previous row. No one will see the floats if you always drop the yarn to the same side. One Row the floats will be on the back of the work. When you turn your work, then the floats seem to be on the front. So when you drop the yarn, drop it to the front of the work that row. The trick is to be consistent.
  • You may want to put a stitch marker on one side of your work to help remind you which side is the back. Then always drop the yarn to side that has the stitch marker.

We’ve included all this information in the printer friendly version of the Groovy Campervan Pillow Crochet Pattern on Etsy as well.

Buy Now on Etsy

VW Campervan Pattern Notes

  • We recommend that you read through the entire pattern before you begin so are familiar with techniques used.
  • Pillow is made two panels that will be sewn together.
  • Sew accessories such as lights, to panels before joining front and back panels together.

How to Change Color

You will change color in the middle of the last stitch of the old color.

Start working the stitch of the old color. Stop just before the last yarn over, drop the old color, pick up the new color, yarn over with the new color and finish the stitch with the new color.

Check Out These Bean Bag Chairs!

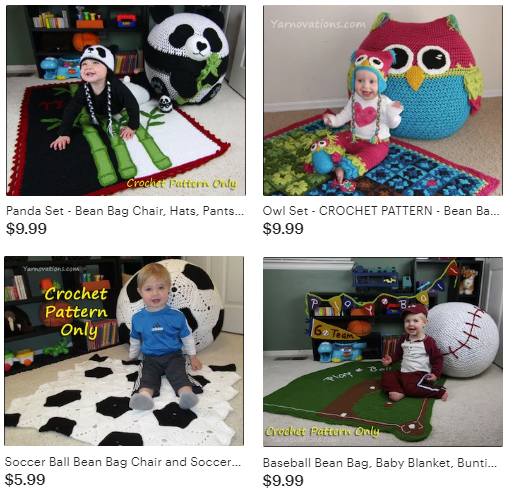
I know you’re right in the middle of your cushion, but these bean bag chairs make me so happy, I couldn’t resist sharing them with you. You can see more pictures on our Etsy Shop.

These sets include bean bag and blanket. Some include baby clothes, too!

Campervan Crochet Pattern

FRONT PANEL INSTRUCTIONS
White
Hook: J
Ch 51
Row 1: Sc in second ch from hook and in each st across. (50)
Rows 2-8: Turn, sc across.
Finish off. Cut yarn; weave in end.
Skip the first st. Attach Sapphire to the second st.
Row 9: Work in back loops only. 21 Sapphire sc, 6 White sc, 21 sc Sapphire. (48)
Row 10: Turn, 20 Sapphire sc, 7 White sc, 21 Sapphire sc.
Row 11: Turn, 20 Sapphire sc, 8 White sc, 20 Sapphire sc.
Row 12: Turn, 19 Sapphire sc, 9 White sc, 20 Sapphire sc.
Row 13: Turn, 19 Sapphire sc, 10 White sc, 19 Sapphire sc.
Row 14: Turn, 18 Sapphire sc, 11 White sc, 19 Sapphire sc.
Row 15: Turn, 18 Sapphire sc, 12 White sc, 18 Sapphire sc.
Row 16: Turn, 17 Sapphire sc, 13 White sc, 18 Sapphire sc.
Row 17: Turn, 17 Sapphire sc, 14 White sc, 17 Sapphire sc.
Row 18: Turn, 16 Sapphire sc, 15 White sc, 17 Sapphire sc.
Row 19: Turn, 16 Sapphire sc, 16 White sc, 16 Sapphire sc.
Row 20: Turn, 15 Sapphire sc, 17 White sc, 16 Sapphire sc.
Row 21: Turn, 15 Sapphire sc, 18 White sc, 15 Sapphire sc.
Row 22: Turn, 14 Sapphire sc, 19 White sc, 15 Sapphire sc.
Row 23: Turn, 14 Sapphire sc, 20 White sc, 14 Sapphire sc.
Row 24: Turn, 13 Sapphire sc, 21 White sc, 14 Sapphire sc.
Row 25: Turn, 13 Sapphire sc, 22 White sc, 13 Sapphire sc.
Row 26: Turn, 12 Sapphire sc, 23 White sc, 13 Sapphire sc.
Row 27: Turn, 12 Sapphire sc, 24 White sc, 12 Sapphire sc.
Row 28: Turn, 11 Sapphire sc, 25 White sc, 12 Sapphire sc.
Row 29: Turn, 11 Sapphire sc, 26 White sc, 11 Sapphire sc.
Row 30: Turn, 10 Sapphire sc, 28 White sc, 10 Sapphire sc.

Row 31: Turn, 9 Sapphire sc, 30 White sc, 9 Sapphire sc.
Row 32: Turn, 8 Sapphire sc, 32 White sc, 8 Sapphire sc.
Row 33: Turn, 7 Sapphire sc, 34 White sc, 7 Sapphire sc.
Row 34: Turn, 6 Sapphire sc, 36 White sc, 6 Sapphire sc.
Row 35: Turn, 5 Sapphire sc, 38 White sc, 5 Sapphire sc.
Row 36: Turn, 4 Sapphire sc, 40 White sc, 4 Sapphire sc.
Row 37: Turn, 2 Sapphire sc, 44 White sc, 2 Sapphire sc.
Row 38: Turn, 48 White sc. Cut Sapphire yarn; weave in ends.
Row 39: Turn, working in back loops only, sc across.
Row 40: Turn, working in both loops, sc across.
Row 41: Turn, 4 White sc, 18 Black sc, 4 White sc, 18 Black sc, 4 White sc.
Row 42-56: Turn, 4 White sc, 19 Black sc, 2 White sc, 19 Black sc, 4 White sc.
Row 57: Turn, White sc dec, 3 sc, 17 Black sc, 4 White sc, 17 Black sc, 3 White sc, White sc dec. (46)
Cut Black; weave in ends.
Row 58: Turn, use White all across, sc dec, 42 sc, sc dec. (44)
Row 59: Turn, sc dec, 40, sc dec. (42)
Row 60: Turn, sc dec, 38 sc, sc dec. (40)
Row 61: Turn, sc dec, 36 sc, sc dec. (38)
With right side facing, attach White to the first unused stitch left on row 8.
Row 62: 2 sc in the unused stitch, continue working around the white area, 1 sc on the end of every white row, turn and continue working on the foundation ch, sc inc in the first st, sc across, sc inc in the last st, turn and work on the ends of each row, 1 sc on the end of each row, turn, 2 sc in the 1 unused st. Continue with the Sapphire, 1 sc on the end of every Sapphire row, continue on the White using White, 1 sc on the end of every row, continue along the top, 1 sc in each st, turn, 1 sc in the end of every White row. Continue with Sapphire, 1 sc in the end of every Sapphire row. Join with a sl st.
Row 63: Working in the back loops only, sc around using the same color as each section.
Row 64-65: Working in both loops, sc around using the same color as each section. Finish off. Cut yarn; weave in ends.

Share The Love

Share the love; pin one of VW Campervan images to Pinterest.

Also, consider buying the VW Campervan Crochet Pattern from Etsy. It’s only a couple bucks and it encourages us to keep making groovy patterns.

You’ve made your first panel. Now it’s time for the magic…the addition of the lights. Be sure to notice that we are using a smaller hook size here. We recommend that you make each of these front side accessories ahead of time, then place them on the pillow to see how they all work together. Refer to the pictures for placement recommendation.

HEADLIGHTS INSTRUCTIONS (make 2)
White
Hook: H
Ch 2
Rnd 1: 8 sc in second ch from hook. (8)
Rnd 2: Sc inc around. (16)
Rnd 3: Sc, sc inc around. Finish off. Cut yarn; weave in end. (24)
Attach Silver Gray to any stitch.
Rnd 4: 2 sc, sc inc around. Finish off. Cut yarn; weave in end. (32)
Stuff lightly. Sew to the lower right and left of the front of the pillow. See pillow for placement.

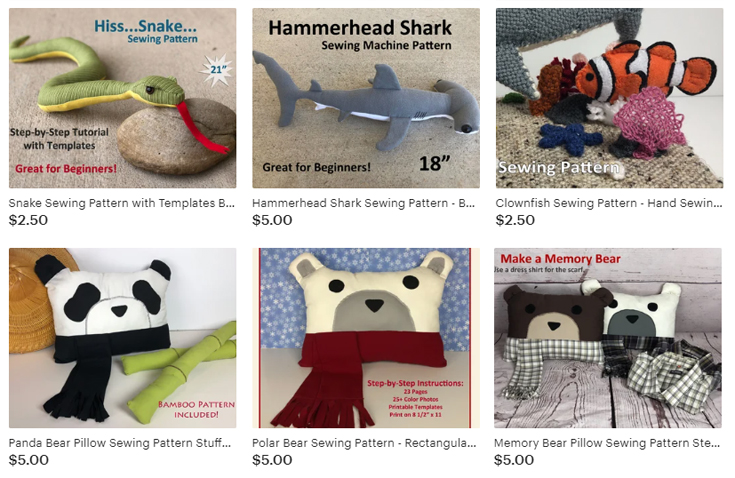
Beginner Friendly Sewing Patterns

We also have fun beginner friendly sewing patterns. Great for new sewists! These are fun to make and fun to give as gifts. Many of these are Step-by-Step tutorials and include templates you can trace.

These are available on Etsy, too!

FRONT BUTTON/EMBLEM INSTRUCTIONS
White
Hook: H
Ch 2
Rnd 1: 7 sc in second ch from hook. (7)
Rnd 2: Sc inc around. (14)
Rnd 3: Sc, sc inc around. Finish off. Cut yarn; weave in end. (21)
Rnd 4: 2 sc, sc inc around. Finish off. Cut yarn; weave in end. (28)
Attach Sapphire to any stitch.
Rnd 5: 3 sc, sc inc around. Finish off. Cut yarn leaving long tail for sewing. (35)
Embroider logo on front or stitch a second flower (pattern below) and whip stitch to emblem. Sew to front center of pillow. See photo for placement.

FRONT TURN SIGNAL INSTRUCTIONS (make 2)
Terracotta
Hook: H
Ch 2
Rnd 1: 7 sc in second ch from hook. (7)
Rnd 2: Sc inc around. Finish off. Cut yarn; weave in end. (14)
Attach Grey to any st.
Rnd 3: Sc, sc inc around. Finish off. Cut yarn; weave in end. (21)
Stuff lightly. Sew to the front of the pillow slightly above the headlights and offset to the side. See photo for placement.

Have You Tried Pin Loom Weaving?

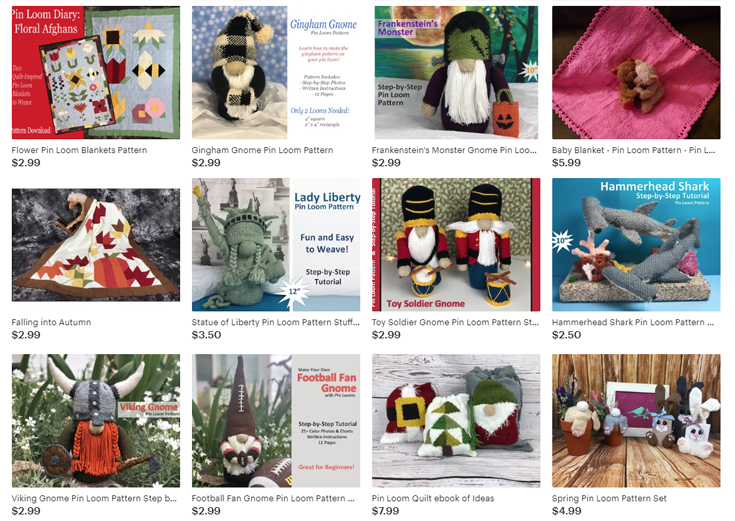
Another great craft for using your yarn is pin loom weaving. It’s fun and easy. You can make a 4″ woven square with only 8 yards of yarn! And there are a ton of things you can make with pin loom woven squares. And many of these patterns include step-by-step photos/instructions.

Learn how to Pin Loom Weave on our website.

Check out these pin loom patterns on our Etsy Shop.

BACK PANEL INSTRUCTIONS
White
Hook: J
Ch 51
Row 1: Sc in second ch from hook and in each st across. (50)
Row 2-8: Turn, sc across.
Finish off. Cut yarn; weave in end.
Skip the first st. Attach Sapphire to the second st.
Row 9: Working in back loops only, sc in the same st as the attached, 47 sc. (48)
Row 10-37: Turn ,sc across.
Attach White to first st.
Row 38: Turn, sc across.
Row 39: Turn, working in back loop only, sc across.
Row 40: Turn, working in both loops, sc across.
Row 41-56: Turn, 4 White sc, 40 Black sc, 4 White sc.
Row 57: Turn, White sc dec, 3 White sc, 38 sc, 3 White sc, White sc dec. (46)
Cut Black; weave in end.

Wild and Wacky Cup Cozy Patterns

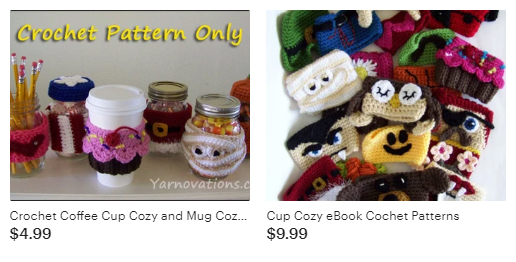
Impress your friends with a new cup cozy every week! The eBook has over 26 designs including cup cozies for major holidays. The ebook includes recipes and crafts so you can make gifts to go along with the cozies.

Go to Etsy for the Cup Cozy Patterns.

Row 58: Turn, sc dec, 42, sc dec. (44)
Row 59: Turn, sc dec, 40 sc, sc dec. (42)
Row 60: Turn, sc dec, 38, sc dec. Finish off. Cut yarn; weave in end. (40)
With right side facing, attach White to the first unused stitch left on row 8.
Row 61: 2 sc in the unused stitch, continue working around the white area, 1 sc on the end of every white row, turn and continue working on the foundation ch, sc inc in the first st, sc across, sc inc in the last st, turn and work on the ends of each row, 1 sc on the end of each row, turn, 2 sc in the 1 unused st. Continue with the Sapphire, 1 sc on the end of every Sapphire row, continue on the White using White, 1 sc on the end of every row, continue along the top, 1 sc in each st, turn, 1 sc in the end of every White row. Continue with Sapphire, 1 sc in the end of every Sapphire row. Join with a sl st.
Row 62: Working in the back loops only, sc around using the same color as each section.
Row 63-65: Working in both loops, sc around using the same color as each section. Finish off. Cut yarn; weave in ends.
Stuff and sew front and back panels together with a whip stitch.

More Fun Crochet Patterns

If you’ve been enjoying this VW Campervan crochet pattern, take a look at these other fun crochet patterns on our Etsy Shop.

REAR TURN SIGNAL INSTRUCTIONS
Terracotta
Hook: H
Ch 4
Row 1: Sc in second ch from hook, 2 sc. (3)
Row 2: Turn, 3 sc. Finish off. Cut yarn; weave in end.
Attach Cranberry to first st.
Row 3: 3 sc.
Row 4: Turn, 3 sc. Finish off. Cut yarn; weave in end.
Attach White to first st.
Row 5: 3 sc.
Row 6: Turn, 3 sc. Finish off. Cut yarn; weave in end.
Attach Silver Gray to first st.
Row 7: Sc around. Finish off. Cut yarn leaving a long tail for sewing.
Sew turn signal to back panel. See picture for placement.

FLOWER INSTRUCTIONS
Terracotta
Hook: H
Ch 2
Rnd 1: 6 sc in second ch from hook. Join with a sl st. Finish off. Cut yarn; weave in ends.
Attach White to the back loop of any stitch.
Rnd 2: Ch 6, dc in third ch from hook, hdc, sc, sl st, sl st into the same terracotta st, sl st into next back loop of next terracotta st six times. Finish off. Cut yarn leaving a long tail for sewing.
Sew to center back of van.

You’ve Made It!

You are one groovy crocheter. You have just completed your VW Campervan crochet pillow. Good job.

We enjoyed making this pattern and hope you enjoyed it as much as we did. We love encouragement, so share the love.

  • Heart this project on Ravelry
  • Pin one of the pictures above to Pinterest
  • Buy another pattern from our Etsy Shop.

Learn a New Stitch with Our Dishcloth+ Series

Learn a new stitch or two with our fun Dishcloth + Series. Each pattern includes a beautiful dishcloth + another kitchen or dining room item.

Dishcloth+ Series available on Etsy.

Sock Monkey Toys and Gifts Crochet Pattern

Sock Monkey Toys and Gifts Crochet Pattern

Sock Monkey Toys and Gifts

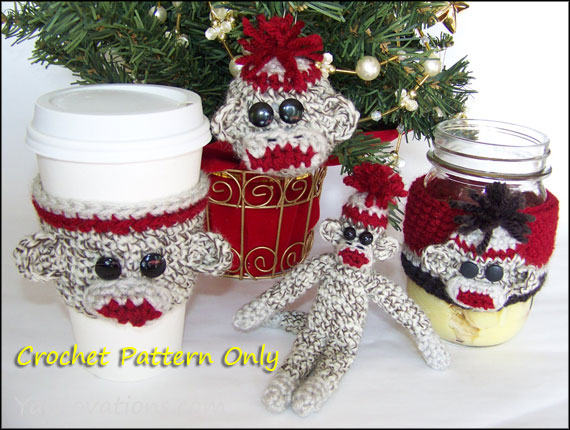
Hey all you Sock Monkey lovers out there….we’ve done it again. We’ve created some toys and cozies that you are gonna love and brought them all together in one set.

Mini Sock Monkey

This mini sock monkey is the perfect size for carrying around with you wherever you go. He can be made into a key chain, a backpack buddy or even an office accessory.

Sock Monkey Christmas Ornament

The sock monkey ornament takes on the shape of a traditional Christmas ball, but with the face of sock monkey! He loves hanging on the tree!

Sock Monkey Applique

The sock monkey applique is the perfect size for sewing to bags, scarves, hats and more. We’ve sewn it to a cozy…making it a fun gift idea!

Trio of CoziesSock Monkey Cozies

We love cozies. This pattern includes two unique designs in three sizes each. There are directions for mason jars, mugs and tapered cups/glasses! That’s six cozy patterns!

There are two delicious recipes, too! You can make monkey bread in the morning and banana pudding for dessert in the evening!

Sock Monkey Toys and Gifts – Available in the Store

The Sock Monkey Toy and Gift Set is available in the store.

Sock Monkey Toy and Gift Set also available on Etsy.

Available in the Store

That’s 9 crochet patterns and 2 recipes! See the store for more details.

Soccer Ball Bean Bag Chair and Soccer Blanket

Soccer Ball Bean Bag Chair and Soccer Blanket Crochet Pattern

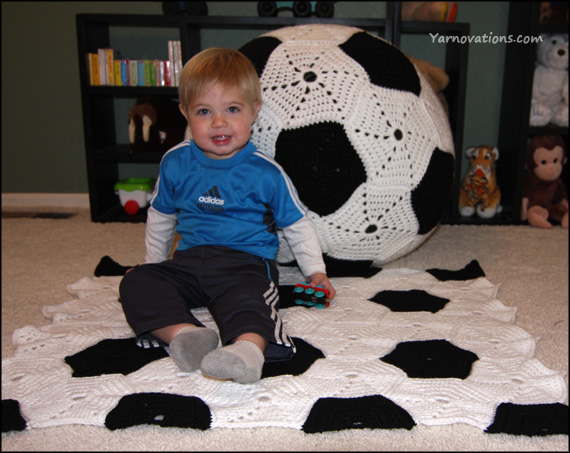
Soccer fans of all ages will get a kick out of this soccer ball bean bag chair and soccer ball blanket set.

soccer ball bean bag chair and soccer blanket

The bean bag chair is a cozy around a bean bag chair we picked up at Walmart. It’s constructed with the same number of pentagons and hexagons as a real soccer ball!

The soccer ball blanket is shown four different ways – rectangular afghan with and without a border and circular afghan with and without a border.

Skill Level: Easy

Stitches Used: Chain, Slip Stitch, Half Double Crochet

Techniques Used: Crochet in the Round

Set Pattern Includes:

  • Bean Bag Chair Instructions
  • Rectangular Blanket Instructions
  • Circular Blanket Instructions
  • Edging for Blanket (Rectangular and Circular) Instructions
  • Pentagon Shape Pattern
  • Hexagon Shape Pattern
  • Half a Hexagon Shape Pattern

Soccer Set with baby standing on it.The Soccer Ball Bean Bag Chair and Soccer Ball Blanket is available in the store.

Soccer Set shown here with a two year old who’s ready to get into the game!

Soccer Set available on Etsy.

Available in the Store

Owl Bean Bag Chair Crochet Pattern

Owl Bean Bag Chair Crochet Pattern

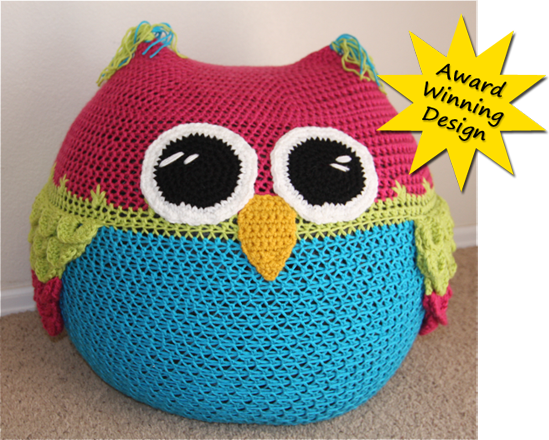
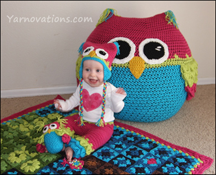
This award winning bean bag chair is now available as a downloadable crochet pattern!

owl bean bag chair crochet pattern

Kids of all ages go crazy for this chair. They love to sit on it, jump on it and fall over it.

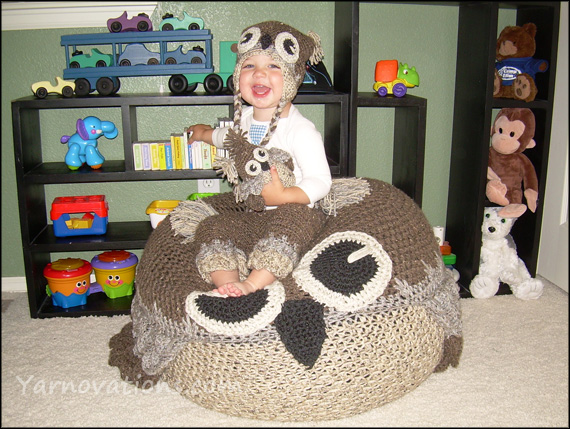
Not only does it look great in vivid colors…but it looks fun in earth tones, too! The yarn used in both photos is Vanna’s Choice. There are sooo many great color in that line of yarn…the color combinations are endless.

brown owl set modeled

The crocodile stitch wings and the spike cluster stitch transition give this design an extra feathery look and feel.

This is a bean bag cozy…meaning you crochet the owl and stuff it with a bean bag (we bought ours at Walmart).

Skill Level: Intermediate

Stitches Used: chain, slip stitch, single crochet, half double crochet, double crochet, treble crochet

Techniques Used: crocodile stitch, spike cluster stitch, working in the round and in rows, crochet in both loops and front and back loops.

The owl bean bag chair won 3rd place in the Artistic Expressions category of the 2013 Crochet Guild of America Design Contest. Now you can have your own award winning owl, too! The pattern  includes photos, written directions, supplies list, check boxes to mark your progress and more.

Owl Set AvailableThe owl designs are available as a set or as individual pieces.

Available in the Store

Onesies pictured are from Chic Couture Boutique.

Dishie Fauxchet Patterns

Dishie Fauxchet Patterns

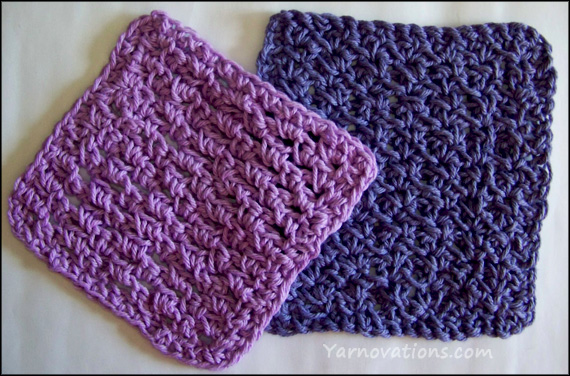
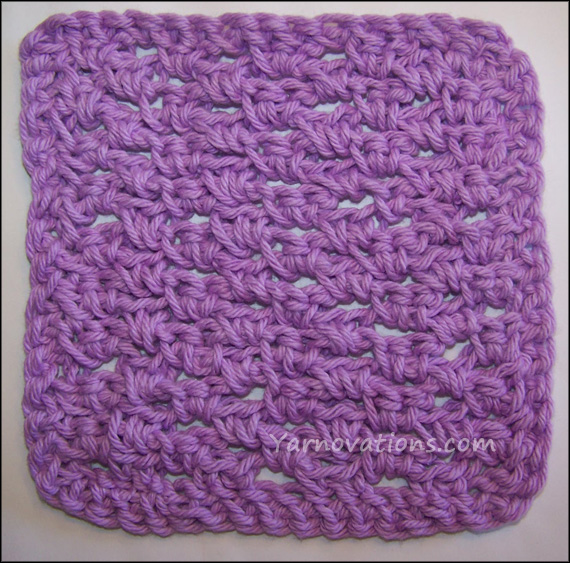
Dish clothes are great projects for learning how to Fauxchet. In fact, these were some of the first projects we made.

fauxchet dishies

As we mentioned in our product review of the easyloop fauxchet tool, any pattern that uses a chain, slip stitch or single crochet can be made with the easyloop tool. The patterns below will list the abbreviation for both crochet and fauxchet.

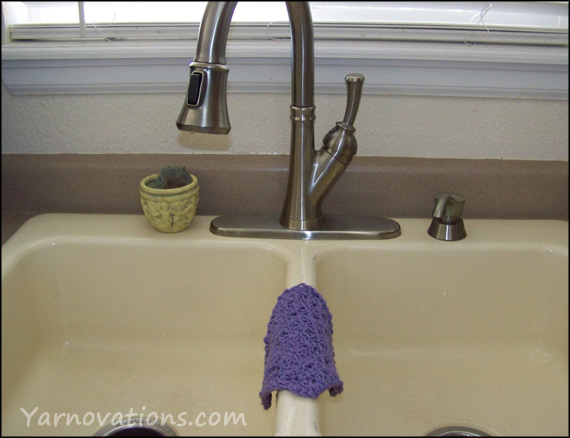
dishie on sink

The dishies in these fauxchet patterns measure approximately 6”x6”. We love the smaller size for getting into cups and such.

Skill Level: Easy

Stitches Used: Chain (ch), slip stitch (sl st), single fauxchet (sf), single crochet (sc)

Techniques Used: fauxchet/crochet in rows, fauxceht/crochet in the round


FAUXCHET PATTERN 1: V-Stitch Dishie

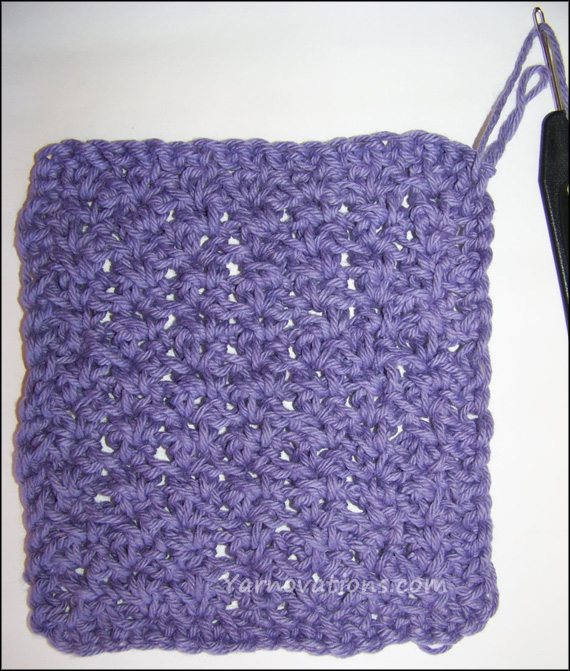
The v-stitch is widely used in crochet…and is easy to fauxchet as well.

v-stitch dishie

Materials List:

  • Easyloop fauxchet tool (or Crochet Hook: H/8/5.00mm)
  • Lily Sugar’n Cream worsted weight (4) cotton
    HOT PURPLE
  • Yarn Needle for sewing

V-Stitch Dishie Fauxchet Pattern

Ch 17

Row 1: In 3rd ch from tool work *sf(sc), ch 1, sf(sc), skip 2 ch* across.

Row 2-17: Ch 2, turn. *In ch-1 sp work sf(sc), ch 1, sf(sc), skip 2 sts* across.

Rnd 18: Sf(sc) around all four sides of dishie. Join with sl st. Weave in ends.


FAUXCHET PATTERN 2: Mini Blocks Dishie

Another popular crochet pattern is mini blocks. Again, an excellent project for learning the easyloop fauxchet tool.

mini blocks dishie

Materials List:

  • Easyloop fauxchet tool (or Crochet Hook: H/8/5.00mm)
  • Lily Sugar’n Cream worsted weight (4) cotton
    LAVENDER
  • Yarn Needle for sewing

Mini Blocks Dishie Fauxchet Pattern

Ch 23

Row 1: Sf(sc) in 6th ch from tool, sf(sc) *ch 2, skip 2 ch, 2 sf(sc)* across. End with ch 2, skip 2 ch, 1 sf(sc).

Row 2: Ch 1, turn. *2 sf(sc) on ch-2 sp, ch 2, skip 2 sts* across. End with 2 sf(sc).

Row 3: Ch 3. *Skip 2 sts, 2 sf(sc), ch 2* across. End with skip 2 sts, 1 sf(sc).

Rows 4-18: Repeat Rows 2 & 3 alternately.

Rnd 19: Sf(sc) around all four sides of dishie. Join with sl st. Weave in ends.


More Fauxchet

To learn more about the easyloop fauxchet tool, visit the fauxchet website.

PDF’s of our Free Fauxchet Patterns are available on the Free Fauxchet Patterns page.

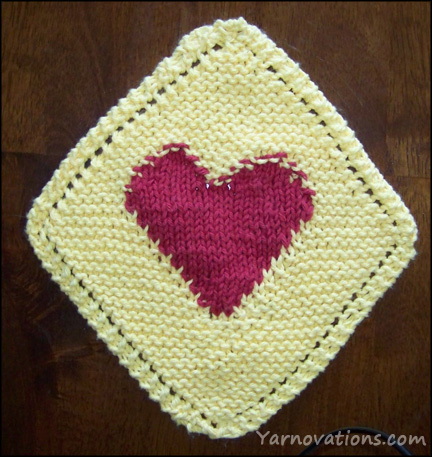
Colorful Heart in Grandma’s Favorite Dishcloth

Ever since I charted the Heart in Grandma’s Favorite Dishcloth knitting pattern, I’ve wanted to knit it in color. I love the stockinette heart in the middle of the garter stitch…but what would a change of color do?

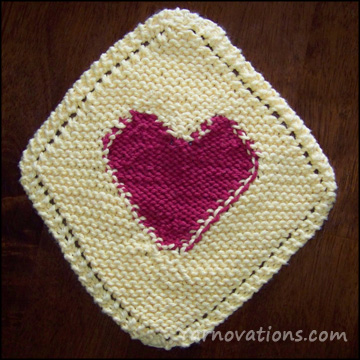
The Front of Grandma’s Favorite Dishie

Colorful Heart in Grandma's Favorite Dishcloth knitting pattern

I’m thrilled with my first ever attempt to knit with a color change.

But I had two challenge:

  1. I had to learn how to pick up a new color without leaving a hole.
  2. Since there is no “back” to this project, that meant I couldn’t carry my color. Yep, there were 5 mini balls of yarn for this project! Way too many for a first timer.

This gave me a new appreciation for any and all knitting projects that use more than one color. And an even greater appreciation for knit groups! I’m definitely going to hit one up next time I start this project!

The Back of Grandma’s Favorite Dishie

back of dishie

So…since I didn’t carry the color…what does the back look like? Here ya go…a sneak peak.

Yeah, not very pretty. But you know what? I’m still gonna use it. Or is this one of those projects only a mother could love…so I should send it to my mom???

If you’ve got some knitting advice, I’m all ears. Leave me a comment below.

Get your free Heart in Grandma’s Favorite Dishcloth knitting pattern.


Greek Salad Dressing Recipe and Crochet Ladybug

Greek Salad Dressing Recipe and Crochet Ladybug Jar Cozy

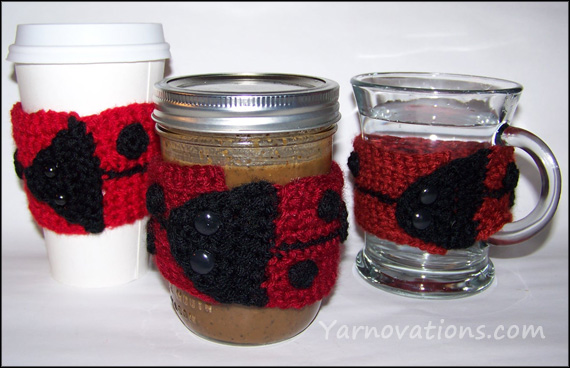
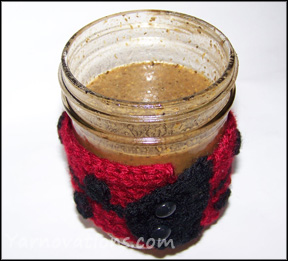
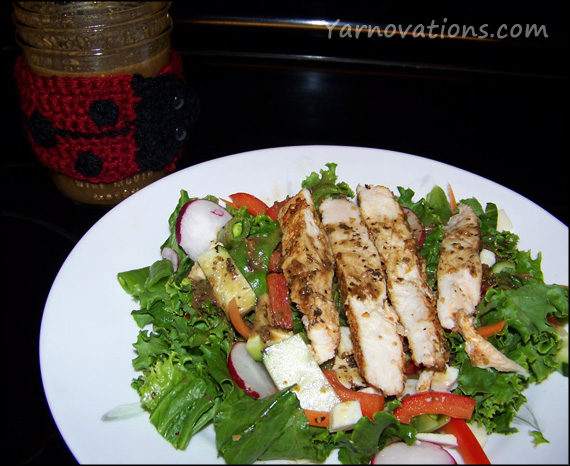
We’ve prepared a simple Greek salad dressing that is stored in a mason jar and wrapped it with a crochet ladybug cozy!

crochet ladybug cozy

This is a fun and delicious treat for summer and a cute way to spruce up salad dressings at your next summer BBQ or potluck.

Let’s start with the recipe because the seasonings need time to blend.

Greek Salad Dressing Recipe

greek salad dressing recipeGreek salad dressing is super easy to make. This recipe does not need to be refrigerated since it’s an oil and vinegar based dressing.
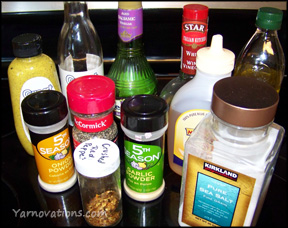
Below you’ll see that we used several different types of vinegar. You can use whatever you have on hand (like a white vinegar or red wine vinegar). Also, this recipe has a ratio of 50% oil to 50% vinegar. If you want to tone down the vinegar flavor, use a little less of it or add a little extra sugar.

Greek Salad Dressing Ingredients:

Step One

  • 1/4 cup red wine vinegar
  • 1/4 cup white wine vine vinegar
  • 1/4 cup balsamic vinegar
  • 2 teaspoons garlic powder
  • 1 1/2 teaspoons coarse black pepper
  • 1 1/2 teaspoons salt
  • 1 1/2 teaspoons onion powder
  • 1 1/2 teaspoons dijon Mustard
  • 1 small clove fresh garlic
  • 2 teaspoon agave nectar (or 1 t sugar)
  • pinch of crushed red pepper

dressing ingredientsStep Two

3/4 cup virgin olive oil

Step Three

  • 2 teaspoons oregano
  • 2 teaspoons basil

 Directions:

  1. Place all ingredients from Step One into blender. Blend on medium speed until well blended.
  2. With blender still on medium, slowly add oil. This will emulsify the oil and vinegar and keep them from separating.
  3. Stop blender. Add herbs from Step Three. Pulse until just blended.
  4. Store in mason jar. Do not refrigerate. Best if allowed to marinate several hours (or overnight) before using.

Alternative:

Use fat free mayo instead of olive oil to create a creamy Greek salad dressing. Keep refrigerated.

This Greek salad dressing can be used in a number of delicious ways including on a green salad, on a chicken salad, on a pasta salad, as a dipping sauce in a veggie tray or as a marinade. Yum!

This recipe was inspired by: http://allrecipes.com/Recipe/Absolutely-Fabulous-GreekHouse-Dressing/Detail.aspx?evt19=1

Crochet Lady Bug Cozy

Making a crochet ladybug cozy is a fun summer project. Ladybugs are a gardeners best friend and therefore make the prefect adornment for a jar of salad dressing.

chicken-salad

We’ve used Vanna’s Choice yarn…and only a remnant is needed. Black and any shade of red or orange will work well for this project.

Crochet Ladybug Supplies:

  • Vanna’s Choice Yarn (Medium Worsted Weight (4))
    CRANBERRY, BLACK
    (Mug: Brick, Black)
    (Cup: Scarlet, Black)
  • Hook: H/8/5.00 mm
  • Hook: F/5/3.75 mm
  • 2 Buttons – 1/4” or 3/8”
  • Needle & Thread
  • Yarn Needle

greek salad dressing recipeLadybug Cozy Instructions:

Cranberry

Hook: H

Ch 35

Row 1: Sc in 2nd ch from hook. Sc across. (34)

Row 2-5: Ch 1, turn. Sc across. (34)

Finish off Cranberry and weave in ends. Attach Black.

Row 6: Ch 1, turn. Sl st across. (34)

Finish off Black and weave in ends. Attach Cranberry.

Row 7: Ch 1, turn. Working in the back loop only, sc across. (34)

Row 8-11: Ch 1, turn. Sc across. (34)

Finish off and weave in ends.

Turn to work on the ends of the Rows. Attach Black to the first Row.

Row 12: Work 10 sc evenly across the ends of the Rows 1-11. (10)

Row 13: Ch 1, turn. Hdc dec, 6 hdc, hdc dec. (8)

Row 14: Ch 1, turn. Hdc dec, 4 hdc, hdc dec. (6)

Row 15: Ch 1, turn. Hdc dec, 2 hdc, hdc dec. (4)

Row 16: Ch 1, turn. 2 sc dec. (2)

Finish off and weave in ends.

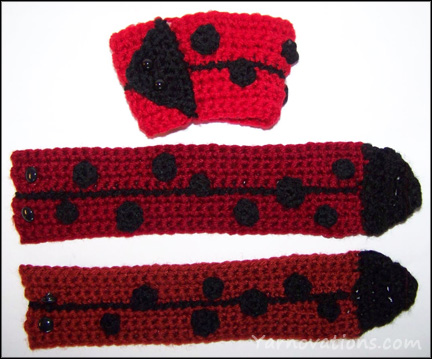
crochet ladybugs

Spots (make 9)

Black

Hook: F

Ch 2

Rnd 1: Work 4, 6 or 8 sc in second ch from hook and join with a sl st for small, medium, and large spots.

Finish off leaving a tail for sewing.

Assembly Instructions

  1. Sew Spots to Red portion (sew randomly as desired or symmetrically…most ladybugs Spots mirror each other on each Wing).
  2. Sew two small black buttons about 1/2″ from the top and sides of the end of the red section.
  3. Wrap cozy around container, and slip buttons through posts of the half double crochets in the black section.

More Cozies in Store

coffee cup cozy patterns ebookLove this ladybug cozy? There are more seasonal, holiday and just for fun cozies in the store in our Crochet Cup Cozy eBook. We’ve created an entire collection with 28 designs one ebook.

Looking for the cup and mug version? They’re in the ebook.

Each design in the ebook has instructions to fit Mugs, Cups and Mason Jars. Every design has a delicious recipe or fun craft.

All 3 ladybugs pictured at the beginning of this post are in this ebook! AND the ebook includes 4 new designs – Dracula, Vampire, Mummy and Blue Jeans.

Available in the StoreRead more about the set:

Blog: Coffee Cup Cozy Collection

Store: Coffee Cup Cozy Collection

Apple Dumpling Recipe with 4th of July Crochet American Flag Cozy

Apple Dumpling Recipe with 4th of July Crochet American Flag Cozy

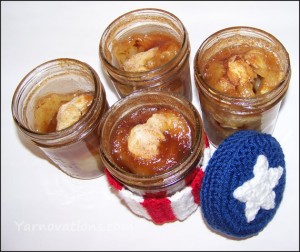
apple dumplings recipe

This super sweet, super easy, Apple Dumpling Recipe is another one of our family favorite desserts (most often requested by my brother)! Dress it up in this crochet American Flag cozy and you’ve got a fun 4th of July dessert and decorating idea (perfect for any American holiday, really)!

Let’s start with the Apple Dumplings. While they bake and cool, you can whip up the mason jar cozies.

Apple Dumpling Recipe / Pie in a Jar

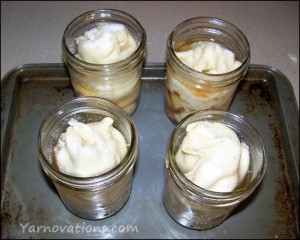
pie in a jarI modified an Apple Dumpling Recipe to be a Pie in a Jar…and IMHO it was the best Apple Dumplings dessert my family has ever had (my parents agree)! My husband loved it so much…he requested I make it again with other fruits like peaches!
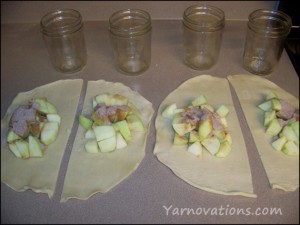
Serves 4 (makes 4 extra large desserts).

Pie Ingredients:

  • 4 wide mouth pint size mason jars
  • 2 ready-made pie crusts
  • 3 Granny Smith Apples
  • 4 Tablespoons sugar
  • 4  1/2 teaspoons cinnamon
  • 1/2  teaspoon nutmeg

Syrup:

  • 1 cup sugar
  • 1  1/2 cups water
  • 1/4  teaspoon cinnamon
  • 1/8  teaspoon nutmeg

Topping:

  • 2 teaspoons sugar

apples and cinnamon sugarDirections:

  1. Preheat oven to 375°.
  2. Mix all Syrup ingredients together in a pot and bring to a boil. Remove from heat and set aside.
  3. Unroll two pie crusts and cut each in half. You now have dough for 4 dumplings.
  4. Peel, core and dice apples (approximately ½” cubes).
  5. Divide apples evenly and place in center of dough.
  6. Mix remaining Pie ingredients (4 T sugar, 4 ½ t cinnamon, ½ t nutmeg) together in a bowl. Sprinkle 1 Tablespoon of mixture on each dumpling over top the apples.
  7. Dab your finger in water and moisten the edges of the dough. Wrap the dough around the apples creating a cocoon around the apples pressing edges together (if dough breaks or tears, don’t worry. A few holes in the dough is fine).
  8. apple dumplings ready for the ovenSpray the bottom of each jar with cooking spray. Place one dumpling in each jar.
  9. Pour ½ cup of Syrup in each jar making sure the syrup reaches the bottom of the jar (use a knife to press the dumpling away from the side of the jar if needed).
  10. Sprinkle ½ teaspoon sugar on top of each dumpling.
  11. Place jars on cookie sheet and bake in oven for 1 hour.
  12. Allow to cool. Serve warm.

Recipe inspired by: http://relish.com/recipes/old-fashioned-apple-dumplings/

Alternatives:

  • If you’d like to add a bit more color to this dessert, try adding a little red food coloring to the syrup.
  • Want it a little more “spicy”? Add some Red Hots candies to the apples.
  • This recipe makes 4 extra large servings. For a smaller dessert, cut each pie crust into either 3 or 4 pieces to create 6 or 8 desserts. Divide all ingredients evenly among each dumpling.

Crochet American Flag Cozy

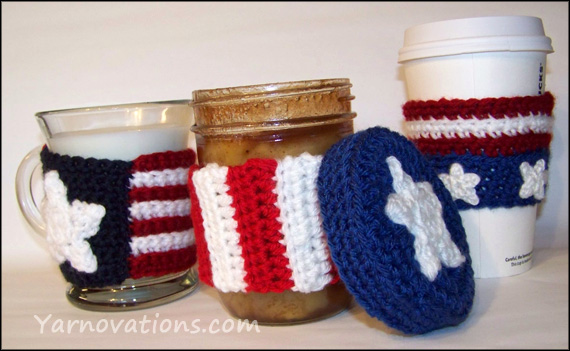
crochet american flagIt’s the stars and stripes that make this look like a crochet American Flag. While it is possible to crochet an exact replica of the American Flag (50 stars and 13 stripes), we also think it’s fun to get a little artistic and a bit fanciful with this cozy project. Have fun with it.
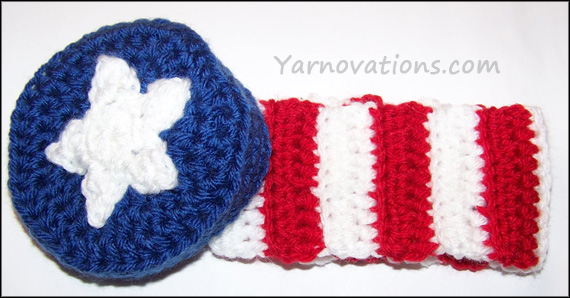
We used Vanna’s Choice for this project. This is a great way to use up remnants from your stash. We showcase this in two different reds and two different blues to illustrate that most any red and blue will work.

Skill Level: Easy

Stitches Used: Chain, Slip Stitch, Single Crochet, Half Double Crochet

Techniques Used: Crochet in the Round, Crochet in Rows, Crochet in Back Loop, Crochet in Both Loops, Crochet Increase (work two stitches in next st)

SUPPLIES:

  • Vanna’s Choice:Worsted Weight (4)
    Jar Cozy: SCARLET, WHITE, COLONIAL BLUE
    (Mug: CRANBERRY, WHITE, NAVY)
    (Cup: CRANBERRY, WHITE, COLONIAL BLUE)
  • Crochet Hook: H/8/5.00 mm
  • Yarn Needle for sewing

AMERICAN FLAG JAR COZY INSTRUCTIONS

Scarlet

Hook: H

Ch 12

Row 1: Hdc in 3rd ch from hook. Hdc across. (10)

Finish off and weave in ends.

Attach White

Row 2: Ch 2, turn. In back loops only, hdc across. (10)

Row 3: Ch 2, turn. In both loops only, hdc across. (10)

Finish off and weave in ends.

Attach Red

Row 4: Ch 2, turn. In back loops only, hdc across. (10)

Row 5: Ch 2, turn. In both loops only, hdc across. (10)

Finish off and weave in ends.

Row 6-23 Repeat Rows 2-5 until you have 23 Rows. End with White.

Attach Red

Row 24: Ch 2, turn. Hdc in back loops only across. (10)

Finish off leaving a long tail for sewing.

Join Row 24 to foundation ch with whip st across.

flag cozy parts

WIDE MOUTH LID COVER INSTRUCTIONS

Colonial Blue

Hook: H

Ch 3

Rnd 1: 8 hdc in 3rd ch from hook. Join with a sl st. (8)

Rnd 2: Ch 1, hdc inc around. (16)

Rnd 3: *hdc, hdc inc* around. (24)

Rnd 4: *2 hdc, hdc inc*around. (32)

Rnd 5: *3 hdc, hdc inc* 7 times. 2 sc, sc inc, sl st. (40)

Rnd 6: Work in back loops only, sc around. (40)

Rnd 7-8: Work in both loops, sc around. (40)

2 Sl st. Finish off, weave in end.

STAR INSTRUCTIONS

White

Hook: H

Ch 2

Rnd 1: 10 hdc in 2nd ch from hook. Join with a sl st. (10)

Rnd 2: In back loops only, sl st into next st. (work next group in the same st as sl st you just worked) * work: ch 2, dc, ch 1, sl st into top of dc, ch 2, sl st. 2 sl sts into next sts of Rnd 1* around.

Finish off leaving a long tail for sewing.

Pin then sew Star to top of Lid.

More Cozies in Store

coffee cup cozy patterns ebookLove this flag cozy? There are more seasonal, holiday and just for fun cozies in the store in our Crochet Cup Cozy eBook. We’ve created an entire collection with 28 designs one ebook.

Looking for the cup and mug version? They’re in the ebook.

Each design in the ebook has instructions to fit Mugs, Cups and Mason Jars. Every design has a delicious recipe or fun craft.

All 3 flags pictured at the beginning of this post are in this ebook! AND the ebook includes 4 new designs – Dracula, Vampire, Mummy and Blue Jeans.

Available in the StoreRead more about the set:

Blog: Coffee Cup Cozy Collection

Store: Coffee Cup Cozy Collection