3″ Pillow Christmas Ornaments

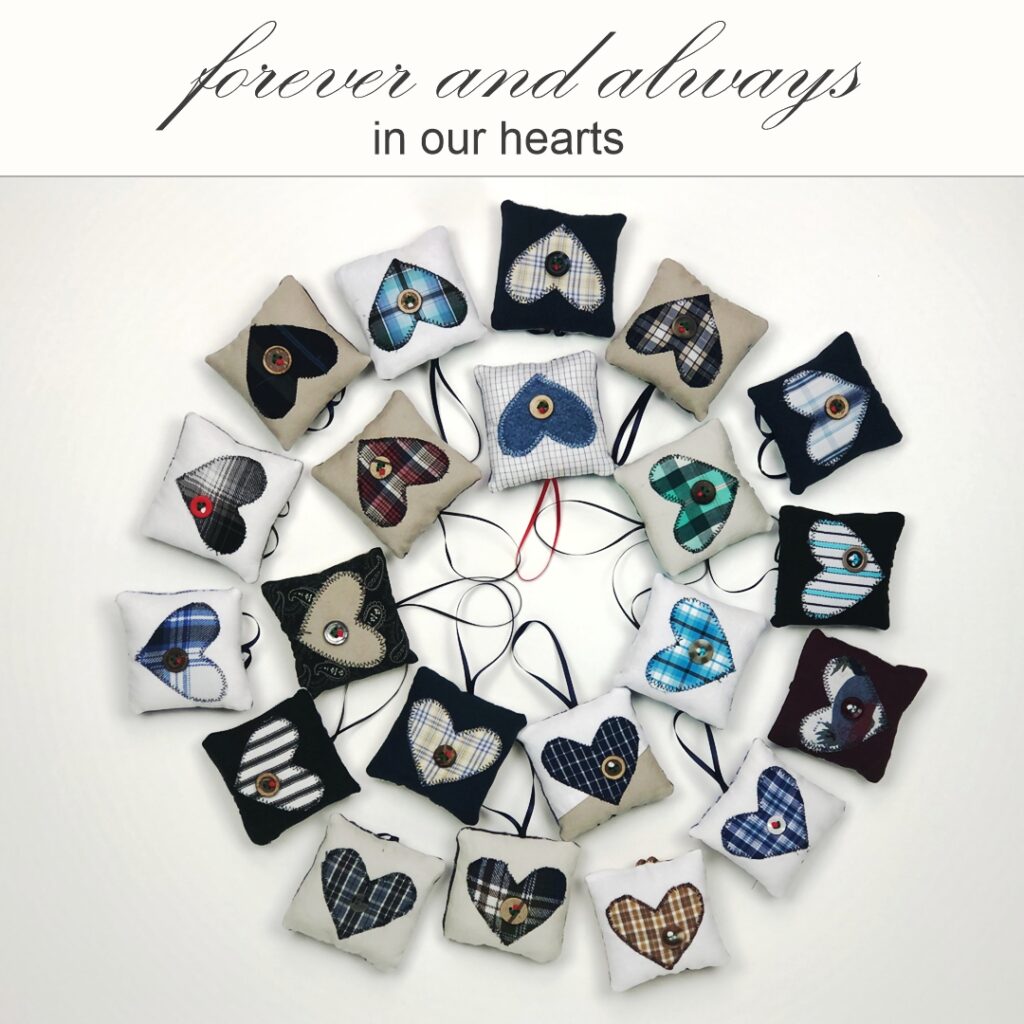
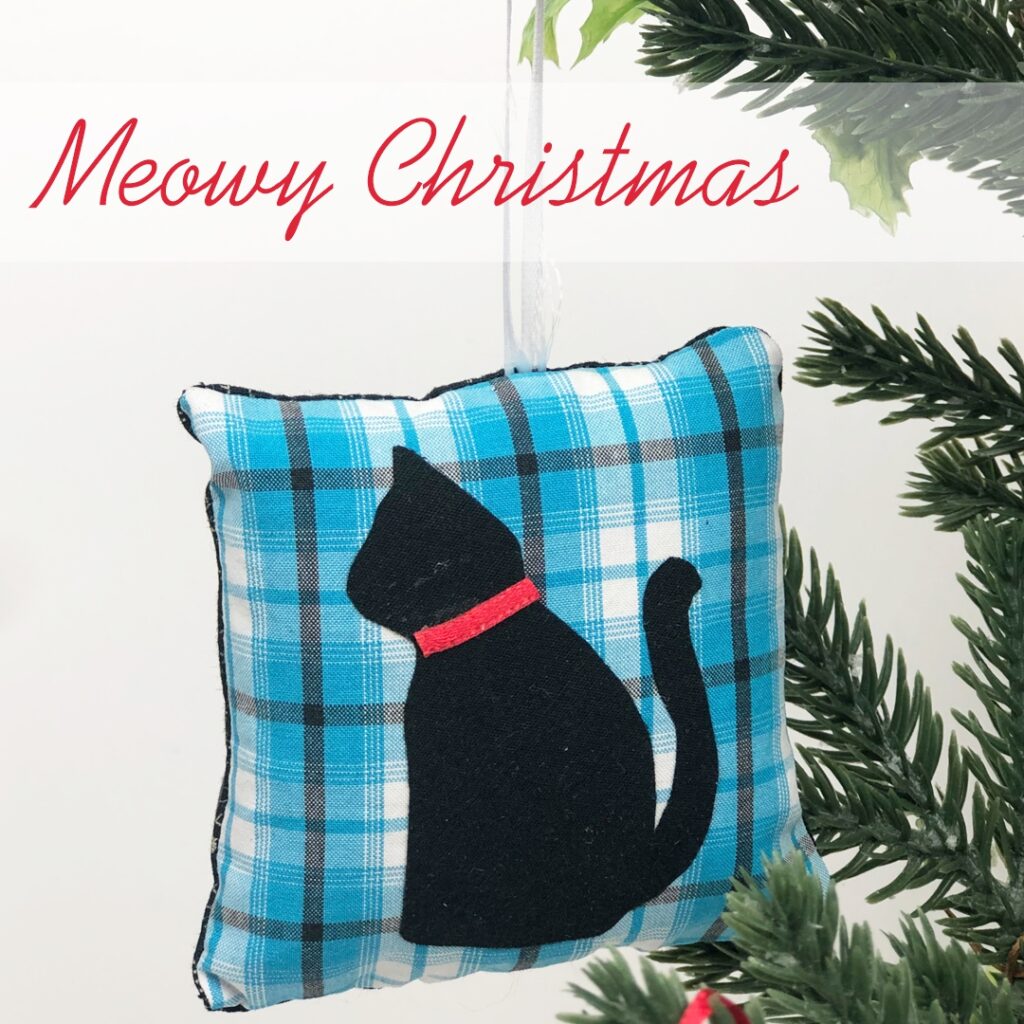
Sew a personalized Christmas Ornament for your family, friends and coworkers. We have created a 3″ Pillow Ornament that can be customized with 1 of 24 fun icons. The sewing pattern has a tracing template that celebrate many hobbies and special occasions.

This is a quick and easy pattern to stitch. The pattern includes step by step written instructions and lots of photos. No measuring required because the tracing template includes the 3″ pillow.

3″ Pillow Christmas Ornament Sewing Pattern

The pattern includes instructions and tracing templates to make a 3″ pillow ornament with a classic icon. Here’s what you’ll find in the pattern:

  • 24 Icons to Trace
  • Step by Step Written Instructions
  • Tracing Template for Pillow and Icons
  • Lots of Photos
  • Complete materials list
  • 14 Pages

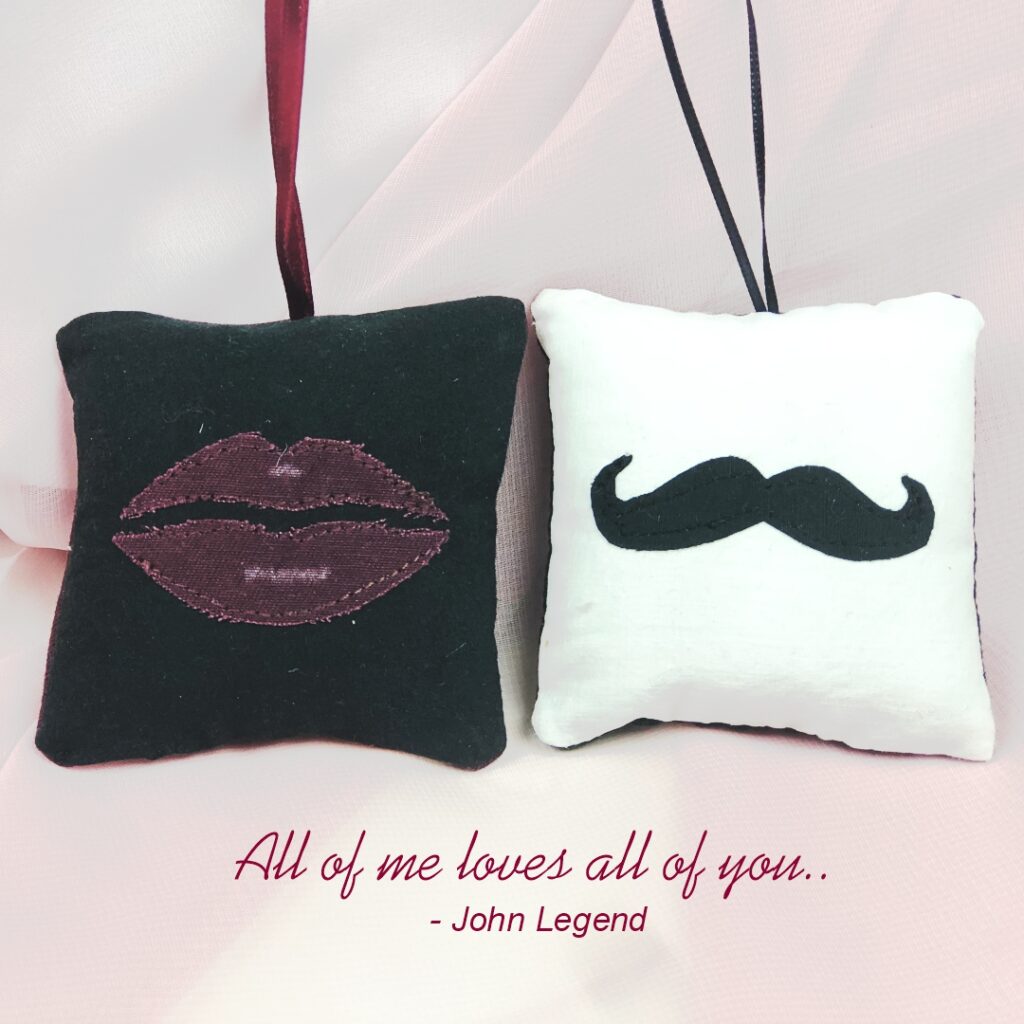
Looking for a fun gift for couples? The lips and mustache are fun for dating couples, newly engaged, just married, bride and groom, his and hers. These would be fun gifts to sew and gift at a bridal shower, wedding gift or to make as a 1st Christmas married gift. Make 2 separate pillow ornaments or sew lips on one side and mustache on the other.

What Others Say About Our Sewing Patterns

We work diligently to make fun and easy sewing patterns for you to follow. Here’s what others have to say about our sewing patterns:

  • “Lovely pattern and makes for a great gift for friends…” -Korina
  • “Great instructions, instant download thanks for a great transaction!” -Laura
  • “Loved this pattern. It worked out great…” -Sabrina

3″ Pillow Christmas Ornament Available on Etsy

The 3″ Pillow Christmas Ornament Sewing Pattern is available in our Etsy Shop.

Available now on Etsy.

Buy the pattern on etsy

What Icons Are Included?

The 24 icons in the pattern were selected because they can be used to make pillows to celebrate many special occasions and hobbies. Meaning you can make a Christmas Ornament for everyone you know. The icons include:

Wedding, Bridal Shower, Quinceañera, Sweet 16, Prom

  • Lips
  • Mustache
  • Dress

School, Students and Teachers

  • Graduation Cap
  • Star
  • Shooting Star
  • Apple

Animal Lovers, Baby Shower, New Baby, Baby’s 1st Christmas

  • Dog
  • Cat
  • Dinosaur
  • Duckie
  • Unicorn
  • Snake
  • Pig

Other Hobbies

  • Flower
  • Ocean Wave
  • Coffee
  • Crown
  • Text Boxes

Special Occasions, Christmas, Birthday, Valentine’s Day

  • Heart
  • Pine Tree
  • Balloons

Share the Love, Pin an Image to Pinterest

Share the love by pinning one or more of these images to pinterest.

We so appreciate it. Thank you.

Upcycle Clothing to Make 3″ Pillow Christmas Ornaments

This is a great project for upcycling clothing or using up scraps you have. Trying making an ornament from clothing. All the Pillow Ornaments pictured in this blog are made from clothing. This is a great way to use clothes that your kids have outgrown, or clothing that’s been stained and no longer wearable. This is also a fun project for using wild and crazy fabrics. Take a trip to the 2nd hand store and look for bright and colorful clothing with small patterns.

The materials list for a 3″ Pillow Christmas Ornament. Here’s what you’ll need:

  • Fabric:          Front – 3 ½” x 3 ½” remnant
  •                      Back – 3 ½” x 3 ½” remnant
  •                      Icon – 2 ½” x 2 ½” remnant
  • Needle and Thread: To match fabric
  • Ribbon: 1/8” (3 mm) x 9” per ornament
  • Button: ½” or desired size (optional)
  • Straight Pins
  • Stuffing and Chopstick
  • Embroidery Thread (If attaching the button with the rose design)
  • Scissors
  • Pencil or Washable Marker
  • White colored pencil for drawing accents (optional)
  • Fabric and/or glue gun (optional)

Pillow Christmas Ornament Sewing Pattern

Buy your 3″ Pillow Christmas Ornament Sewing Pattern with 24 Icon Templates on Etsy.

Available now on Etsy.

Buy the pattern on etsy

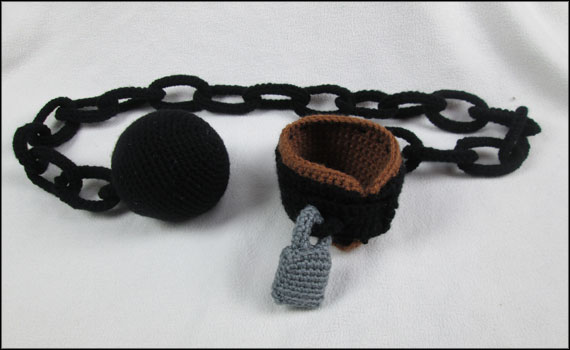
Ball and Chain Crochet Pattern

Ball and Chain Crochet Pattern

Ball and Chain Crochet Pattern

Do your burdens feel like the old ball and chain?

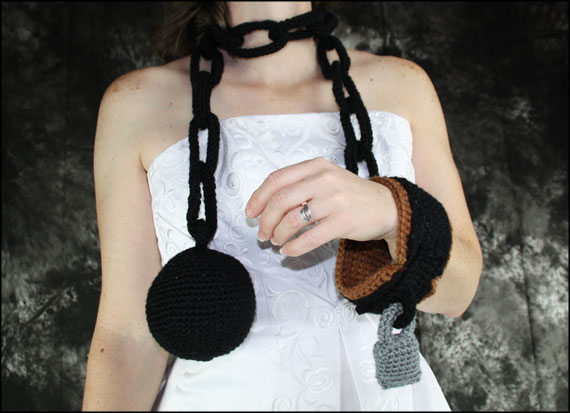
We couldn’t resist having a little fun with the many references to the ball and chain. This is a funny gift to give at a bridal shower (yes, we have done that). It’s also a fun prop for use in plays like “A Christmas Carol” for the ghost of Christmas past.

Ball and Chain Wedding

Whatever your burden, this ball and chain was designed with comfort in mind. It has a faux leather lined cuff for when your burden seems extra heavy to carry.

Pictured above, the scarf is 5′ long. Add more or less links to change the length.

Ball and Chain pattern available on Etsy.

Available in the Store

This Ball and Chain crochet pattern is available in the store.

Tuxedo Chocolate Covered Almonds Recipe & Crochet Jar Cozy

Tuxedo Chocolate Covered Almonds Recipe & Crochet Jar Cozy

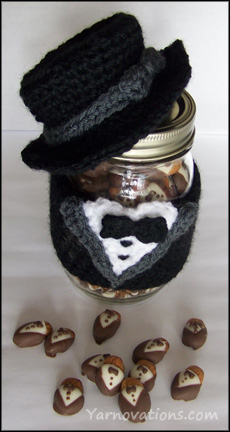
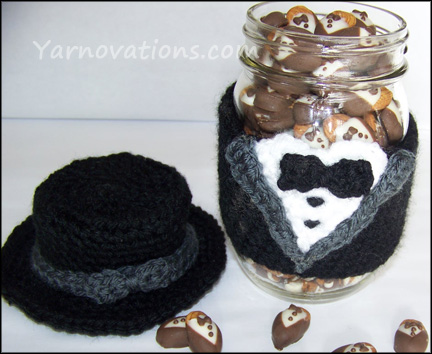
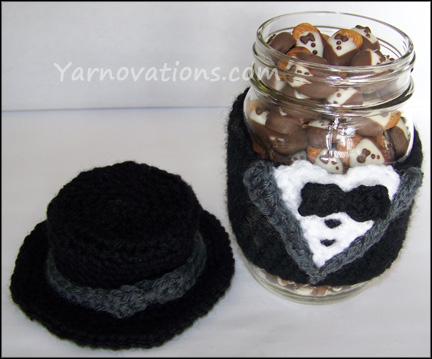
Tuxedo Chocolate Covered Almonds Recipe and Recipe CozyWe’ve cooked up this Tuxedo Chocolate Covered Almonds recipe with coordinating Tuxedo Jar Cozy…’cause it’s party time!
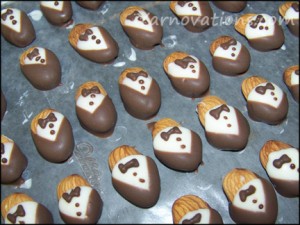
And we have a video! (below the recipe)

It’s a little nutty, but we love these tuxedo almonds. They’ll definitely dress up your special occasions. They’re perfect for New Year’s Eve parties, Weddings, Anniversaries or any event where you want to impress your guests.

Let’s start by covering the almonds with chocolate…so they can cool while you crochet.

Tuxedo Chocolate Covered Almonds Recipe

INGREDIENTS:

  • 16 oz Whole Natural Almonds (unsalted)
  • 12 oz Almond Bark – Chocolate
  • 12 oz Almond Bark – Vanilla

DIRECTIONS:

Line a cookie sheet with parchment paper.

1st Step – Vanilla Shirts

Melt 4 oz of Vanilla Almond Bark in microwave (stirring every 30 seconds). Holding an almond at the widest end, dip into Vanilla Almond Bark. Scrape excess off back. Lay on parchment paper to cool and harden. Make as many as desired.

2nd Step – Chocolate Jackets

Almonds Dressed UpMelt 4 oz of Chocolate Almond Bark in microwave (stirring every 30 seconds). Holding the Vanilla coated almond at the widest end, dip the side edge of the almond into the Chocolate Almond Bark, turn and dip the other side edge. Scrape excess off back. Lay on parchment paper to cool and harden.

3rd Step – Bow Ties and Buttons

Melt 4 oz of Chocolate Almond Bark in microwave (stirring every 30 seconds). Pour Chocolate Almond Bark into a sandwich bag (to act as a cake decorating icing bag). Twist bag to lock chocolate into corner. With scissors, cut off a tiny bit of the corner (as small as you can). Squeeze bag and practice making bow ties and buttons on a scrap of parchment paper. When you are happy with the look, create bow ties and buttons on the almonds.

Cool for a couple of hours (in refrigerator if needed).

tuxedo almonds step by step photo

Creating Bow Ties

How to Make a Bow TieLightly squeeze bag as you create bow tie following the arrows. Stop squeezing at the bottom of the right most arrow. As you pull up and away from the almond, move the bag toward the start of the bow tie (top left).
Creating Buttons

Do no squeeze bag. Simply tap bag to surface of almond and pull straight up. This should leave a dab of Chocolate.

Video: Tuxedo Chocolate Covered Almonds
Click the image below to watch

If you’re having trouble seeing it here, check out Tuxedo Chocolate Covered Almonds on YouTube. The crochet pattern for the snazzy tuxedo jar cozy is below.

The Tuxedo Chocolate Covered Almonds Jar Cozy

Now you need a tuxedo jar cozy for the chocolate covered almonds. These are fun to crochet and will jazz up any party or gift. Crochet a top hat for an extra touch of class!

The cozy and hat are crocheted in the round. The shirt details are crocheted separately and sewn on…as is the hat ribbon.

This is a great stash buster. We are using Vanna’s Choice yarn because we think the Charcoal Grey looks snazzy next to the Black and White.

SUPPLIES:

  • 1 Pint size canning jar
  • Vanna’s Choice: Medium Worsted Weight (4)
  • BLACK, WHITE, CHARCOAL GREY
  • Crochet Hook: H, F
  • Yarn Needle

TUXEDO COZY INSTRUCTIONS:

Tuxedo Crochet Jar Cozy

Black

Hook: H

Ch 34, join with a sl st.

Rnd 1-12: Sc around. (34)

Join with a sl st. Finish off and weave in end.

WHITE SHIRT INSTRUCTIONS:

White

Hook: H

Ch 2

Row 1: Sc in second ch from hook. (1)

Row 2: Ch 1, turn. Sc inc. (2)

Row 3: Turn. Sc inc twice. (4)

Row 4: Turn. Sc inc, 2 sc, sc inc. (6)

Row 5: Turn. Sc across. (6)

Row 6: Turn. Sc inc, 4 sc, sc inc. (8)

Row 7: Turn. 3 sc, 2 sl st, 3 sc. (8)

Row 8: Turn. Sc inc, 2 sc, 2 sl st, 2 sc, sc inc. Finish off leaving a long tail for sewing. (10)

Sew white shirt to the front of the cozy with row 8 sticking out above the top of the cozy.

TUX LAPEL INSTRUCTIONS:

Charcoal Grey

Hook: F

LEFT LAPEL

Ch 13

Row 1: Dc in fourth ch from hook, dc inc, 3 hdc, 3 sc, 2 sl st, ch 1. (11)

Finish off leaving tail for sewing.

Pin then sew over the left edge of the white Shirt and on the cozy.

RIGHT LAPEL

Ch 13

Row 1: Dc in fourth ch from hook, dc inc, 3 hdc, 3 sc, 2 sl st, ch 3. (14)

Finish off leaving tail for sewing.

Pin then sew right lapel over the right edge of the white shirt with the last 3 ch stitches sewn vertically to represent the jacket opening.

TIE & BUTTONS INSTRUCTIONS:

Black

Hook: H

Ch 6

Row 1: Sc in second ch from hook, 4 sc. (5)

Row 2: Turn. Sc across. Finish off. Cut yarn leaving a long tail for sewing. (5)

Using tail, wrap yarn around the middle of the tie and pull tight. Secure with a knot. Sew tie to white shirt below the sl sts on row 7. Weave in ends.

Whip stitch two buttons below bow tie with black yarn. Weave in ends.

TOP HAT INSTRUCTIONS:

Tuxedo and Hat Crochet PatternBlack

Hook: H

Ch 2

Rnd 1: 8 sc in second ch from hook. (8)

Rnd 2: Sc inc around. (16)

Rnd 3: *1 sc, sc inc* around. (24)

Rnd 4: *2 sc, sc inc* around. (32)

Rnd 5: *3 sc, sc inc* around. (40)

Rnd 6: Work in back loops only. *3 sc, sc dec* around. (32)

Rnd 7-12: Work in both loops. Sc around. Add more rounds for a taller top hat. (32)

Rnd 13: Work in front loops only. *3 sc, sc inc* around. (40)

Rnd 14: Work in both loops. *4 sc, sc inc* around. (48)

Rnd 15: *5 sc, sc inc* around. (56)

Rnd 16: *Sc inc, sc, sc inc, 3 sc* 3 times, 7 sc. Repeat from beginning. (62)

Add more rounds for a larger bill.

Finish off and weave in end.

TOP HAT RIBBON INSTRUCTIONS:

Charcoal Grey

Hook: H

Ch 34

Rnd 1: Join with a sc. Sc around. (34)

Join with a sl st. Finish off and weave in ends.

TOP HAT BOW INSTRUCTIONS:

Charcoal Grey

Hook: H

Ch 6

Row 1: Sc in second ch from hook, 4 sc. (5)

Row 2: Turn. Sc across. (5)

Finish off leaving a long tail for sewing.

Using tail, wrap yarn around the middle of the tie and pull tight. Secure with a knot.

Sew tie to Top Hat Ribbon.

Slide Ribbon on Top Hat. Secure if needed.

More Cozies in Store

coffee cup cozy patterns ebookLove this tuxedo cozy? There are more seasonal, holiday and just for fun cozies in the store in our Crochet Cup Cozy eBook. We’ve created an entire collection with 28 designs one ebook.

Looking for the cup and mug version? They’re in the ebook.

Each design in the ebook has instructions to fit Mugs, Cups and Mason Jars. Every design has a delicious recipe or fun craft.

The ebook includes 4 new designs – Dracula, Vampire, Mummy and Blue Jeans.

Available in the StoreRead more about the set:

Blog: Coffee Cup Cozy Collection

Store: Coffee Cup Cozy Collection