Granny Square Turkey Joins the Flock

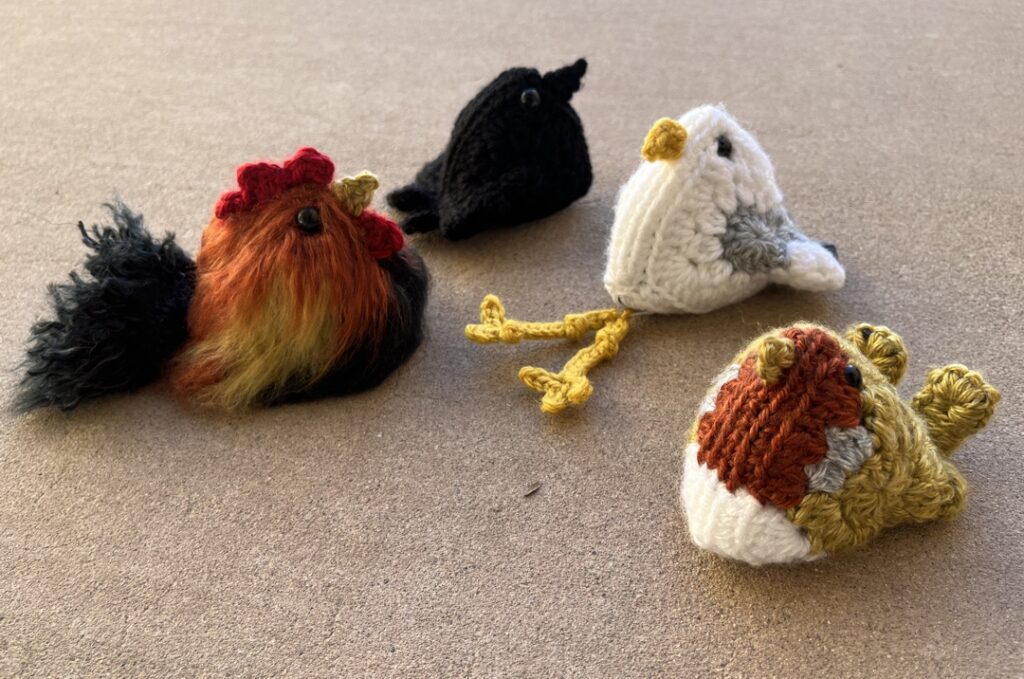
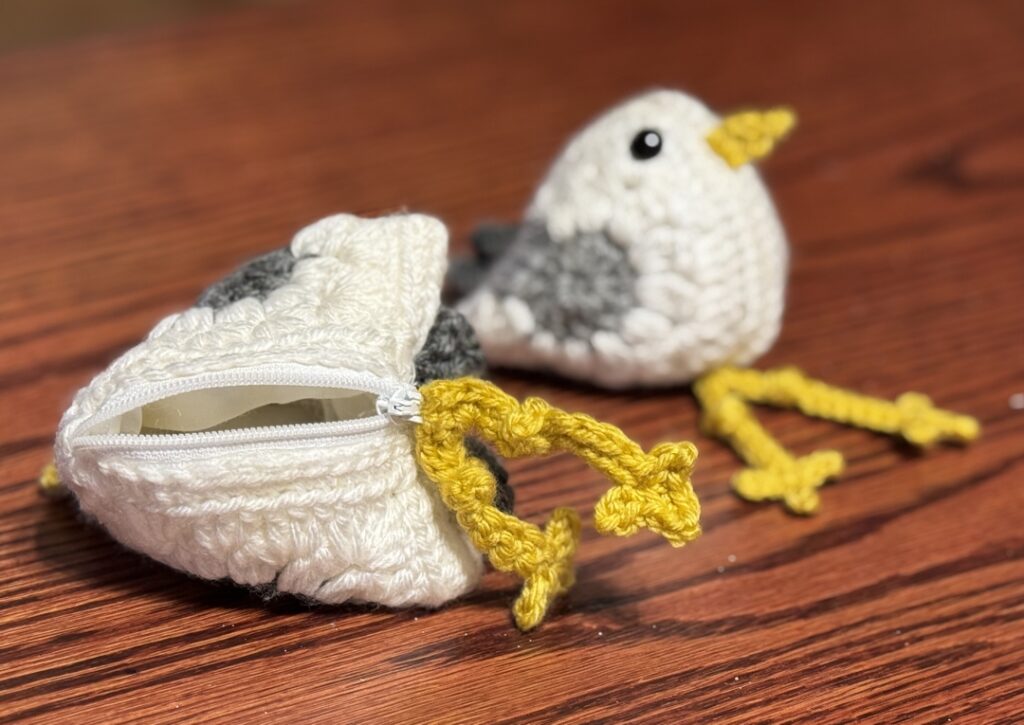
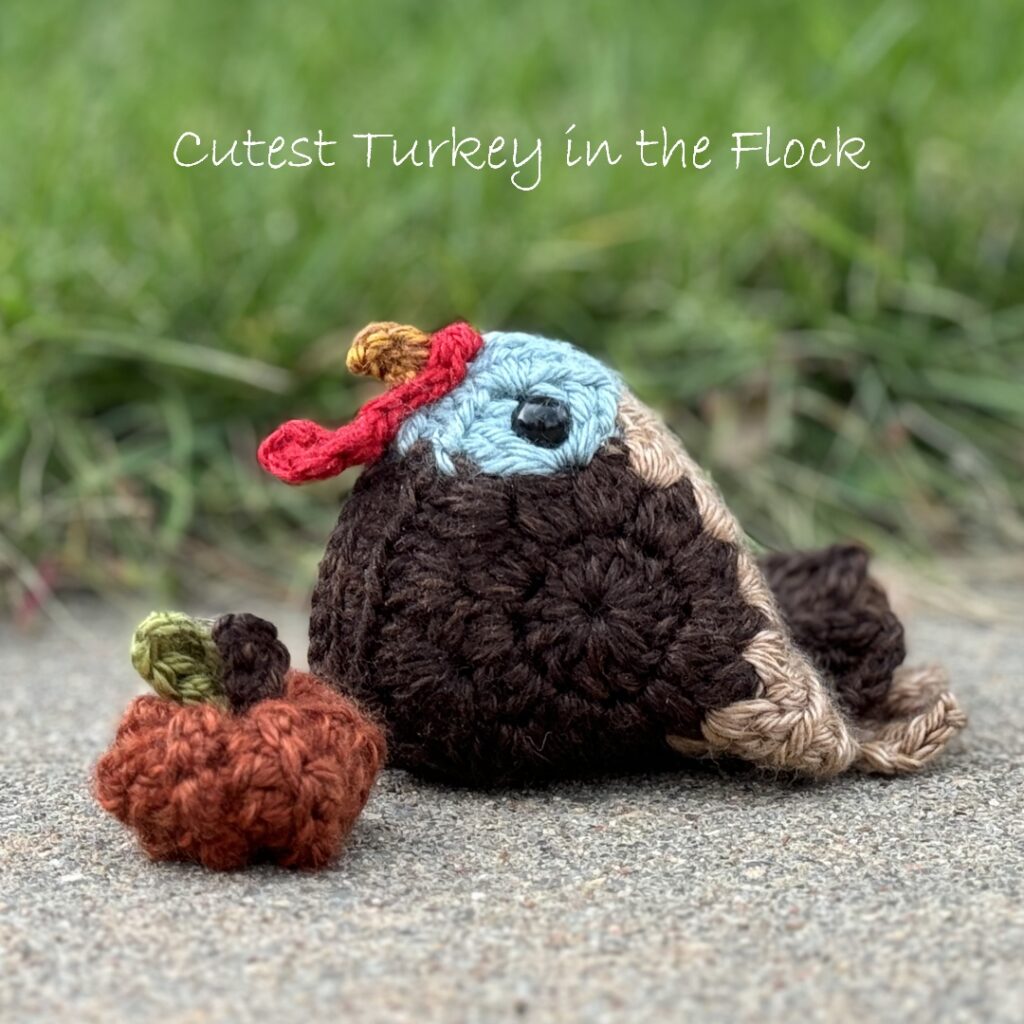
Birds of a Feather is wildly popular…and now the granny square chicken pattern includes a variation for the Turkey. Gobble, Gobble! Not only does the pattern include the crochet turkey, but a mini crochet pumpkin to go with it.

The crochet turkey stuffed animal has an iconic blue head and a snood along the beak. This amigurumi turkey also has more tail feathers than some of the other birds in the crochet chicken pattern.

The mini pumpkin is quick to make. We used mini bobbles every other row to give it a gourd like bumpy rib.

Both the turkey and pumpkin are crocheted with medium worsted weight yarn. They are pictured above in Lion Brand Heartland Yarn.

Granny Square Turkey on Etsy

The turkey and pumpkin are available in our Birds of a Feather crochet pattern on Etsy.

Available now on Etsy.

Buy the pattern on etsy

Quick Video Tips on YouTube

We made several brief videos on how how to put together the bird. You can see our YouTube Granny Square Bird Videos which include the snood.

These videos are shorts…quick videos on how to crochet various aspects of the granny square chicken including beak, eyes, tail, wattle, snood as well as changing colors mid row and joining squares.

Gobble, Gobble!

Birds of a Feather Granny Square Chicken Pattern

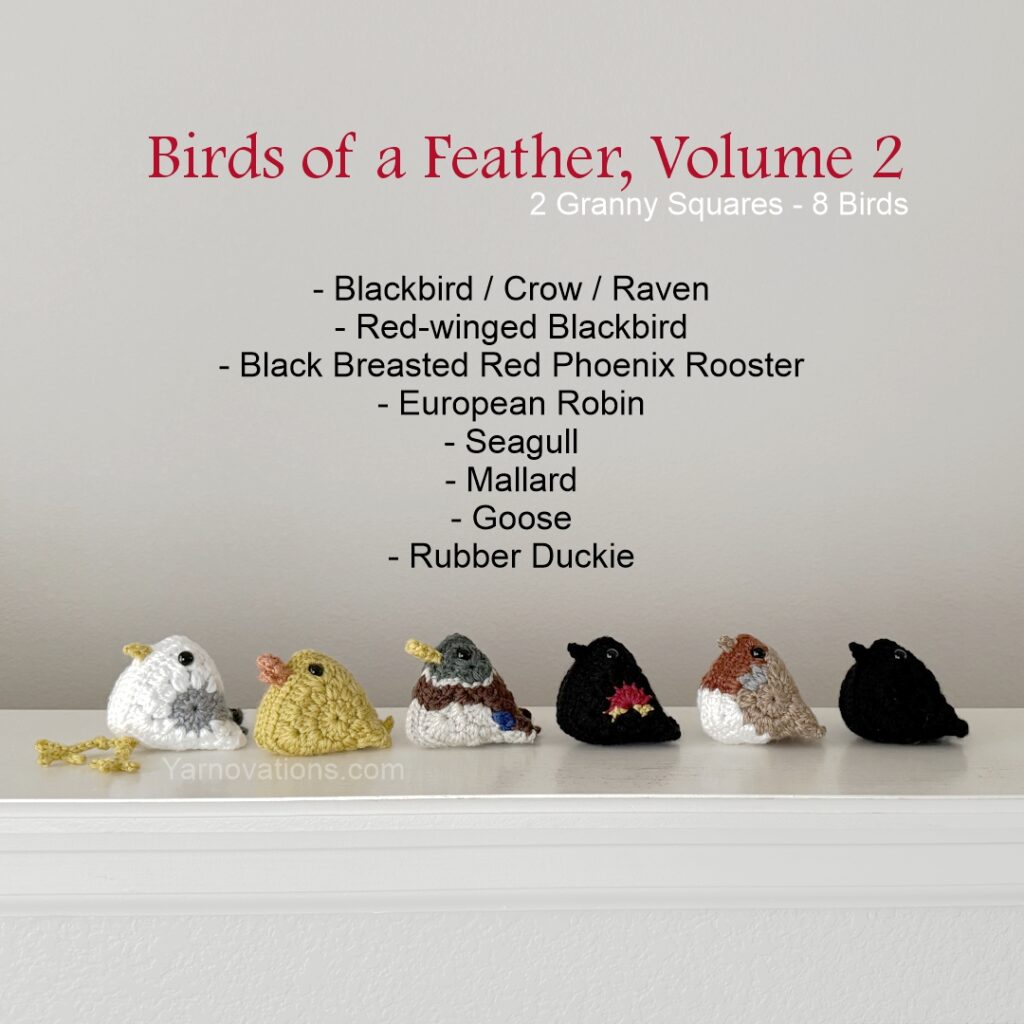
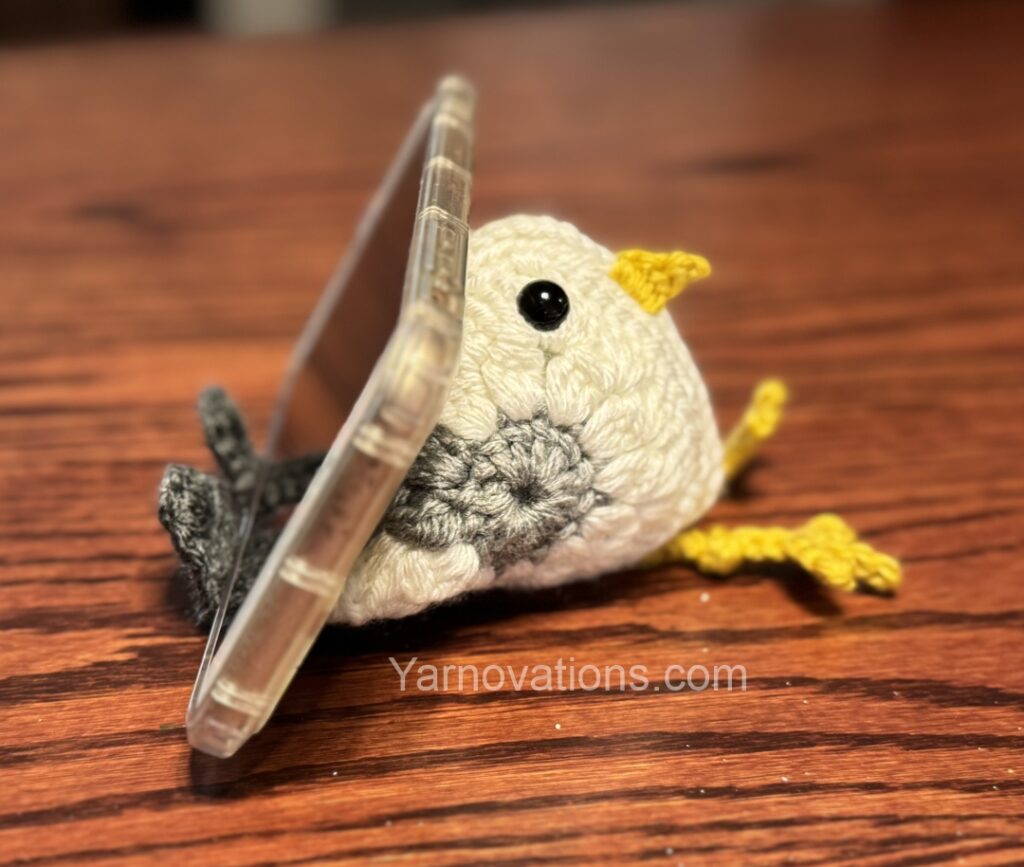
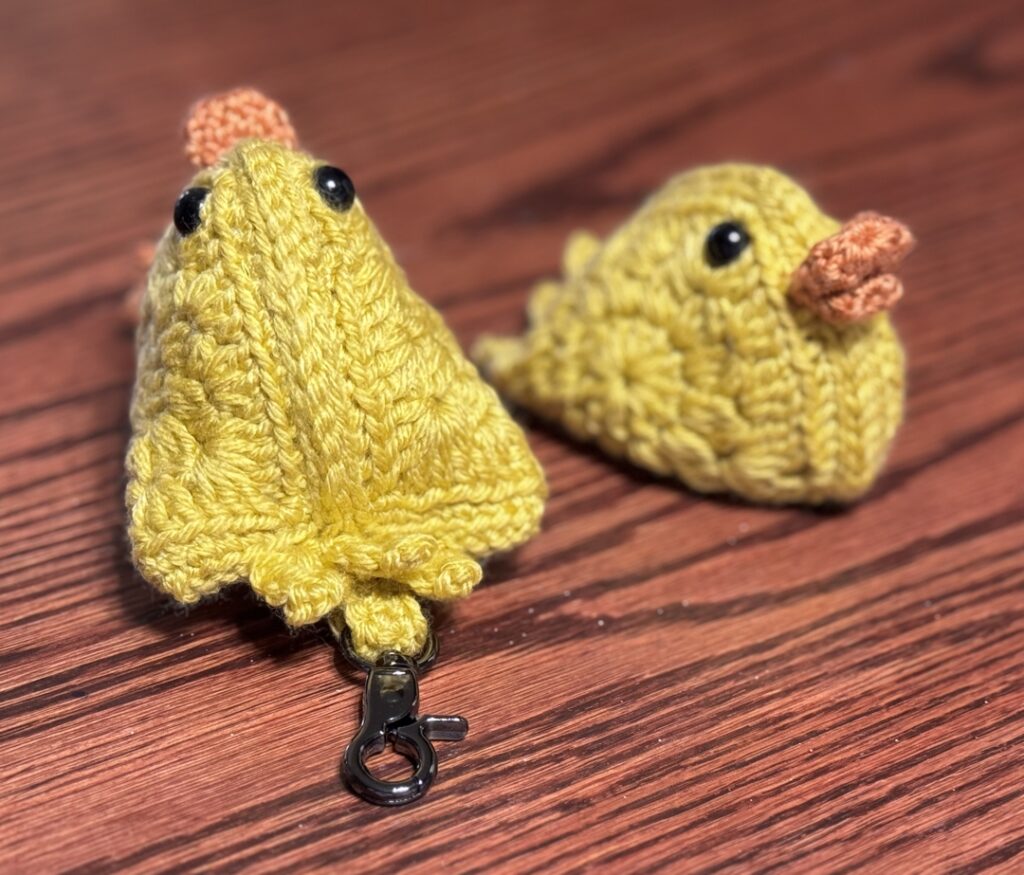
The granny square chicken pattern includes 9 different birds. Each made with only 2 granny squares. Changing the color mid round is what makes each bird unique. The Birds of a Feather pattern includes:

  • Chicken
  • Turkey
  • Blue Jay
  • Cardinal
  • Robin
  • House Finch
  • Gold Finch
  • Parakeet
  • Bald Eagle
  • BONUS: Mini Pumpkin

The turkey joined the flock on 11/7/24. If you’ve purchased the pattern prior to that date and need the revised version with turkey, let us know via Etsy where you purchased the pattern.

Happy Thanksgiving!

Yarn Twins

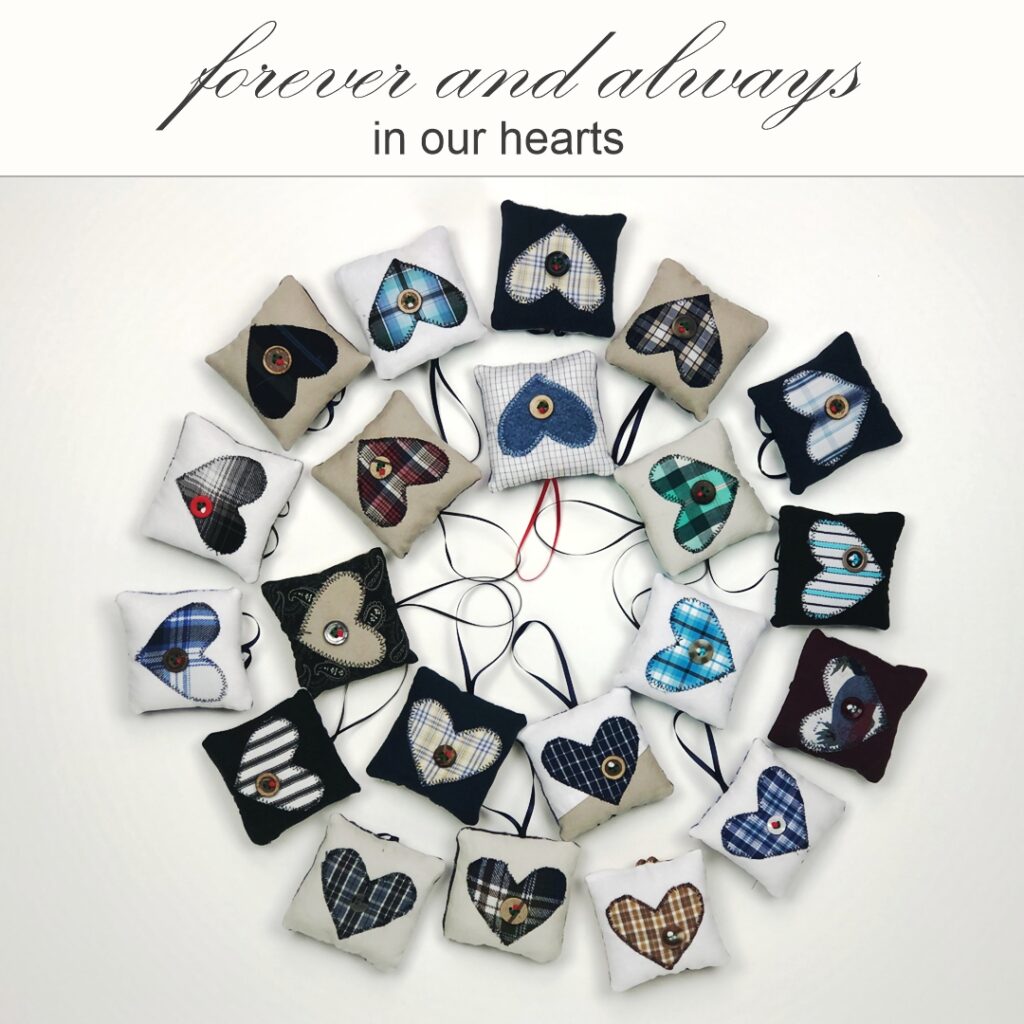
3″ Pillow Christmas Ornaments

Sew a personalized Christmas Ornament for your family, friends and coworkers. We have created a 3″ Pillow Ornament that can be customized with 1 of 24 fun icons. The sewing pattern has a tracing template that celebrate many hobbies and special occasions.

This is a quick and easy pattern to stitch. The pattern includes step by step written instructions and lots of photos. No measuring required because the tracing template includes the 3″ pillow.

3″ Pillow Christmas Ornament Sewing Pattern

The pattern includes instructions and tracing templates to make a 3″ pillow ornament with a classic icon. Here’s what you’ll find in the pattern:

  • 24 Icons to Trace
  • Step by Step Written Instructions
  • Tracing Template for Pillow and Icons
  • Lots of Photos
  • Complete materials list
  • 14 Pages

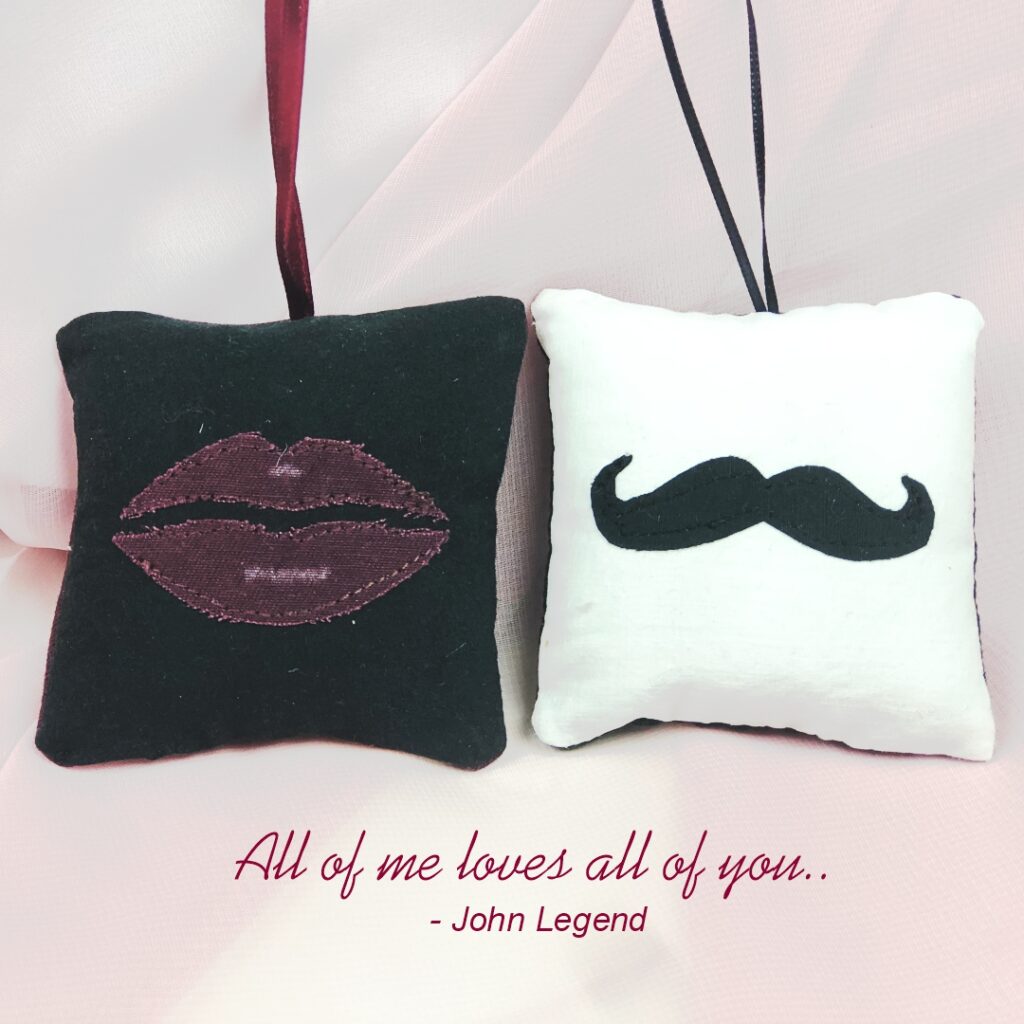
Looking for a fun gift for couples? The lips and mustache are fun for dating couples, newly engaged, just married, bride and groom, his and hers. These would be fun gifts to sew and gift at a bridal shower, wedding gift or to make as a 1st Christmas married gift. Make 2 separate pillow ornaments or sew lips on one side and mustache on the other.

What Others Say About Our Sewing Patterns

We work diligently to make fun and easy sewing patterns for you to follow. Here’s what others have to say about our sewing patterns:

  • “Lovely pattern and makes for a great gift for friends…” -Korina
  • “Great instructions, instant download thanks for a great transaction!” -Laura
  • “Loved this pattern. It worked out great…” -Sabrina

3″ Pillow Christmas Ornament Available on Etsy

The 3″ Pillow Christmas Ornament Sewing Pattern is available in our Etsy Shop.

Available now on Etsy.

Buy the pattern on etsy

What Icons Are Included?

The 24 icons in the pattern were selected because they can be used to make pillows to celebrate many special occasions and hobbies. Meaning you can make a Christmas Ornament for everyone you know. The icons include:

Wedding, Bridal Shower, Quinceañera, Sweet 16, Prom

  • Lips
  • Mustache
  • Dress

School, Students and Teachers

  • Graduation Cap
  • Star
  • Shooting Star
  • Apple

Animal Lovers, Baby Shower, New Baby, Baby’s 1st Christmas

  • Dog
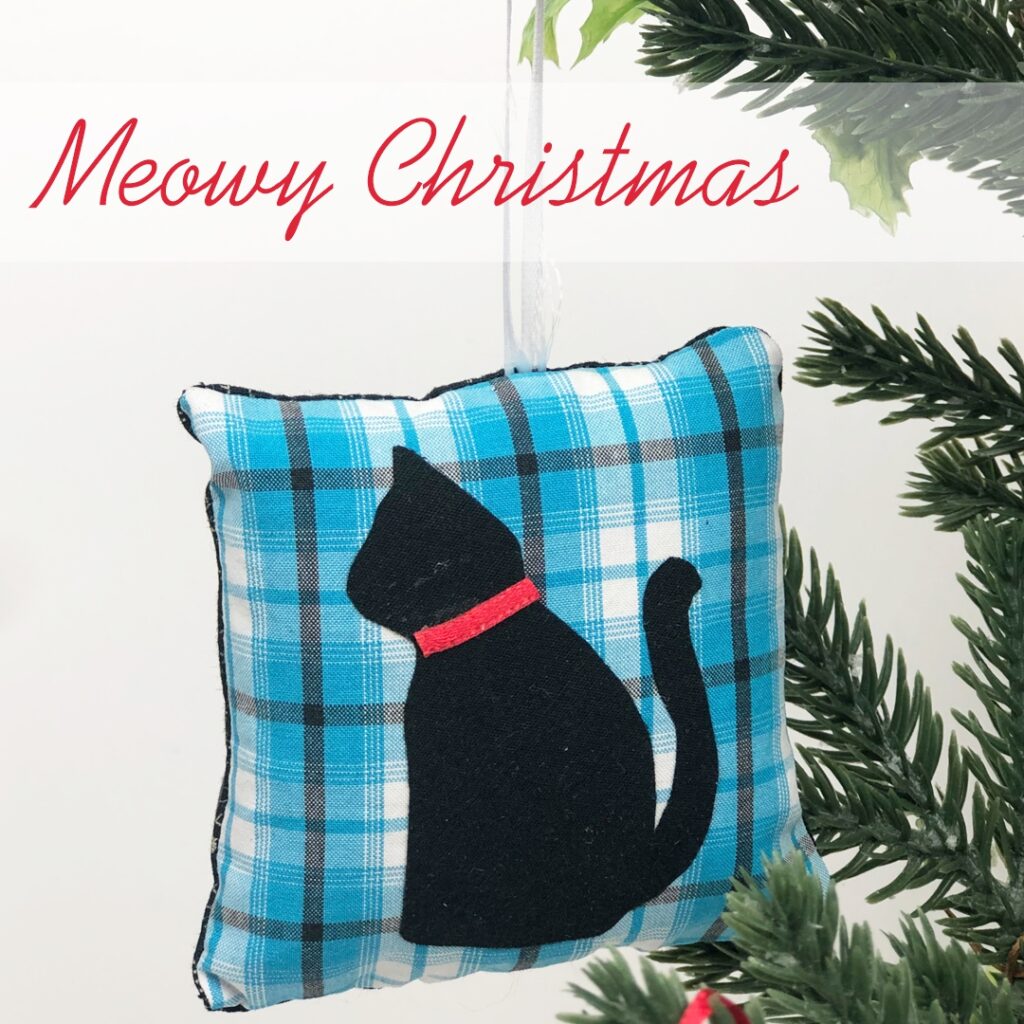
  • Cat
  • Dinosaur
  • Duckie
  • Unicorn
  • Snake
  • Pig

Other Hobbies

  • Flower
  • Ocean Wave
  • Coffee
  • Crown
  • Text Boxes

Special Occasions, Christmas, Birthday, Valentine’s Day

  • Heart
  • Pine Tree
  • Balloons

Share the Love, Pin an Image to Pinterest

Share the love by pinning one or more of these images to pinterest.

We so appreciate it. Thank you.

Upcycle Clothing to Make 3″ Pillow Christmas Ornaments

This is a great project for upcycling clothing or using up scraps you have. Trying making an ornament from clothing. All the Pillow Ornaments pictured in this blog are made from clothing. This is a great way to use clothes that your kids have outgrown, or clothing that’s been stained and no longer wearable. This is also a fun project for using wild and crazy fabrics. Take a trip to the 2nd hand store and look for bright and colorful clothing with small patterns.

The materials list for a 3″ Pillow Christmas Ornament. Here’s what you’ll need:

  • Fabric:          Front – 3 ½” x 3 ½” remnant
  •                      Back – 3 ½” x 3 ½” remnant
  •                      Icon – 2 ½” x 2 ½” remnant
  • Needle and Thread: To match fabric
  • Ribbon: 1/8” (3 mm) x 9” per ornament
  • Button: ½” or desired size (optional)
  • Straight Pins
  • Stuffing and Chopstick
  • Embroidery Thread (If attaching the button with the rose design)
  • Scissors
  • Pencil or Washable Marker
  • White colored pencil for drawing accents (optional)
  • Fabric and/or glue gun (optional)

Pillow Christmas Ornament Sewing Pattern

Buy your 3″ Pillow Christmas Ornament Sewing Pattern with 24 Icon Templates on Etsy.

Available now on Etsy.

Buy the pattern on etsy

Old Blue Whale Sewing Pattern

Sew a blue whale with this step-by-step PDF pattern. Better yet, sew 2 blue whales stuffed animals! This pattern comes with tracing templates for a blue whale that’s 15.5″ long and one that’s 10″ long. Templates are at 100% scale and print on 8.5″x11″ paper.

You WHALE love this pattern. Get your copy on Etsy: Blue Whale Sewing Tutorial.

Great for beginners! This fun and easy tutorial is the perfect project to learn how to top stitch, sew a dart and create an invisible join with the ladder stitch. In the end, you have a soft toy that’s great for gifting to young boys and girls, taking to baby showers and decorating a nautical nursery.

Adult blue whales can grow to 98 feet long and calves can be 20 feet long. These blue whale plushies are considerably smaller. The large template makes a whale stuffed animal that’s 15.5″ long x 7″ wide x 4″ tall. The small template makes a whale toy that’s 10″ long x 4.5″ wide. 2.5″ tall.

Blue Whale Pattern on Etsy

The instant downloadable PDF pattern for the Blue Whale is available in our Etsy Shop.

Available now on Etsy: Blue Whale Sewing Pattern.

Buy the pattern on etsy

Blue Whale Sewing Pattern with Templates

Use traditional fabrics or whimsical prints to sew a blue whale. This pattern is great for new sewists because the written instructions list each step needed to create a blue whale just like the ones pictured. The instructions are the same for both sizes and the pattern includes tracing templates for both.

Here’s what’s included in the blue whale Step-by-Step Sewing Tutorial PDF:

  • Whale pattern in 2 sizes
  • Tracing Templates at 100% scale for 8.5″x11″ paper
  • Step-by-Step written instructions
  • 15+ photos
  • 16 pages

Pin this Whale Picture to Pinterest

Share the love! Pin one of these whale stuffed animal images to Pinterest.

Blue whales are classified as endangered. This blue whale plushie is a great prop for teaching the importance of caring for wild life. Sew one as an illustration and gift it to students as a reminder of your valuable lesson.

Supplies for Sewing a Blue Whale Stuffed Animal

Another great thing new sewists will love about this blue whale pattern is that the materials list is rather small. This is a great project for using scrap fabrics or recycling old ones like denim. Here’s everything you’ll need to sew your own blue whale stuffed toy.

  • Templates: at the end of the pattern
  • Fabric per Whale       
  •   Top small: 8” x 11”;
  •   Top large: 10” x 16”
  •   Bottom small: 7” x 11”;
  •   Bottom large: 10 x 16”
  • Felt (optional): White – 2 ½” x 5”
  • Needle and Thread: to match fabric
  • Thread: color desired for throat grooves
  • Safety Eyes: (2) 8mm (small whale);
  •                      (2) 10mm (large whale)
  • Straight Pins
  • Fabric Glue
  • Stuffing and Chopstick
  • Scissors
  • Pencil or Washable Marker

Reviews of our Sewing Patterns

Don’t just take our word for it. Read what others are saying about our sewing patterns:

  • Amazing and so easy to follow! – Erika
  • Great instructions, instant download thanks for a great transaction! – Laura
  • Just what I wanted. My grandson will love it. – Valerie
  • Very clear instructions and templates with the aid of photographs! – Nadia

Blue Whale Pattern on Etsy

This adorable blue whale pattern is available in our etsy shop, along with other fun sewn sea creature downloads.

Available now on Etsy: Blue Whale Sewing Pattern PDF

Buy the pattern on etsy

Stingray and Manta Ray Sewing Pattern

Sew a manta ray or stingray plushie soft toy with this easy to follow tutorial.

This step-by-step tutorial includes tracing templates for 2 rays in 2 sizes each! Sew a stingray and a manta ray stuffed animal with some pups. The smallest stingray is 7.5″ wide and the largest manta ray is 13″ wide.

Rays in real life vary in shape and size. For instance, the manta ray can grow up to 23 feet long, while stingrays grow to about 6 feet long. Manta rays do not have barbs on the ends of their tails, but stingrays do. Manta rays are often found deeper in the ocean while stingrays are found closer to the coast.

Stingray and Manta Ray Sewing Pattern

This sewing tutorial will guide you through each step to making a stingray or manta ray like those pictured. The step-by-step instructions make this a great project for the confident beginner. Tracing templates are included for all sizes. They are drawn at 100% scale and can be printed on 8.5″x11″ paper. Here’s what’s included in the pattern:

  • Stingray Pattern Large: 12″ wide x 10″ long x 1.5″ tall
  • Stingray Pattern Small: 7.5″ wide x 6″ long x 1″ tall
  • Manta Ray Pattern Large: 13″ wide x 9.5″ long x 1.5″ tall
  • Manta Ray Pattern Small: 8.5″ wide x 6″ long x 0.5″ tall
  • Tracing templates for all sizes at 100% scale (print to 8.5″ x 11″ paper)
  • Step by step written instructions
  • 20+ photos
  • 16 pages

Stingray and Manta Ray Sewing Pattern on Etsy

Our stingray and manta ray sewing pattern PDF is now available in our Etsy shop.

Available now on Etsy: Stingray and Manta Ray Sewing Pattern

Buy the pattern on etsy

5 Star Reviews of Our Sewing Patterns

Here’s what others are saying about our sewing patterns:

  • Wonderful pattern, was very easy to follow and the images were very helpful. – Alex
  • Easy to follow and has a great end product! – Emily
  • Fast delivery. Good eayt to follow instructions. – Adele

Share to Pinterst

Share the love, pin one of these images on Pinterest.

Materials List for Manta Ray and Stingray Soft Toy

Very few supplies are needed to sew your own stingray and manta ray. This is a great project for using scraps or upcycling old fabric. They are adorable toys in solids and printed fabrics. The templates include arrows for use on directional fabric. Here is a complete list of materials you’ll need to sew your own ray plushie:

  • Templates: at the end of the pattern     
  • Cotton Fabric:                                               
    • Main color/top
      • Small 8” x 10”                    
      • Large 16” x 11”                      
    • White/bottom
      • Small 8” x 10” 
      • Large 16” x 11”
  • Needle and Thread: color of both fabrics
  • Stuffing
  • Safety Eyes:
    • (2) 8mm (small);
    • (2) 10mm (large)
  • Scissors; tweezers/hemostat (optional)
  • Straight Pins, chalk/marking pen
  • Fabric Glue (optional)

Make a Variety of Stingrays and Manta Rays

Have fun with it. There are over 600 species of rays including stingray, manta ray, devil ray, cownose ray, and round ray. Create classic rays or whimsical ones. Sew them as gifts. Use them as educational props. Create fun photo props or toys to spark a child’s imagination.

Manta Ray and Stingray Sewing Pattern on Etsy

Our Stingray and Manta Ray Sewing Pattern PDF is available in our Etsy Shop: Yarnovationsshop.

Available now on Etsy: Stingray and Manta Ray Sewing Pattern.

Buy the pattern on etsy

Panda Gnome-ium

This gnome loves pandas! The cool weather of fall is his favorite time of year because he can put on his panda hat and munch on bamboo.

Weave your own panda loving gnome with this step-by-step pin loom pattern pdf Panda-Gnome-ium download. The tutorial includes the gnome, panda hat and bamboo! The pattern has written instructions for each step telling you how to roll, fold, tuck and sew pin loom shapes into a panda gnome plush toy.

Panda-Gnome-ium Pattern PDF

Whether you’re new to pin loom weaving or have been weaving a while, this pattern will make it easy to recreate a panda gnome stuffed animal just like the one pictured. Here’s what’s included in the pattern:

  • Gnome Instructions
  • Panda Hat Instructions
  • Bamboo Instructions
  • Step by Step Written Instructions
  • 30+ Photos
  • 13 Pages

Reviews for Our Pin Loom Patterns

This Panda Gnome is fun and easy to make following the PDF pattern. Don’t just take our word for it. Here’s what others are saying about our pin loom patterns:

  • Super explained, cute, everything done well. – Steffi
  • Fun pattern. Matches description. Fast download. – Kim
  • Well written pattern nicely illustrated with good photos showing any tricky parts. – Windspinner

Panda-Gnome-ium Available on Etsy

Get your copy of Panda-Gnome-ium Pin Loom Pattern in our Etsy Shop.

Available now on Etsy: Panda-Gnome-ium Pin Loom Pattern.

Buy the pattern on etsy

Pin Panda-Gnome-ium to Pinterest

Share the love, pin one of these panda gnome images to pinterest.

We appreciate it so much. Thank you.

Materials Needed to Make a Panda-Gnome-ium

The supplies list to make a panda gnome is pretty short. In fact, it only takes 3 pin looms to make your own soft toy panda gnome: 4″ square, 2″ square, and 2″x4″ rectangle. Here’s the complete list of what you’ll need to make your own Panda-Gnome-ium:

  • Pin Loom Squares: 4”, 2”
  • Pin Loom Rectangles:  2” x 4”
  • Yarn:   Lion Brand: Basic Stitch – Medium Worsted Weight (4)
    • BLACK #153 – 70 yds
    • WHITE #100 – 125 yds
    • ALMOND #121L – 20 yds
    • GRASS #130B – 35 yds
    • CHARCOAL HEATHER #403J – 10 yds
  • Needle:  6” needle for weaving and yarn needle for sewing
  • Crochet hook: G/6/4.00mm (optional)
  • Stuffing
  • Black Felt: 2 ½” x 4”
  • Fabric Glue
  • Beans: to weigh the gnome down
  • Fabric Marker: – white
  • Pet comb: – metal
  • Steamer (optional)

Pandas in Real Life

Did you know…

  • Giant pandas are a type of bear found in China.
  • Pandas are easily identifiable by their distinct black and white coloration.
  • Pandas are roughly 4-6 feet long, weighing 220 to 250 pounds.
  • Pandas have thumbs on their forepaws to help them hold bamboo.
  • Pandas eat 20-30 pounds of bamboo shoots a day.
  • In 2016, the giant panda was moved from the endangered list to the vulnerable list.

Make a Pin Loom Weaving Panda Gnome

It’s fun and easy to make your own Panda Gnome. Instantly download the Pattern PDF on Etsy.

Available now on Etsy: Panda-Gnome-ium pin loom pattern.

Buy the pattern on etsy

Graduate Gnome Pin Loom Pattern

The tassel was worth the hassle. Celebrate their recent achievement with a hand woven graduate gnome stuffed toy. It’s fun and easy to make with this pin loom pattern.

This pin loom pattern includes step by step instructions for making an adorable graduate gnome that measure approximately 9 3/4″ tall x 6″ deep and 7 1/2″ wide. If you’re graduate has honor cords, the pattern includes instructions for making those, too.

Graduate Gnome Pin Loom Pattern PDF

The pin loom pattern to make the graduate gnome has step by step written instructions and lots of photos. It will tell you how to roll, tuck and sew pin loom woven squares and rectangles to create a gnome stuffed toy that looks like a graduate student who recently accepted their diploma. Here’s what’s included in the tutorial:

  • Gnome Instructions
  • Cap Instructions
  • Tassel Instructions
  • Honors Cords Instructions (and color meanings)
  • Step-by-Step Written Instructions
  • 30+ Photos and Charts
  • 15 Pages

Graduate Gnome Pin Loom Pattern on Etsy

The step-by-step Graduate Gnome Pin Loom Pattern PDF is available in our Etsy shop.

Available now on Etsy.

Buy the pattern on etsy

Pin the Graduate Gnome to Pinterest

Share the love, pin one of these graduate gnome photos to pinterest. We appreciate it so very much.

Thank you.

Reviews of Our Pin Loom Patterns

Our step-by-step gnome tutorials are fun and easy. Don’t just take our word for it…here’s what others are saying about our pin loom weaving patterns:

  • “Fun pattern. Matches description. Fast download.”
    Kim M.
  • “Very easy pattern to read.”
    Sandra H.
  • “Super explained, cute, everything done well.”
    Steffi K.

Graduate Gnome Pin Loom Materials List

The graduate gnome can be made with just 2 pin looms: 4″ square and 2″x4″ rectangle. The diploma can be made with a piece of paper or a 2″ square pin loom. If you opt to make it with yarn, than that would be a third pin loom. Here’s the complete materials list.

  • Pin Looms:
    • Squares: 4”; (2” optional)
    • Rectangles:  2” x 4”
  • Yarn:   Lion Brand: Basic Stitch – Medium Worsted Weight (4)
    • BLACK #153 – 150 yds
    • WHITE #100 – 37 yds
    • ALMOND #121L – 15 yds
  • Embroidery Thread: 1-3 skeins (1 for tassel, 1 per graduation cord)
  • Button: (1) 10mm
  • Plastic Canvas (or cardboard): 3” square
  • Needle:  6” needle for weaving and yarn needle for sewing
  • Stuffing
  • Fringe Twister or premade gold cord
  • Beans: to weigh the gnome down
  • Fabric Marker: – white
  • Pet comb: – metal
  • Steamer (optional)

The honors cords were made with a fringe twister. If you don’t have one, no worries. We’ve included a link to a video on how to make a cord without a fringe twister.

This is a really fun graduation gift. Make the gnome in black yarn or make it in the same color as the graduating student. It’s fun to give hand made gifts and this is one they will cherish.

All the shapes in this pin loom gnome are woven in plain weave. The chart at the beginning of the pattern will tell you how many shapes you need in each color so you can weave them all ahead of time, then assemble them at the end. You’ll be surprised at how easy it is to make this stuffed toy.

Graduate Gnome Pattern on Etsy

The Graduate Gnome Pin Loom Pattern PDF is available in our Etsy shop.

Available now on Etsy.

Buy the pattern on etsy

The pattern is for your eyes only. You have permission to give away or sell your finished project with credit to Yarnovations as the original designer.

Puffin Sewing Pattern with Templates

Most people agree that the Puffin is a funny looking seabird. And that’s what makes it so adorable! Our sewing pattern comes with templates in two sizes: 9″ and 7 1/2″ tall.

Reviews for Our Sewing Patterns

  • “Wonderful pattern, was very easy to follow and the images were very helpful.”
  • “This pattern was exactly as advertised and met my expectations. The instruction were great and easy to follow.”
  • “Great project! Easy and clear assembly directions!”

Step-by-Step Sewing Pattern with Templates

This puffin sewing pattern is easy to follow along because it has step by step written instructions and lots and lots of photos. In the end you’ll have a loveable huggable stuffed animal. Here’s what’s in the puffin sewing pattern.

Puffin Sewing Pattern Includes:

  • Traceable templates
  • 2 sizes: 9″ and 7 1/2″ tall
  • Step by Step written instructions
  • 20+ photos
  • 18 pages
  • links to stitch videos

Puffin Pattern Available on Etsy

The puffin sewing pattern with templates is available in our Etsy Shop. When you purchase the pattern PDF on Etsy, you get an instant download link.

Buy the pattern on etsy

More about the Puffin Sewing Pattern with Templates

We are rating the puffin pattern as intermediate because of all the curves and multiple parts and pieces, but the pattern is easy to follow with step-by-step written instructions and more than 20 color photos. The tracing templates can be enlarged should you want a larger puffin, though we think the larger 9″ bird is the perfect size for hugging.

The puffin is sewn with a traditional 1/4″ seam allowance. There is a little bit of top stitching, as seen on the bill. That makes sewing the small fabrics much easier. And of course, there is the ladder stitch which creates and invisible seam where you turn the puffin right side out. We have a couple video links to these stitch techniques.

Share the Puffin Love

puffin stuffed animal

Share the love by sharing this puffin pattern on social media. Pin one of our photos to pinterest and share on facebook.

Thank you!

What You Need to Sew a Puffin Stuffed Animal

To sew your own puffin stuffed animal, you need fabric, stuffing, safety eyes and a sewing machine. Here’s the complete materials list:

  • Pattern Pieces: template at the end of the pattern
  • Fabric (for 1): Cotton: Black – 11” x 17”, White – 6” x 8”, Red – 3” x 5”, Orange – 3” x 6”
  • Felt: Yellow – 1 ½” x 4”, Steel Blue – 2” x 4”, Orange – 1” x 1 ½”
  • Thread: Black, yellow, steel blue, orange
  • Safety Eyes: Large bird – (2) 12mm, Small bird – (2) 8 mm
  • Needle and Straight Pins
  • Fabric Glue
  • Stuffing, Stuffing Stick, Tweezers
  • Scissors, Sewing Machine
  • Pencil, chalk, or Washable Marker

Available Now on Etsy

The PDF for the Puffin Sewing Pattern is available in our Etsy Shop: YarnovationsShop. When you purchase from Etsy, you get a link to instantly download the pattern.

Available now on Etsy.

Buy the pattern on etsy

Caterpillar Pencil Case Pin Loom Pattern

Make your own super cute caterpillar pencil case with pin loom woven shapes. This zipper pouch uses only 2 pin looms: 4″ square and 2″x4″ rectangle! If you also have a 1″ square, you can add little finger grips and zipper pull (pictured but optional).

This is a beginner friendly project as each shape is woven in plain weave. The Caterpillar Pattern includes step by step written instructions and lots of photos. Here’s what’s in the tutorial:

  • Caterpillar Pencil Case
  • Step-by-Step Written Instructions
  • 10+ color photos and charts
  • 7 pages

Reviews for our Pin Loom Patterns

  • “Well written pattern, nicely illustrated with good photos showing any tricky parts.”
  • “Well written pattern. Highly recommend her patterns.”
  • “This pattern in incredible and the designer is wonderful!”

Caterpillar Pencil Case Pin Loom Pattern on Etsy

The Caterpillar Pencil Case Pin Loom Pattern is now available in our Etsy Shop. This first appeared in Little Looms 2022. We have the rights back and are making the pattern available to you in our Etsy Shop.

Available now on Etsy.

Buy the pattern on etsy

Share the Love, Pin to Pinterest

Share the love of pin loom weaving by pinning one of these images to Pinterest.

Thank you!

More about the Caterpillar Pencil Case

We call this Caterpillar Pouch a pencil case, but it’s also a fun size for storing other craft and hobby supplies like crochet hooks. The Caterpillar Pencil Case is pretty quick to stitch. It takes a little longer if you want to line the bag…which we totally recommend as woven squares aren’t the most secure for sharp objects like pencils.

Here’s what you’ll need in order to make your own Caterpillar Pencil Case:

  • Pin Loom Square: 4” (and 1″ optional)
  • Pin Loom Rectangle: 2”x4”
  • Yarn: Lion Brand Yarns Vanna’s Choice (Acrylic, 170 yd/3.5 oz;),
    #180 Cranberry, 20 yd;
    #172 Kelly Green, 20 yd;
    #171 Fern, 30 yd
  • Fabric for Lining: 1 sq. foot
  • Zipper: 8” Green
  • Felt: remnants of brown, blue, grey.
  • Needle: 6” weaving needle, tapestry needle, sewing needle
  • Thread: Green
  • Washable Marker
  • Fabric Glue
  • Straight Pins

Caterpillar Pencil Case on Etsy

The Caterpillar Pencil Case Pin Loom Pattern is now available as an instant PDF download in our Etsy Shop.

Available now on Etsy.

Buy the pattern on etsy

Otter Family Sewing Pattern

These stuffed animals are Otterly adorable! Sew a momma and pup with this fun and easy step-by-step sewing pattern PDF with templates. Don’t forget the fish! The otter and fish each come in two sizes.

Here’s what’s included in the Otter Sewing Pattern

  • Otter Sewing Pattern Includes:
  • Otter in 2 sizes: 14″ and 11.5″ long
  • Fish in 2 sizes: 3 5/8″ and 2 3/4″ long
  • Traceable Templates
  • 20 Pages
  • 30+ Color Photos
  • Step-by-Step Written Instructions
  • Helpful tips

Reviews of our Sewing Patterns

  • “Wonderful pattern, was very easy to follow and the images were very helpful.”
  • “This pattern was exactly as advertised and met my expectations. The instruction were great and easy to follow.”
  • “Great project! Easy and clear assembly directions!”

Otter and Fish Sewing Pattern on Etsy

The Otter and Fish Sewing Pattern is now available in our Etsy Shop.

Available now on Etsy

Buy the pattern on etsy

About the Otter and Fish Sewing Pattern

The otter and fish are great projects for upcycling and recycling fabric. We used old sheets to create these. Here’s what you’ll need to sew your own stuffed animal otter and fish:

  • Pattern Pieces: Templates included
  • Fabric (per otter/fish):
    • Brown – 18” x 21”
    • Tan – 4 ½” x 2”
      • Fish Head – 1 ½” x 2”
      • Fish Body – 2 ½” x 6”
  • Felt:
    • Black – 1” x 1”
    • Off White – 2” x 3”
  • Needle and Thread: brown, black, off white
  • Safety Eyes: (2) per animal; black; 12mm for the otter, 5 mm for the fish
  • Straight Pins
  • Stuffing and Chopstick
  • Scissors
  • Seam Ripper
  • Pencil or Washable Marker
  • Fabric Glue optional
  • Wire Cutter optional
  • Sewing Machine

Share the Love, Pin to Pinterest

Share the love of sewing these cute little critters. Pin one of our images to Pinterest.

Thank you!

Get the Otter Sewing Pattern on Etsy

The Otter and Fish Sewing Pattern is now available in our Etsy Shop.

Available on Etsy.

Buy the pattern on etsy

Roman Soldier Gnome Pin Loom Pattern

It’s easier than you think to pin loom weave your own Roman Soldier. This step-by-step pattern will guide you every step of the way – showing you how to fold, tuck and sew squares and rectangles into a Roman Soldier Gnome including a helmet, spear, and shield.

Reviews of Our Pin Loom Patterns

Here’s what people are saying about our pin loom patterns:

  • “Well written pattern, nicely illustrated with good photos showing any tricky parts.”
  • “Well written pattern. Highly recommend her patterns.”
  • “This pattern in incredible and the designer is wonderful!”

The Roman Soldier Gnome Pin Loom Pattern is available in our Etsy shop.

About the Roman Soldier Gnome Pin Loom Pattern

The Roman Soldier Gnome measures approximately 13″ tall x 9″ wide and 5″ deep while holding the shield. This toy soldier tutorial includes:

  • Gnome Instructions
  • Helmet, Shield, Spear, Belt, etc. Instructions
  • Step by Step Written Instructions
  • 16 Pages
  • 40+ photos

Roman Soldier Gnome Pattern on Etsy

The Roman Soldier Gnome Pin Loom Pattern is now available in our Etsy shop for immediate download.

Available now on Etsy

Buy the pattern on etsy

Share the Love – Pin This to Pinterest

Share the love of pin loom weaving with the world, pin one of our images to pinterest.

Thank you!

More about the Roman Soldier Pin Loom Pattern

The Roman Soldier Gnome is made with only 5 pin looms. We use these sizes a lot. Here’s what you’ll need to make your own woven warrior:

  • Pin Looms: Square: 2” and 4”
  • Pin Looms: Rectangle: 1” x 4”, 2” x 4” and 2” x 6”
  • Yarn: Lion Brand: Basic Stitch – Medium (4)
    • RED HEATHER #400G – 100 yds
    • ALMOND #121L – 40 yds
    • SILVER HEATHER #404J – 100 yds
    • WHITE #100 – 120 yds
    • MUSTARD #158I – 20 yds
    • MAHOGANY #126AL – 40 yds
  • Needle: 6” needle for weaving and yarn needle for sewing
  • Stuffing
  • Beans: to weigh the gnome down
  • Felt: gold, 2” square
  • Fabric Glue
  • Skewer: 8 ½” long, wooden
  • Fabric Marker: – white, dark
  • Pins
  • Pet comb: – metal
  • Steamer (optional)
  • Spray Starch (optional)

Buy on Etsy

The Roman Soldier Gnome Pin Loom Pattern is now available in our Etsy shop for immediate download.

Available now on Etsy

Buy the pattern on etsy