Twins Face Off – Bernat Softee Baby Sneak Peek

Twins Face Off – Bernat Softee Baby Sneak Peek

Last week we announced that we are raiding our stash for the Bernat Softee Baby yarn Twins Face Off design challenge.

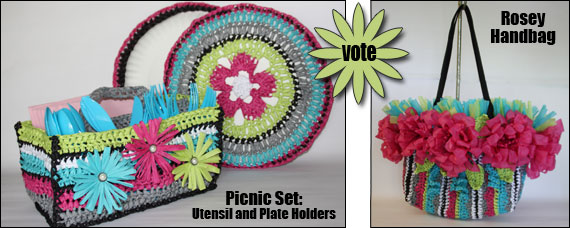
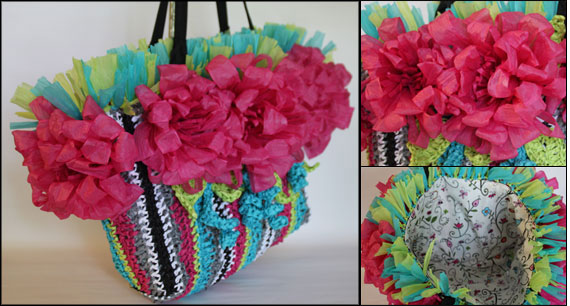
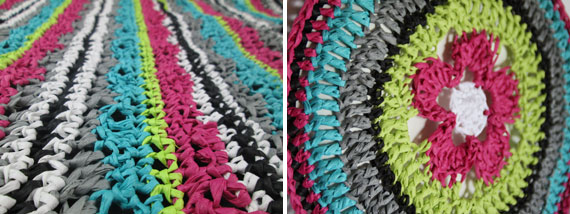
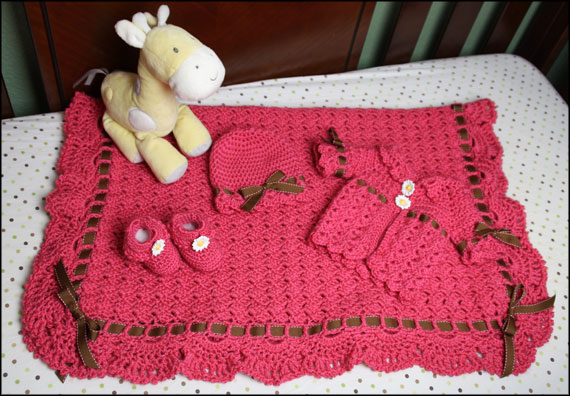
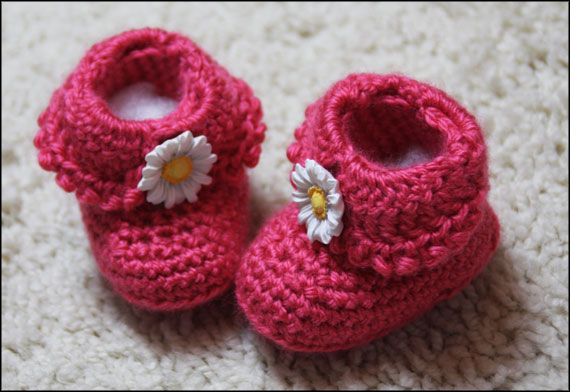
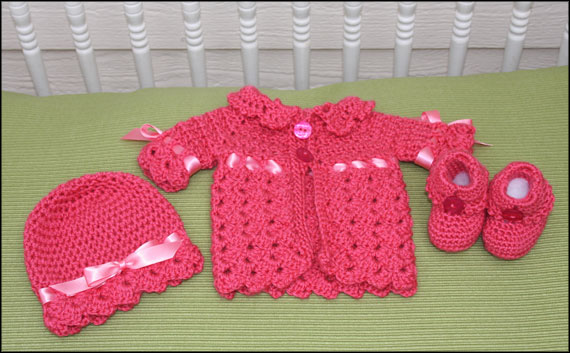
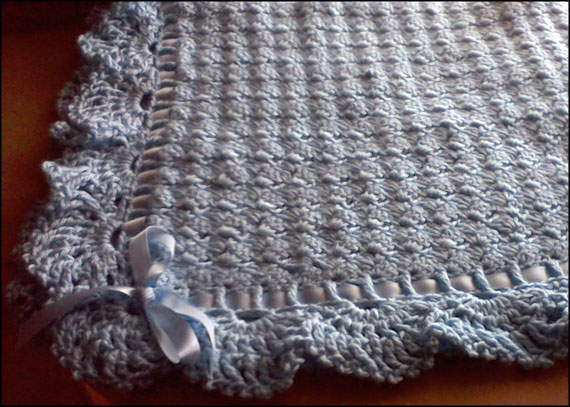
Here’s a peek at what we’re working on:

Twins Face Off May 2015 Sneak Peek

Baby projects! That’s the category we chose for the yarn. We’ll be wrapping up the patterns this week.

Next week we’ll share photos and ask you to vote for your favorite design. We’ll also be giving away prizes. 1 place: 4 skeins of yarn (pale blue or soft red, color of winners choice) and the patterns; 2nd place: two patterns.

See you next week!


Behind the Scenes: Chutes and Lattice

chutes and lattice with twist and tuckBehind the Scenes:
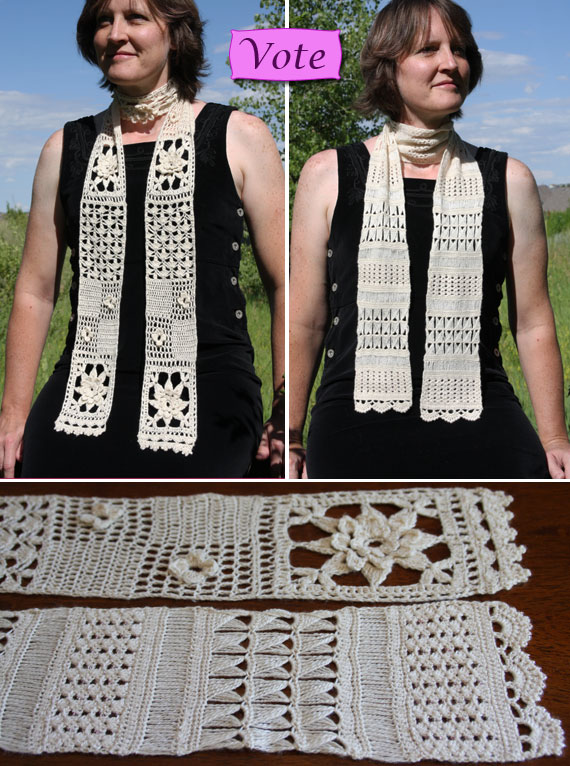
Chutes and Lattice Scarf

Inspiration comes from lots of different places. In the case of the Chutes and Lattice Scarf, it was a combination of having a beautiful yarn on hand at a time when I was browsing through a stitch dictionary.

First: The Yarn

I attended the Estes Park Wool Festival a few years ago with my friend Jean (from Desert Rose Designs). There were lots of beautiful yarns at the show, and I was overwhelmed by it all (what did I know…I crocheted with acrylic most of the time). Jean had a lot of great things to say about the yarn we saw in the booth of Brooks Farm. So I decided to buy a skein. I selected Acero because I loved the rich color, the soft fiber (wool/silk/viscose blend) and that one skein had 420 yards. Of course, I had no idea what I was going to do with it!

Second: The Stitch Dictionary

donna kooler's encyclopedia of crochetAbout a year after attending the wool festival, I found myself browsing through Donna Kooler’s Encyclopedia of Crochet. I was inspired by a lot of the designs in there, particularly those in the “Lace Patterns” section.

So, out came the Acero yarn. I began crocheting a few swatches and soon realized that my projects didn’t always look like the pictures in the book. I learned a valuable lesson: the material the yarn is made of will impact the look, drape and feel of the finished project! I was bound to stumble upon this widely known truth sometime. I’m glad it was when I had a beautiful yarn and a great book to refer to.

Third: The Scarf

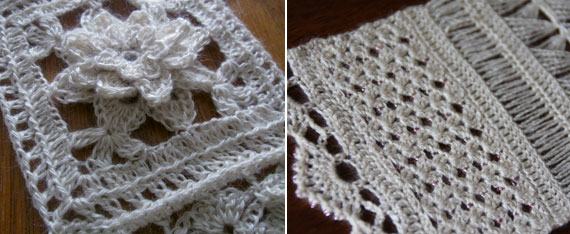
To me, the “Chain Lace” on page 149 of Donna Kooler’s book looked like flowers or chutes. Although I loved it, I didn’t want that pattern to make up the entire scarf. So I added some lattice; open ladder like chain work which I sprinkled throughout and added to the ends. And since the chutes are directional, I created the scarf in two panels.

I loved it. My sister and mom did, too. My mom has even hinted that she’d love it if I’d accidently leave it at her house when I come visit. Since she’s a crocheter herself, I think I’ll just leave her the pattern!

Coral BloomsFourth: Publication

I was so happy with the scarf, I decided to submit it to Love of Crochet magazine and they accepted it! They requested a lighter color yarn, so I recrocheted it in Knit Picks Gloss in Guava (color discontinued). Renamed “Coral Blooms”, my scarf appeared in the Spring 2014 issue of the magazine.

Fifth: Self Publishing

The magazine had exclusive rights to the design for several months, meaning I couldn’t sell it on my website (or blog or share photos of the design I loved so much).

Now I can…thus my Behind the Scene’s article. One of the fun things about self publishing is the ability to show more photos. Earlier this week I posted the pattern in the shop and shared lots of styling options on the blog, which were modeled by my friend Lorien (from Lady Lorien Designs).

This is a really fun lacy design. If you make one for yourself, please share photos on Ravelry! We’d love it.

Available on Etsy: Here

Review: The Crocheter’s Skill-Building Workshop

Review: “The Crocheter’s Skill-Building Workshop”
by Dora Ohrenstein

Crocheter's Skill Building Workshop-Cover“A beautiful, stunning and informative resource.” You can quote me, Dana, on that!

I read a review of “The Crocheter’s Skill-Building Workshop” on Crochetville and wondered if this book was all it was touted to be. And, yeah. It’s good. Really good.

If ever I thought about writing down all that I know and tricks I think every crocheter needs to know, this is the book I would have envisioned writing. But it wouldn’t have been half as good. Dora Ohrenstein nailed it with this book.

Have you ever wondered why some people’s crochet projects looks sloppy while other people’s work looks great? The difference can be a matter of technique, of knowing and putting into practice some basic skills. This book will transform your crochet.

The Crocheter’s Skill-Building Workshop Pros

  • Step-by-step instructions & photos of basic techniques for beginners
  • Advice (and photos) for advanced crocheters
  • In depth discussion (and charts) on how to write and modify patterns
  • Photos with amazing clarity
  • 75 swatch patterns (photos and charts) that illustrate various techniques
  • Charts with two colors to help distinguish odd and even rows.
  • 256 pages with nice thick glossy paper that’s durable and provides crisp clear images
  • Great writing style – it feels like you’re having a converstaion with an instructor that’s professional yet approachable.

My three favorite sections are:

  1. Pages 53-55  Alternatives to Standard Turning Chains
    I hate how wimpy the turning chain looks as a stitch (so I often don’t count it as a st). Dora gives several great alternatives (with step-by-step photos which are very much appreciated).
  2. Pages 194-195  Tapestry Crochet
    I’ve done a little bit of tapestry crochet, but haven’t fallen in love with it. Her tip on crocheting backwards (and again, love the step-by-step photos!) makes me want to give it another try.
  3. Pages 136-139 Internal Shaping
    I liked all of Chapter 7 “Advanced Shaping” but loved the highlighted chart that addressed building a pattern internally on page 137.

The Crocheter’s Skill-Building Workshop Cons

  • Instructions on designing 3D items seemed light. There are patterns for a hat and bag, but the book didn’t address things like amigurumi.
  • My tablet had trouble with the electronic version (which I checked out from the library). It skipped from chapter to chapter instead of page to page. In the end I’m thankful that my tablet had problems because the printed version is stunningly beautiful.
  • Not really a con, but something I found odd was the placement of the section on Pattern Reading. It seems like it would have been better placed at the front of the book rather than the back, since there were patterns sprinkled throughout the book.

The only thing I thought missing was a technique called an invisible join (which I’ve pinned on pinterest). Page 102 does give 4 ways to start and end a round.

I was pleasantly surprised by how much I enjoyed reading The Crocheter’s Skill-Building Workshop. Not because I think I know it all, cause I don’t. I guess I thought it would be a long winded detailed discussion on every miniscule crochet technique ever known to man. Instead, the chapters were concise yet thorough and were beautifully illustrated with fun patterns and beautiful photos. This is definitely one to keep on the shelf as a reference along side your stitch dictionaries.

Twins Face Off – Stashbuster with Bernat Softee Baby

Twins Face Off – Stashbuster Crochet Design Challenge
with Bernat Softee Baby

Twins Back to BackIt’s a new month and time for a new Twins Face Off crochet design challenge. We’ve each won one challenge so we’re both feeling the pressure this month!

For the May design challenge we’re raiding our stash.

We using Bernat Softee Baby in a Soft Red and Pale Blue.

Bernat Softee Baby

We’ll each use 4 skeins of a single color for this challange. The yarn is 100% acrylic, 140 g / 5 oz / 331 m / 362 yards. It’s a soft light weight (3) yarn with a beautiful sheen.

Giveaway and Challenge

Next week we’ll announce what category of item we’re crocheting and share sneak peek photos.

In two weeks we’ll share photos of the completed items and ask you to vote for your favorite. We’ll also be giving away prizes!

  • 1st place wins 4 skeins in the color of winner’s choice and the two patterns.
  • 2nd place wins the two patterns.

In three weeks we’ll announce the winners of the yarn and patterns as well as the twin who designed the most popular design.

Behind the Scenes: Bohemian Handbag

Behind the Scenes: Bohemian Handbag

The Bohemian Handbag won by a very healthy margin in the Lion Brand sponsored Twins Face Off purse design challenge in April. I, Dana, am thrilled that so many people liked it.

Bohemian Handbag Collection

I have a confession to make, this simple handbag was not one of those projects that come to fruition in one sitting. In fact, I talked about it with the ladies in my crochet group, looked at projects online, and visualized a myriad of designs before settling on this basic construction.

There were several types of bags I considered for the challenge.

  • 1st I was contemplating a backpack, something cutesy that a child might wear. I was even calculating how to incorporate a small padded pocket to store a computer tablet.
  • 2nd I decided on a stitch sampler bag with lots of different pieces sewn together almost like a free form project. I even worked up a small swatch with the star stitch (which looked beautiful, by the way)
  • 3rd I began working on a round bag with the spiral that would be on the front and back panel. I envisioned a long shoulder strap and a gusset with a zipper.
  • Bohemian Handbag Crochet PatternFinally, after carefully frogging the previous designs, I settled on a spiral based bag with two skeins of yarn that would chase each other around the bag. I decided to let the color be the main feature of the bag and double crocheted in the round. Once the main shape of the bag was finalized, items like the handle and flower closure quickly took shape.

This entire project makes me chuckle becaues I rarely use a purse. Those rare instances where I do use a purse, it’s generally so small that it only fits my phone, wallet and car keys. That being said, this challenge was quite fun. I enjoyed both the project category and the vibrant Landscapes yarn.

Pattern available on Etsy: Here.

Chutes and Lattice Scarf Crochet Pattern

Chutes and Lattice Scarf Crochet Pattern

chutes and lattice scarf crochet pattern

Chutes and Lattice is a lacy scarf crochet pattern that beautifully showcases that crochet can create a delicate fabric.

This is one of my favorite scarves to wear. It’s also one that my mother wishes I would accidently leave at her house when I visit. So far, I’ve remebered to wear or bring it home with me. =)

The fingering weight yarn used in these photos is:

  • Purple Scarf: Brooks Farms: Acero in purple (1 skein)
  • Coral Scarf: Knit Picks: Gloss Fingering in Guava (2 skeins)

Chutes and Lattice Crochet Pattern

Coral BloomsThe motif is created with floral chutes interspersed with lattice work. It’s constructed primarily with chain work.

This pattern first appeared in Love of Crochet magazine Spring 2014 with the name “Coral Blooms”. Chutes and Lattice is now available for direct purchase in our shop.

Available on Etsy: Here

Available in the Store

Learn more about Chutes and Lattice in our shop.

Chute and Lattice Styling Options

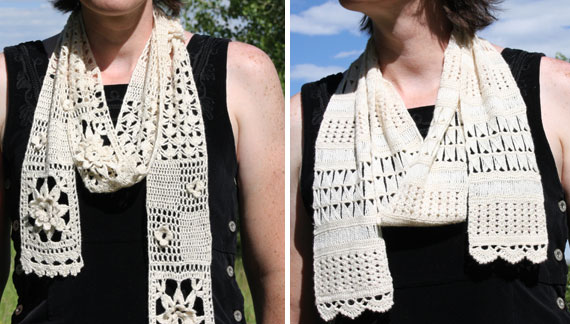
This lacy scarf is a lot of fun to style.

chutes and lattice wrapped twice

Scarf wrapped twice around the neck with a beautiful drape.

chutes and lattice as choker

Cinched tight around the neck with long tails.

Lacy-Scarf-gathered

Scarf folded in half with ends tucked through fold.

chutes and lattice with twist and tuck

Scarf folded in half with a single twist on the folded edge. One end is tucked up from below and one down from above.

Review: Landscapes by Lion Brand

Yarn Review: Landscapes by Lion Brand

We used Landscapes yarn in our Lion Brand Sponsored Twins Face Off design challenge. Here are our thoughts about the yarn.

Lion Brand Landscape Yarn

We love this yarn and yet were challenged by it as well. More specifically, we found the color challenging since we rarely use self striping yarn. But really, using a yarn that changes colors automatically kind of takes care of one design element. No need to worry about when to use a specific color!

Yarn Features:

According to Lion Brand website: “Landscapes is a premium acrylic, single plied roving yarn that has a satiny feel and a richly colored palette.”

Worsted Weight: 3.50 oz./100 g (147 yd/134 m)

Self Striping – Based on the Bohemian Handbag pattern, the color lasted about 20 dc’s and then took another 20 dc’s to fully transition into the next color.

Lion Brand Landscapes Pros:

  • Soft and smooth to work with
  • Glides easily over the hook and hand
  • Soft finished projects
  • Self Striping adds lots of color with a single skein
  • Vibrant color with smooth color transitions
  • Shiny sheen making finished projects rich looking
  • Loose roving style yarn is fun to crochet
  • 7 fun color combos to choose from (both masculine and feminine)

Lion Brand Landscapes Cons:

  • Difficult to rip out work because roving is not tightly twisted which means the strands can bind together (for best results, frog slowly)
  • Yarn is soft and can snag easily so you’ll want to line projects like purses
  • Yarn splits a little bit. An inline hook may work better for this type of yarn

If you’ve never worked with roving style yarn, give it a try. It is really fun to crochet with and we thoroughly enjoyed working with Landscapes yarn. Once we got over our own hang ups with not being able to control the color changes (I know, control issues), we found this yarn a delight to work with.

Here are some patterns that use Landscapes yarn by Lion Brand.

Tips and Tricks: Faux Fur

Working with Faux Fur Yarn

There is no doubt that a little faux fur yarn can add a lot of pizazz to a hand crafted project. And with a little practice, one can learn to crochet or knit with it a little easier.

Tip #1: Crocht Double Stranded

It is nearly impossible to see the stitches when crocheting with faux fur. The furry strands nearly completely hide the stitches. That’s great on a finished product, but not so great when you have to work in those stitches. The problem is not as pronounced when knitting since the stitches are on the needle. If stitches have to be picked up, it will be difficult to find them.

Solution: Crochet with two strands at once, one faux fur and one non-furry yarn. It makes each stitch thicker and a little easier to see. If the non-furry strand is the same color (or nearly the same) as the fur, it almost disappears. The thicker stitches may still be difficult to see, but it is also possible to feel the stitches as you work.

A Furry Sitting

Crocheting with Vanna’s Choice and Fun Fur yarn made finding the stitches in this panda set much easier to find.

Panda Pattern Set available on Etsy.

Tip #2: Count every row.

Counting the number of stitches at the end of every row or round is generally a good idea, but it is almost critical when using faux fur. It is very easy to drop a stitch or lose  track of a stitch because it can be difficult to see. You might even add a stitch because it’s not always easy to tell if a stitch has been worked in already.

Tiger Striped Scarves Crochet Pattern

Keeping track of the number of stitches per row is crucial to keeping a neat edge in projects like the tiger striped scarves.

Tiger Striped Scarves pattern on Etsy.

Tip #3: There is a Right Side and a Wrong Side.

The little furry strands often get trapped within the stitches as they are worked. When working back and forth in rows, both sides will generally be equally furry. When working in the round, the inside tends to be furrier. For a furrier look, turn the project inside out when appropriate so that the furrier side is out.

A hat can often be turned inside out after it’s finished. Some items may need to be turned inside out before they are sewn together. Just note how furry the sides are before completing the project.

Monkey Hanging in Palm Tree with Banana

The parts of the monkey are turned inside out to keep the furrier side on the outside. A little faux fur on the tree makes the palm tree look more authentic too.

Palm Tree and Monkey pattern set available on etsy.

Tip #4: Not all faux fur is equal.

Faux fur comes in varying lengths. The furry strands can be short or long, coarse or smooth. The type of fur can significantly impact the look and feel of the finished product. Projects with the longer strands of fur tend to look fuller and are softer than the shorter stranded fur. The size and nature of the project may determine which fur to use. Generally speaking, the longer stranded fur costs a little more.

Houndstooth Trio

 La Furla from Trendsetter Yarns is long and soft making this houdstooth trio very luxurious.

Houndstooth Trio pattern set available on Etsy.

Tip #5: Notice yardage.

Some faux furs come in small skeins. Generally speaking that means more skeins of fur yarn will be needed than non-furry yarn. Projects with smaller stitches will use more faux fur than larger stitches. For instance, a project  crocheted using single crochet will use more than the same project done in double crochet. Because the faux fur hides stitches anyway, you might want to change the stitch to a taller stitch to save on yarn. The project will get done faster and still look good.

Halloween Trick or Treat Bags

One skein of faux fur will work for small projects like the trick or treat bags.

Trick or Treat Bags pattern set available on Etsy.

Mulberry Stitch Sampler Scarf

Mulberry Stitch Sampler Scarf – Crochet Pattern

Mulberry Stitch Sampler Crochet Scarf

This Mulberry Stitch Sampler is a fabulous scarf! The extra length makes it fun to style (see photos below).

We refer to it as a stitch sampler because of all the fun crochet techniques it uses:

  • Star Stitch at the ends and middle
  • Horizontal cable created with reverse single crochet
  • Vertical cables made with front and back post work
  • Shell Stitch creates a lacy middle section
  • Chain work creates an edge to attach tassles
  • Working in front loop only allowed for another row of crochet to be worked in the back loop

scarf closeup

Mulberry Stitch Sampler Crochet Pattern

Summer 2014 Love of Crochet MagazineThe Mulberry Scarf first appeared on the cover of Love of Crochet magazine Summer 2014. It’s now available in our shop: Mulberry Stitch Sampler Scarf.

The pattern includes lots of photos, written directions, checkboxes to mark your progress, gauage and materials info, etc.

Available on Etsy: Here

Available in the Store

Learn more about the Mulberry Stitch Sampler Scarf in the shop.

Mulberry Stitch Sampler Scarf – Styling Options

Here are a few fun ways to style the Mulberry Stitch Sampler:

Long Pink Scarf

Star Stitch Scarf Woven in Front

Winners in Twins Face Off Purse Challenge

Winners in the Twins Face Off Purse Design Challenge Sponsored by Lion Brand

Dana BincerCongratulations Dana Bincer for designing the winning Bohemian Handbag. It received 70% of the votes! The twins are now tied having won one challenge each.

We received lots of comments in person and in social media about the yarn. So many people loved the bright colors. Our mom raved not only about the yarn but hinted that she would like the Bohemian Handbag as a Mother’s Day gift!

Winners of the Giveaway

Lion Brand Landscape YarnDrumroll please for the two winners in the Lion Brand Giveaway.

First Place: Janet C
Janet wins 3 skeins of Lion Brand yarn and the patterns for both purses.

Second Place: Lisa S
Lisa wins both patterns for the purses.

A big thank you to everyone for participating in the Twins Face Off Design Challenge. We are so thankful to Lion Brand for providing the yarn for the challenge and giveaway.

The patterns for both purses are available in the shop. Both the Bohemian Handbag and Flower Power Satchel are included in the one pattern. Learn more about the Handbags pattern.

The Handbags Pattern is available on Etsy.