Crochet Boston B – More Details
Boston fans asked us for more photos on how we crocheted the B we blogged about on our post: Boston Red Sox – Crochet B Applique.
Here are some tips and photos that may help.
Tips:
- First crochet this with a worsted weight yarn (4) and a J hook. Once you are comfortable with it, then switch to a C hook for a nice tight applique.
- There are slip stitches that are worked into a chain and the side of a single crochet. If that’s too complex, just sl st into the ch.
- Take liberty to wing it. If you aren’t liking how your B is looking…try inserting your hook in different places and using different stitches to get the look you want. It won’t hurt our feelings if you don’t follow our pattern to the letter. =)
Crochet Boston B Photo Help
“B” INSTRUCTIONS
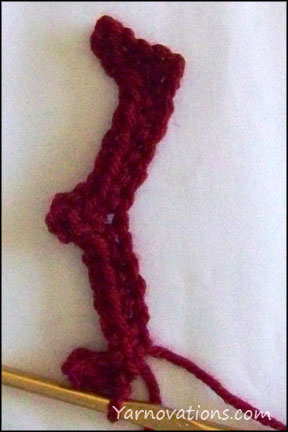
Ch 13
Row 1: Sc in 2nd ch from hook. Ch 3. Sl st into 2nd ch from hook. Ch 1. Work sl st in 1st ch made in the ch-3 and side of last sc made. 5 sc. In next st work sc, ch 3 and sc. 5 sc, ch 3. Sl st into 2nd ch from hook. Ch 1. Work sl st in 1st ch made in the ch-3 and side of last sc made.
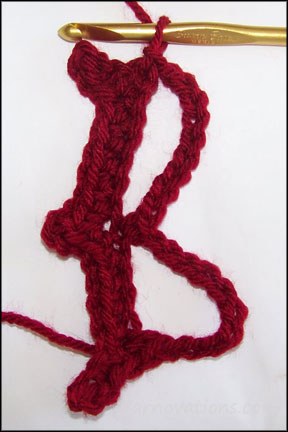
Row 2: Work on the other side of the foundation ch. Sc inc. Ch 10, skip 4 sts, sc (in sp opposite of ch-3 sp), ch 10, skip 5 sts, sc, sl st on top of work.
Row 3: Turn, skip the sl st. 6 sc, ch 3. Work sl st into 3rd ch from hook and side of last sc made. 4 sc, skip a st, sc dec, 3 sc. Ch 3. Work sl st into 3rd ch from hook and side of last sc made. 6 sc, 2 sl st (last sl st will be on top of the B). Finish off leaving a long tail for sewing.
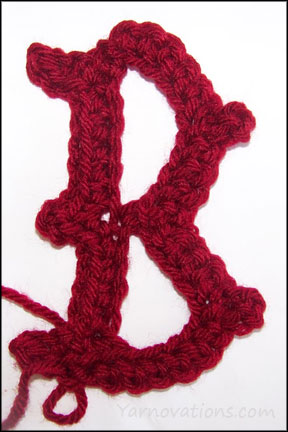
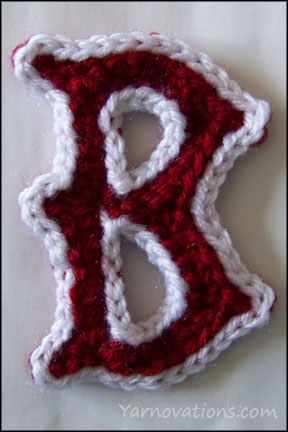
OUTLINE INSTRUCTIONS
There is no “right side” to the letter. Choose which side you want to be the top.
In the back loop only, loosely sl st around the outside of the “B” and the inside holes. If your sl sts are tight, the “B” will bunch making it harder to stretch the “B” to its desired form when pinning it to the hat. Finish off and weave in ends.
Attach the B to a little baby baseball cap. Check out the Baseball pattern set on Etsy.