Smiley Face Sugar Cookie Recipe and Crochet Smile Cozy
Make any day a happy day with this smiley face sugar cookie recipe and crochet smile cozy!
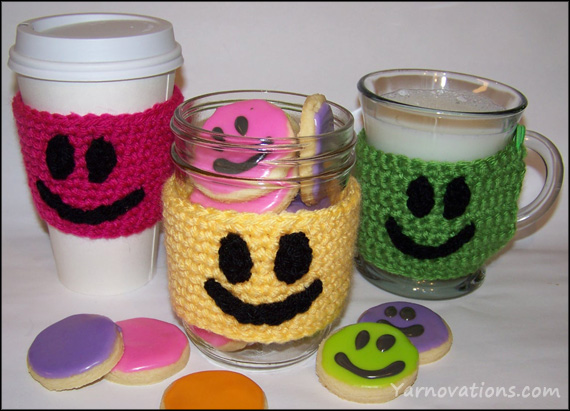
With the wild and crazy colors available in food coloring and yarn…this project will have you grinning from ear to ear all day long.
If a friend or family member needs a little pick me up…this smiley face duo is sure to do the trick!
Let’s start with the sugar cookies because they need time to refrigerate before baking.
 Smiley Face Sugar Cookie Recipe
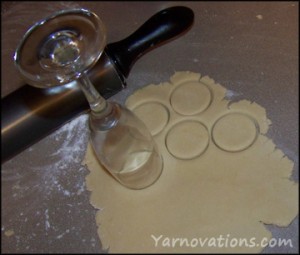
This sugar cookie recipe is quite sweet so we recommend that you make mini sugar cookies (approximately 2” diameter). We used a champagne flute as our cookie cutter.
COOKIE DOUGH INGREDIENTS:
- 3 cups flour
- 1 ¼ teaspoon baking powder
- 1 cup butter, room temperature
- ½ cup sugar
- ¼ cup agave nectar
- 1 egg
- ½ teaspoon vanilla
ICING INGREDIENTS:
- 3 cups powdered sugar
- ¼ cup milk
- ½ teaspoon vanilla
- Dash of salt
- Food coloring gel
 COOKIE DIRECTIONS:
- Preheat oven to 375°.
- With a wire whip, whisk together flour and baking soda in a bowl and set aside.
- In a separate bowl, beat butter, sugar and agave together until smooth.
- Stir egg and vanilla into butter mixture.
- Add flour mixture to butter mixture and mix until blended.
- Chill cookie dough for at least 30 mintues.
- Roll out dough on a floured surface until ¼” thick. Cut out cookie shapes (we used a champagne flute).
- Place cookies on cookie sheet and bake for 8 minutes.
- Place cookies on wire rack to cool.
- While cookies are cooling, make icing.
ICING DIRECTIONS:
- Pour all icing ingredients together into a bowl and stir until smooth.
- Separate icing into 5 bowls (or number of colors you’ll be using).
- Add a few drops of food coloring into one of the bowls and stir until color is consistent.
- Repeat step 3 for all the colors you want.
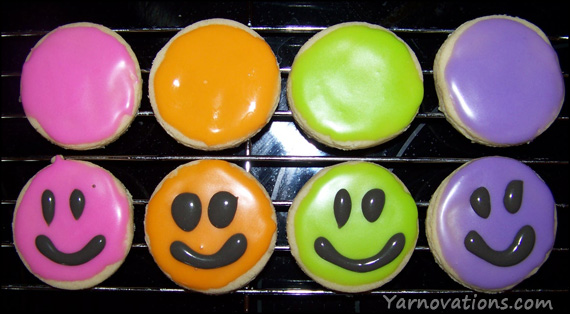
- Ice the cookies with the colored icing.
- For dark grey icing, add a bit of several colors of the food colorings into one of the bowls and stir, adding more of needed colors until you get the color desired.
- Place dark grey icing into a sandwich bag and squeeze it to one corner of the bag. With scissors, cup off the very tip of the corner. The bag can now be used as a pastry bag.
- Draw smiles onto cookies with pastry bag.
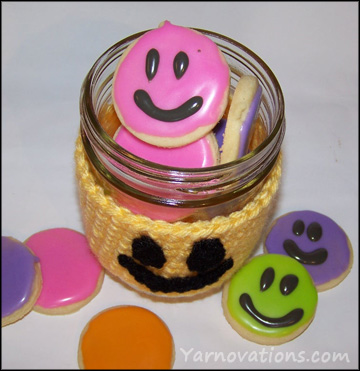
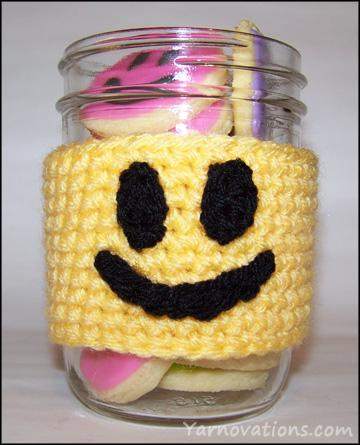 Crochet Smile Cozy
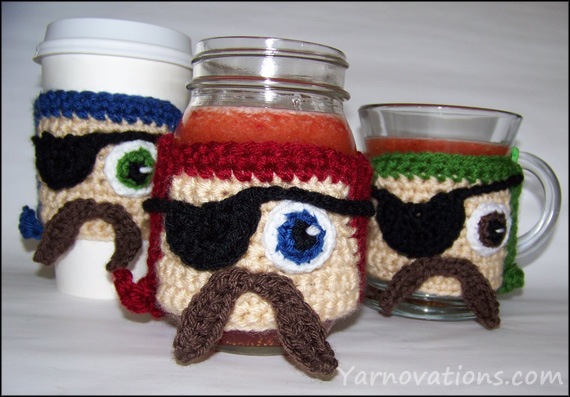
You can’t wipe the smile off the face of this mason jar cozy! No matter what you say or do, it will keep smiling that cheeky grin.
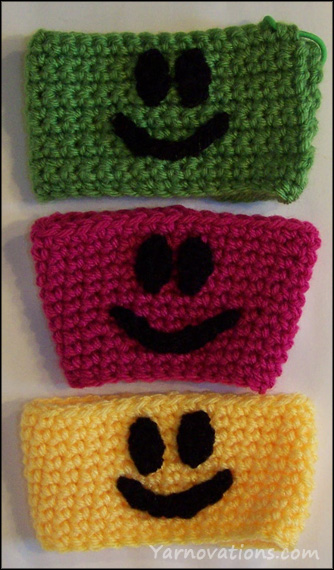
This is a great stash buster for all of the bright and cheerful colors you have in your remnant pile. We’ve used several fun colors from Vanna’s Choice yarn.
Skill Level: Easy
Stitches Used: Chain, Slip Stitch, Single Crochet, Double Crochet
Techniques Used: Crochet in the Round
SUPPLIES:
- Vanna’s Choice Yarn: Worsted Weight (4)
Yellow: DUCKIE, BLACK
(Pink: Berrylicious, Black)
(Green: Fern, Black) - Crochet Hook: H
- Yarn Needle for Sewing
- Mason Jar
COZY INSTRUCTIONS:
Duckie
Hook: H
Ch 34, join with a sl st.
Rnd 1-10: Sc around. (34)
Sl St. Finish off. Weave in end.
BlackEYE INSTRUCTIONS: (make 2)
Hook: H
Ch 3
Row 1: Dc in 3rd ch from hook.
Finish off leaving a long tail for sewing.
MOUTH INSTRUCTIONS:
Black
Hook: H
Ch 8
Finish off leaving a long tail for sewing.
ASSEMBLY INSTRUCTIONS:
- Pin then sew Eyes to cozy. Weave in ends.
- Pin then sew Mouth to cozy. Weave in ends.
More Cozies in Store
 Love this smile cozy? There are more seasonal, holiday and just for fun cozies in the store in our Crochet Cup Cozy eBook. We’ve created an entire collection with 28 designs one ebook.
Looking for the cup and mug version? They’re in the ebook.
Each design in the ebook has instructions to fit Mugs, Cups and Mason Jars. Every design has a delicious recipe or fun craft.
All 3 smiles pictured at the beginning of this post are in this ebook! AND the ebook includes 4 new designs – Dracula, Vampire, Mummy and Blue Jeans.
 Read more about the set:
Blog: Coffee Cup Cozy Collection
Store: Coffee Cup Cozy Collection
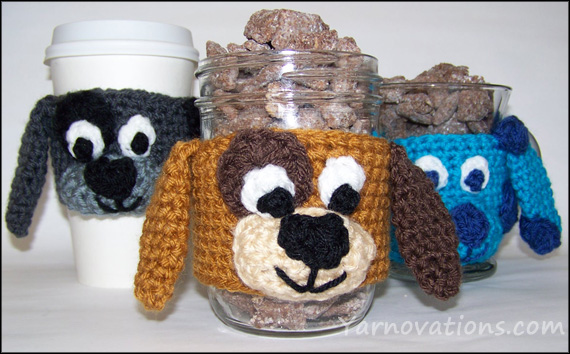
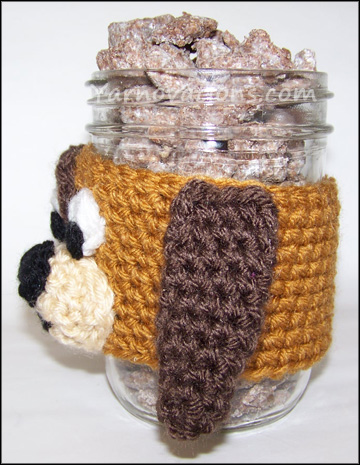
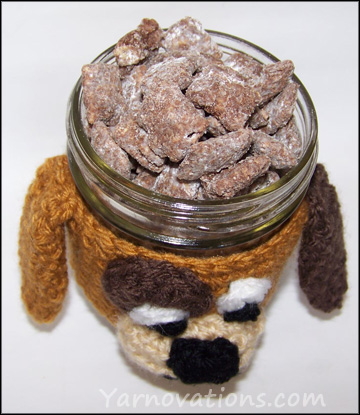 You’ll have the boss eating out of your hand (or mason jar) with this puppy chow recipe! He will lap it up and return begging for more. (PS: if you don’t bring a doggie bag to refill his jar, you can always share the recipe with him instead).
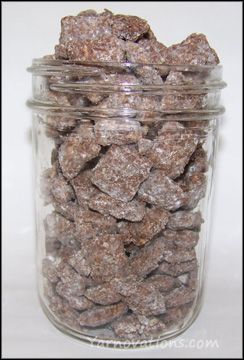 Place cereal in large pot. Set aside.
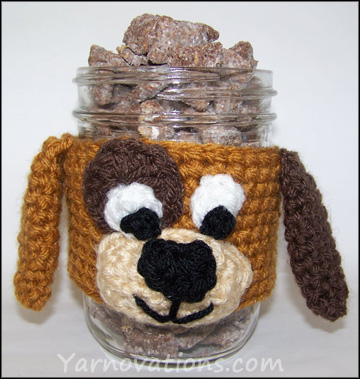 This crochet dog cozy is great for Boss’s Day or as a special gift for a dog loving friend. They’ll dig it and the treats that come with it.
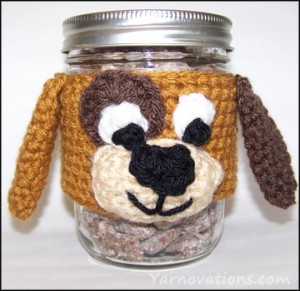 COZY INSTRUCTIONS
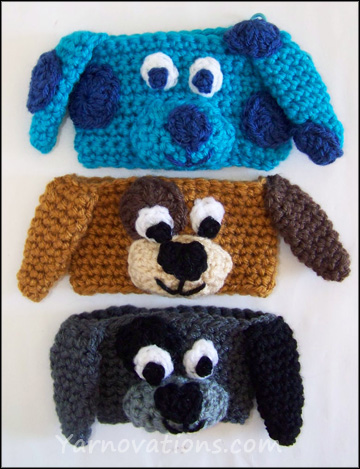
 PUPIL INSTRUCTIONS (make 2)

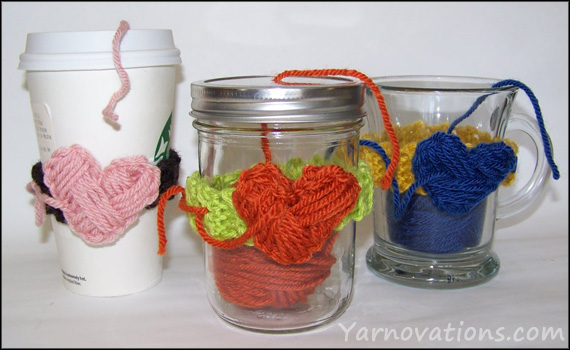
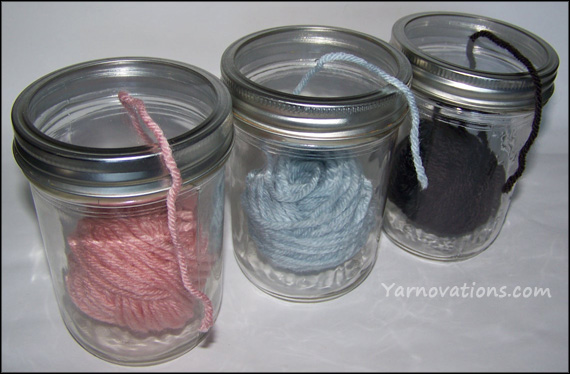
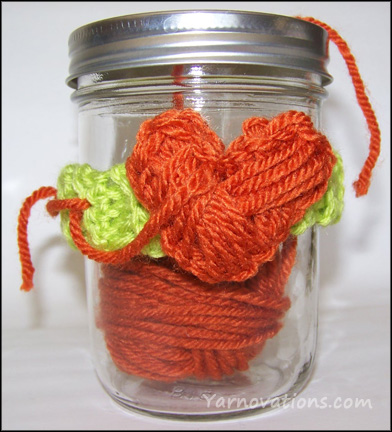 This mason jar yarn keeper is similar to yarn bowls and yarn keeper bags. The mason jar version has the added benefit of looking adorable on a shelf stuffed with yarn in a kaleidoscope of colors.
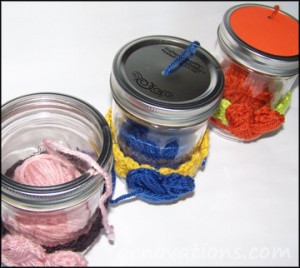

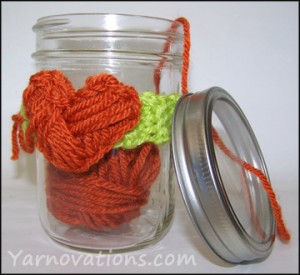 I Love Yarn Day Cozy
 HEART INSTRUCTIONS
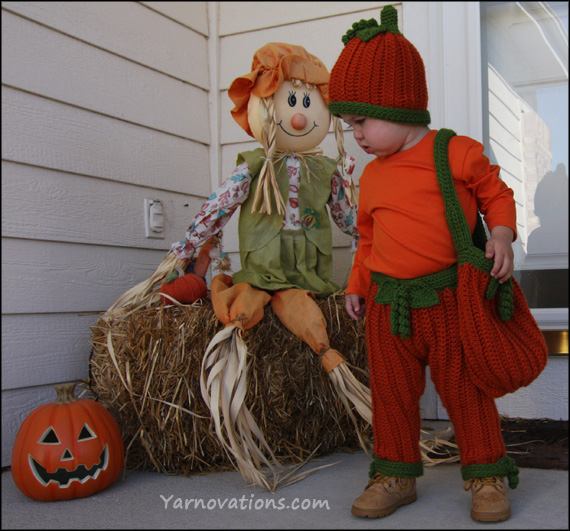
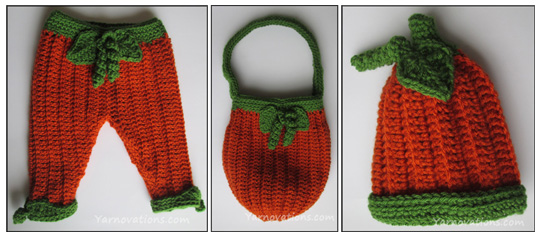
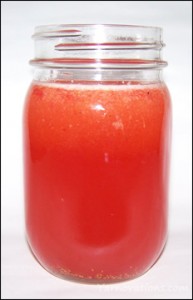 Strawberry Lemonade Recipe
 Juice lemons (best if they are room temperature) and strain to remove seeds.