Boston Red Sox – Crochet B Applique

Boston Red Sox – Crochet B Applique

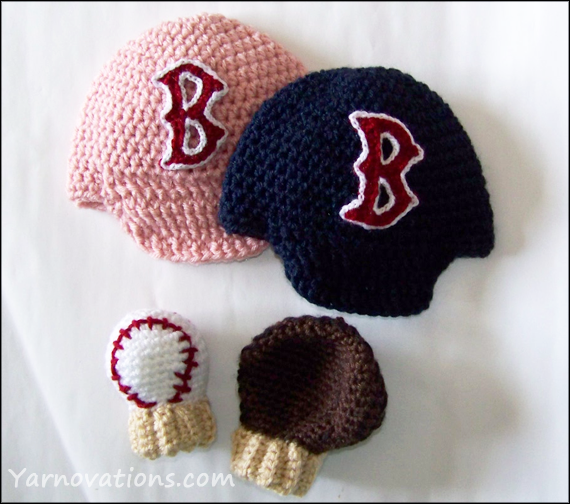
If you’re a Boston Red Sox fan, you’re gonna love this crochet B applique. It looks adorable on the Lil Slugger Baseball Set…which I crocheted for my nephew, who’s expecting his first child.

Lil Slugger Baseball Set pattern on Etsy.
Boston Red Sox Baby Set

No one knows the gender of the baby…so I crocheted two caps, a blue one and a pink one. If they  have a little girl…well, I’ll let them decide which cap they want to dress the baby in.

Not only is the cap adorable in pink, it’s also great for breast cancer awareness games!

Boston Red Sox – Crochet “B” Applique Pattern

I tried to make the B as close to the logo as possible. Though its not exact, I figure close is close enough. I hope you agree.

Skill Level: Easy

Stitches Used: chain, slip stitch, single crochet

Techniques Used: Crochet in the Round, Decrease

Size: 2.5″ tall x 1.5″ wide (when crocheted with C & 3 hooks)
3.5″ tall x 2.5″ wide (when crocheted with H & C hooks)

MATERIALS NEEDED:

  • Vanna’s Choice (Worsted Weight – 4):
    CRANBERRY, WHITE
  • Hook: C/2/2.75 mm
  • Hook: 3 / 2.10 mm
  • Yarn Needle for sewing

Because this applique is crocheted with a small hook, it can be a bit challenging to see the stitches. I would recommend that you practice this pattern with an H and C hook before attempting it with a C & 3 hook.

UPDATE: We took more photos of how to crochet the B on our post: Boston “B” – Photos of Each Row.
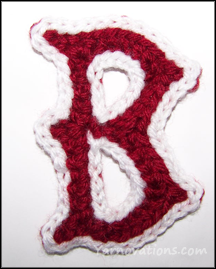
Crochet B Larger“B” INSTRUCTIONS

Cranberry

Hook: C

Ch 13

Row 1: Sc in 2nd ch from hook. Ch 3. Sl st into 2nd ch from hook. Ch 1. Work sl st in 1st ch made in the ch-3 and side of last sc made. 5 sc. In next st work sc, ch 3 and sc. 5 sc, ch 3. Sl st into 2nd ch from hook. Ch 1. Work sl st in 1st ch made in the ch-3 and side of last sc made.

Row 2: Work on the other side of the foundation ch. Sc inc. Ch 10, skip 4 sts, sc (in sp opposite of ch-3 sp), ch 10, skip 5 sts, sc, sl st on top of work.

Row 3: Turn, skip the sl st. 6 sc, ch 3. Work sl st into 3rd ch from hook and side of last sc made. 4 sc, skip a st, sc dec, 3 sc. Ch 3. Work sl st into 3rd ch from hook and side of last sc made. 6 sc, 2 sl st (last sl st will be on top of the B). Finish off leaving a long tail for sewing.

OUTLINE INSTRUCTIONS

White

Hook: 3

Use only 2 of the 4 strands of the yarn.

There is no “right side” to the letter. Choose which side you want to be the top.

In the back loop only, loosely sl st around the outside of the “B” and the inside holes. If your sl sts are tight, the “B” will bunch making it harder to stretch the “B” to its desired form when pinning it to the hat. Finish off and weave in ends.

Baseball closeupPin then sew “B” to hat or desired project with the Cranberry tail.

Learn more about the Lil Slugger Set.  Newborn pattern includes:

  • Baseball Cap
  • Baseball Mitt
  • Catchers Mitt
  • Ball Diamond Bib

Lil Slugger Set pattern on Etsy.
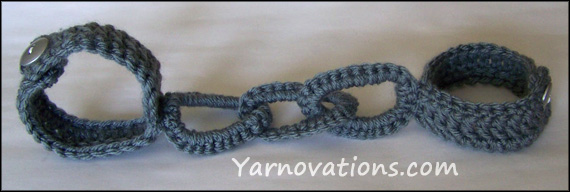
Crochet Handcuffs

Crochet Handcuffs

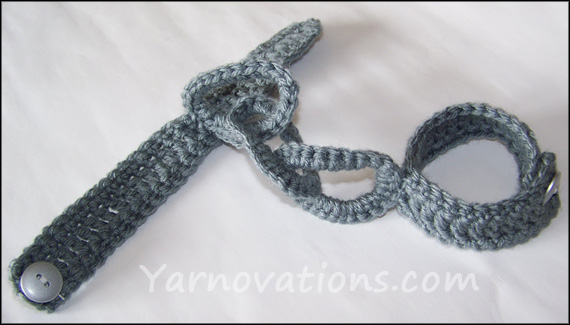
Crochet handcuffs remind us of a childhood full of make believe.

crochet handcuffs

We spent hours playing house, school and, of course, cops and robbers. We dodged behind trees and shot at each other with guns made from twigs. I can’t imagine what playtime would have been like if our mother had crocheted a pair of handcuffs for us!

If you have kids who love to run and play and make believe…picture what adventures they’ll have with a pair of handcuffs! Do they love heros like Dick Tracy and Andy Griffith? Or would they enjoy creating their own characters as local cops, private detectives or special agents?

These crocheted handcuffs are one size fits all. The button slips through any of the spaces in the row of double crochets.

Skill Level: Beginner

Technique Used: Crochet in Rows, Crochet around Chain

Stitches Used: chain, single crochet, double crochet

CROCHET HANDCUFF SUPPLIES:

  • Vanna’s Choice [worsted weight (4)] SILVER GREY – remnant (approx. 26 yards)
  • Hook: J/10/6.00 mm
  • (2) ¾” buttons
  • Yarn Needle
  • Needle and thread

CROCHET HANDCUFF PATTERN:

Chain Link Instructions (make 2)

Ch 15, Join with sl st. Ch 1

Rnd 1: Work 27 sc around the ch-15. Join with a sl st. Finish off leaving a long tail for sewing.

Joining (Center) Chain Link Instructions (make 1)

Ch 15: Put two links made previously onto chain. Join with a sl st so the two other links are captured. Ch 1.

Rnd 1: Work 27 sc around the ch-15. Join with a sl st. Finish off and weave in ends.

handcuffs assembled

Cuff Instructions (make 2)

Ch 31

Row 1: Sc in 2nd ch from hook. Sc across. (30)

Row 2: Ch 2, turn. Dc across. (30)

Row 3: Ch 1, turn. Sc across. Finish off and weave in ends. (30)

With a whip stitch, attach Row 15 of one handcuff to outer chain link using the tail of the outer link. Repeat with other handcuff.

Sew a button to the end of one of the handcuffs (either 2nd or 29th stitch). The row of DC will act as button holes. Repeat with other handcuff.

Wishing your kids lots of playtime adventures where all the bad guys are caught and the good guys live happily ever after!

These are toys only and are not to be used as a restraining device. Please play at your own risk.

Celebrate Armed Forces Day with Soup in a Jar

Celebrate Armed Forces Day with Soup in a Jar

We’re celebrating armed forces day with soup in a jar.

armed forces day

We are thankful for the men and women who serve our country in the military. We couldn’t resist creating an “MRE” (meals ready to eat) type recipe for this week’s mason jar.

This project is very simple to make. In fact, this cozy may be the easiest one’s we’ve made to date!

Armed Forces Day – Jar Cozy

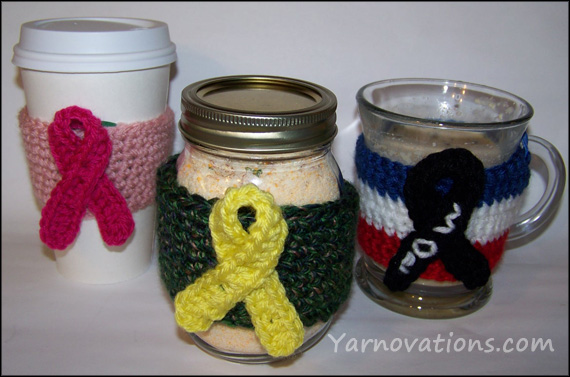
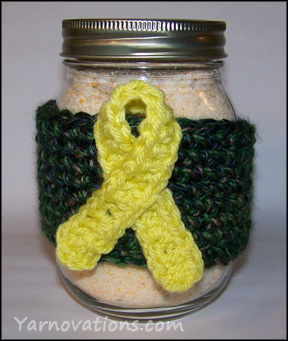
cozy and ribbonMany organizations use a crossed ribbon to help raise awareness of their cause. The yellow ribbon signifies a wish to see our troops come home. A black ribbon helps us remember prisoners of war and those missing in action.
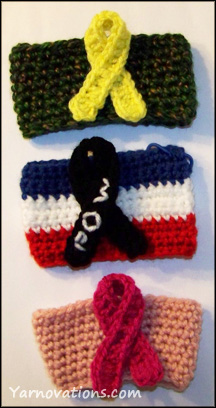
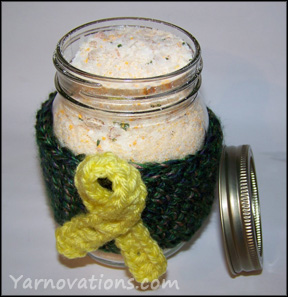
Though it’s not military related, we are demonstrating how this cozy can be used for most any cause with a change of color. The pink ribbon is used to raise breast cancer awareness.

Cozy Supplies

  • Vanna’s Colors (Bulky – 5): Pine
    Vanna’s Choice (Worsted – 4): Radiant Yellow
    (Black Ribbon: Vanna’s Choice – Scarlet, White, Colonial Blue, Black)
    (Pink Ribbon: Vanna’s Choice – Berrylicious, Pink)
  • Hook: H/8/5.00mm
  • Hook: K/10.5/6.5mm
  • Yarn Needle

cause ribbons

Cozy Instructions

Pine

Hook: K

Ch 28, Join with a sl st

Rnd 1-8: Sc around. (28)

Rnd 9: 2 sl st. Leave remaining sts unworked. Finish off and weave in ends.

Ribbon Instructions

Radiant Yellow

Hook: H

Ch 30

Row 1: Work in the back loop only. Dc in 3rd ch from hook, dc across. Ch 2, sl st into base of last st made. Finish off leaving a long tail for sewing.

Embroider if desired.

Cross ribbon and sew to cozy. Weave in ends.

“Just Add Water” Soup in a Jar

soup in a jarMost soup in a jar recipes require additional ingredients like meat, oil and dairy when the soup is being prepared. Those extra ingredients aren’t usually available to those who are roughing it. So we came up with the following “just add water” recipe.
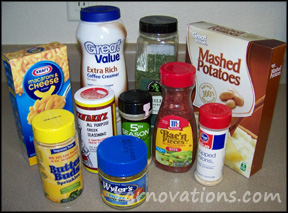
As a side note: this recipe would be great for those who are camping or backpacking. And it would be a great snack item or quick meal for the kids, too!

Potato Cheese Soup Recipe

  • 1 ½ cups instant mashed potatoes
  • 1 cup instant coffee creamer (or powdered milk)
  • 1/3 cup cheddar cheese powder (or 1 ½ packets of Kraft Mac and Cheese packets)
  • 1 ½ teaspoons chicken bouillon
  • 1 teaspoons dried onion flakes
  • ½ teaspoon dried parsley
  • ¼ teaspoon garlic
  • ¼ teaspoon pepper
  • ¼ teaspoon Greek Seasoning (or seasoning salt)
  • ¼ cup imitation bacon bits (optional)

ingredients for soup in a jarMix all ingredients together thoroughly. Store in mason jar.

To serve, mix ½ cup soup mix with 1 cup boiling water. (For a thicker soup, use ¾ cup soup mix to 1 cup water).

Note: The imitation bacon bits are an over powering ingredient. Only add them if you know you like them.

“Just add water” Recipe Alternatives

There are other “just add water” foods you can use instead of the Potato Cheese Soup. If you’re looking for a simple alternative – buy pre-mixed foods. Be sure to include cooking instructions if these are a gift item.

  1. Pancake Mix (Aunt Jemima)
  2. Brownie Mix (Krusteaz)
  3. Cornbread Mix (Marie Callender’s)

More Cozies in Store

coffee cup cozy patterns ebookLove this cause ribbon cozy? There are more seasonal, holiday and just for fun cozies in the store in our Crochet Cup Cozy eBook. We’ve created an entire collection with 28 designs one ebook.

Looking for the cup and mug version? They’re in the ebook.

Each design in the ebook has instructions to fit Mugs, Cups and Mason Jars. Every design has a delicious recipe or fun craft.

All 3 of the cause ribbons pictured above are in this ebook! And there are 4 new designs – Dracula, Vampire, Mummy and Blue Jeans.

Available in the StoreRead more about the set:

Blog: Coffee Cup Cozy Collection

Store: Coffee Cup Cozy Collection

Crochet Mother’s Day Gift

Happy Mother’s Day, Mom!

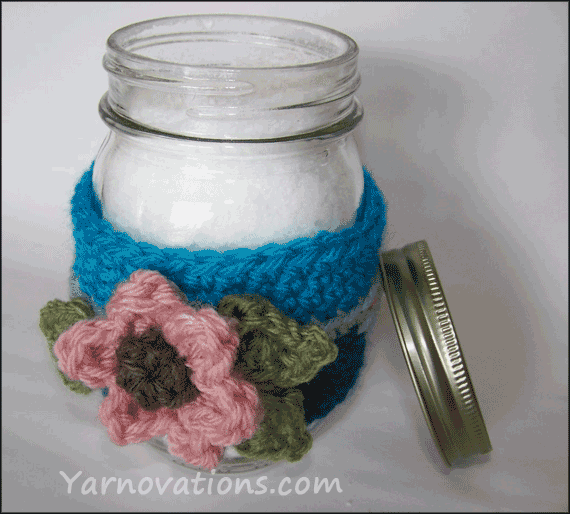
We celebrated Mother’s Day a week early…so I can reveal the mason jar cozy I made for her jar of bath salts.

mothers day bath salts

This cozy follows the FREE pattern on our post: How to make bath salts and a crochet flower cozy. This Mother’s Day cozy was crocheted with Vanna’s Choice yarns with a strong emphasis on teal colors to coordinate with my mother’s bathroom.

Colors used – Vanna’s Choice:

  • Pink
  • Silver Blue
  • Dusty Green
  • Taupe
  • Sapphire
  • Aqua

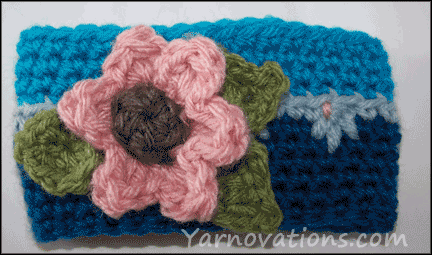
flower and leaf mason jar cozyThe bath salts are super easy to make. The recipe and the directions for the flower cozy are free on the post: How to make bath salts and a crochet flower cozy.

For this particular cozy, I added leaves. The pattern for those are below:

CROCHET LEAF PATTERN:

Hook: H

Ch 5

Rnd 1: Dc inc in 3rd ch from hook. Sc inc, sl st. Ch 2. Turn to other side of foundation Row. Sl st, sc inc, 3 dc in last st. Join with sl st. Finish off leaving a long tail for sewing.

That’s it. Make three (or as many as desired).

Wishing a Happy Mother’s Day to our mom and yours.

Enjoy!


How to Make Bath Salts and a Crochet Flower Cozy

How to Make Bath Salts and a Crochet Flower Cozy

how to make bath salts

Learn how to make bath salts and pamper yourself (and your mom). Store the crystals in a mason jar and wrap it with a fun crochet flower cozy. This is a beautiful Mother’s Day gift idea. (Mom, if you’re reading this…I guess you know what you’re getting for your special day!)

The bath salts are surprisingly simple to make. We’ll start with them because you’ll want them to be completely dry before storing (otherwise the salt may get clumpy).

How to Make Bath Salts

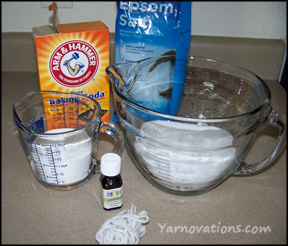
bath salts ingredientsAs I mentioned, learning how to make bath salts is easy. The hardest part is figuring out what scent you want! Think about who the bath salt is for. If it’s for you, do you like floral? Do you want something relaxing or energizing? Do you like a lot of scent or just a hint of it?
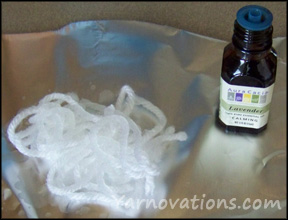
Essential Oils are available in natural grocery stores. The bottles will list their scent as well as their characteristics. Some will even list whether they work well in a bath. Common scents include: peppermint, lavender, rosemary, eucalyptus and orange.

Scented Bath Salts Ingredients:

  • 2 cups Epson Salts
  • 1/2 cup Baking Soda (optional)
  • Essential Oil (as desired)
  • Scraps of Yarn
  • Aluminum foil
  • Cookie sheet

Note: Sea Salt can be used in exchange or in addition to Epson Salt. Table salt cannot be used.

Baking soda is a skin softener and is an optional ingredient. It can be used in equal parts to the salt.

scented yarnScented Bath Salts Directions:

  1. Mix salt and baking soda together.
  2. Sprinkle several drops of Essential Oil onto scraps of yarn. Stir yarn through bath salt mixture to desired strength of scent.
  3. Repeat Step 2 if needed.
  4. Line cookie sheet with aluminum foil. Spread salt mixture onto cookie sheet to dry.
  5. Periodically stir salts. Allow to dry completely (overnight).
  6. Store in mason jar.

How to Make a Crochet Flower Cozy for Mason Jar of Bath Salts

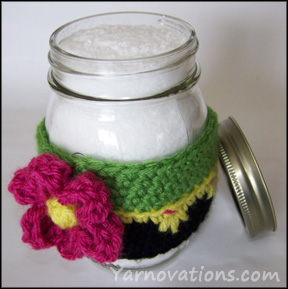
mothers day gift ideaThis crochet flower reminds me of the annual tradition my family had of planting flowers in my mother’s yard on Mother’s Day. That tradition was the inspiration for this cozy.
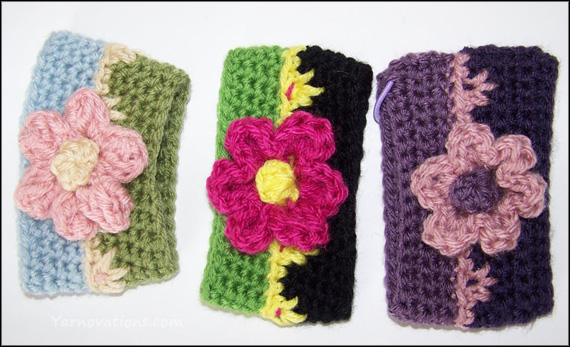
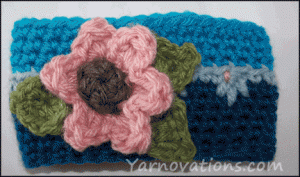
This crochet flower can be sewn directly to the cozy or affixed with a pin (something like a coiless pin would work well). Using a pin will allow the flower to be removed and used to decorate other things.

This is a great stash buster project. We’ve used Vanna’s Choice yarn (medium worsted weight). We love her blend of bright colors and pastels.

Skill Level: Intermediate

Stitches Used: Slip Stitch, Single Crochet, Double Crochet, Treble Crochet

Technique Used: Crochet in the Round. Cluster Stitch

Note: Replace the cluster stitch with a single crochet and this Intermediate pattern would be rated Easy.

CROCHET FLOWER SUPPLIES

  • Vanna’s Choice: Black, Raspberry, Radiant Yellow, Fern
    (Pastel: Pink, Silver Blue, Dusty Green, Beige)
    (Purples: Dusty Rose, Dusty Purple, Purple)
  • Crochet Hook: H
  • Yarn Needle

COZY INSTRUCTIONS

Cluster Stitch Instructions:

Cluster Stitch: Insert hook into next stitch (the current working stitch), YO, draw through stitch, YO, pull through one loop on hook, insert hook in the stitch one row below and one stitch back, YO (pulling yarn from the inside of the project), pull through stitch, YO, pull through one loop on hook, insert hook two rows below the current working stitch  (pulling yarn from the inside of the project), YO, draw through stitch, YO, pull through one loop on hook, insert hook in the stitch one row below and one stitch ahead of the current working stitch (pulling yarn from inside the project), YO, pull through stitch, YO, pull through one loop on hook, YO, pull through all five loops on hook. *Note, the next working stitch is under the last YO.

Black

Ch 34, join with a sl st.

Rnd 1-4: Sc around. (34)

Rnd 5: Sc around. Change color to Radiant Yellow with sl st. Ch 1. Finish off Black and weave in ends. (34)

Rnd 6: 2 sc, *cluster st, 3 sc* around. End with 3 sc. Change color to Fern with sl st. Ch 1. Finish off Radiant Yellow and weave in ends. (34)

Rnd 7: Working in the back loop only, sc around. (34)

Rnd 8-9: Working in both loops now and throughout, sc around. (34)

Rnd 10: 33 sc, sl st. Finish off and weave in ends. (34)

With 12” length of Raspberry yarn, embroider a small stitch into the center of the cluster st.

cozies flat

FLOWER INSTRUCTIONS

Center

Radiant Yellow

Ch 3

Rnd 1: 5 dc in third ch from hook. (Count ch-3 as first dc). (6)

Rnd 2: Working in back loops only, sc around. Finish off leaving a long tail for sewing. (6)

Attach Raspberry to the front loop of any stitch of Rnd 2.

Rnd 3: Work the following stitches in the front loop of each stitch around, (sc, dc, trc, dc, sc). Finish with a sl st in the first sc made. Finish off and weave in end. (6 petals made)

Sew flower to cozy.

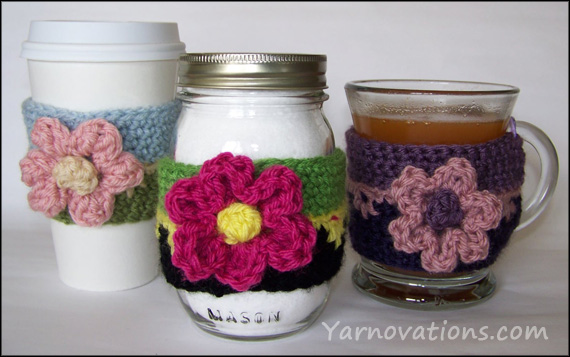
flower and leaf mason jar cozyNote: Turn the edges of the flower under for a puffy looking flower (as seen in the pastel cozy on the far left). Or leave ends of Rnds out for a layered look (like the two on the right).

UPDATE: I recently added leaves to this cozy. You can get the pattern to the leaves on the Crochet Mother’s Day Gift post.

More Cozies in Store

coffee cup cozy patterns ebookLove this flower cozy? There are more seasonal, holiday and just for fun cozies in the store in our Crochet Cup Cozy eBook. We’ve created an entire collection with 28 designs one ebook.

Looking for the cup and mug version? They’re in the ebook.

Each design in the ebook has instructions to fit Mugs, Cups and Mason Jars. Every design has a delicious recipe or fun craft.

All 3 flowers pictured at the beginning of this post are in this ebook! AND the ebook includes 4 new designs – Dracula, Vampire, Mummy and Blue Jeans.

Available in the StoreRead more about the set:

Blog: Coffee Cup Cozy Collection

Store: Coffee Cup Cozy Collection

Mason Jar soap Dispenser Update

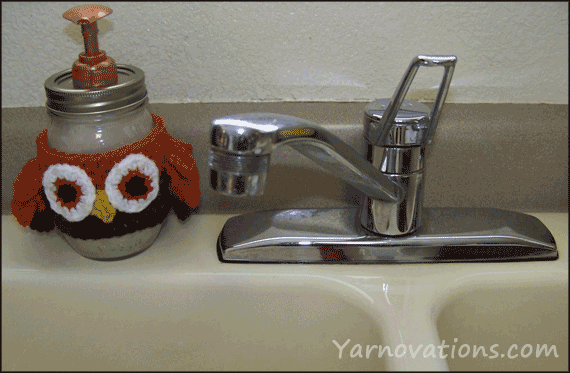
Did you make the mason jar soap dispenser? I did. I have mine by my kitchen sink. I’d like to share with you what I discovered after a few months of use.

mason jar soap dispenser by kitchen sink

First, I have to admit: I love my mason jar soap dispenser. I do most of my hand washing by the kitchen sink, so it’s been a godsend (that word may be a bit dramatic…but I really do love it!). This would also be a cute dispenser for dish soap (just sayin’).

The pump worked great, the soap flowed smoothly (no air bubbles), and it didn’t clog.

But after a few months of use, when the soap was nearly used up, I noticed a brown fleck floating in the soap. That’s kind of strange since I hadn’t opened the dispenser since filling it with soap. I had my suspicions of what it must be.

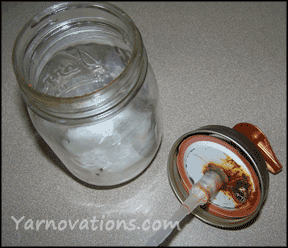
Rust on LidYep, it’s rust. The scratches I put on the inside of the lid when drilling the hole for the pump had all turned into rust. Not a pretty picture.
But, that’s ok. Now that I know about the problem, I would modify the soap dispenser as follows:

  1. Make a ring from plastic packaging , or
  2. Use a plastic canning jar lid instead of a metal one, or
  3. Replace the metal ring once a quarter

If you are doing option 1, simply use a permanent marker to trace around the metal lid on a piece of plastic packaging. Cut it out and follow the directions outlined in the mason jar soap dispenser post we wrote a few months ago.

This issue with rust and metal is not a new problem (though it’s new to me). A week or so ago I went to an antique mall with a girlfriend. While there, I stopped to use the restroom and saw a mason jar soap dispenser by the sink! The lid appeared to be made of tin. Curiosity got the better of me and I took a peak under the lid to see if it at a rust problem.

The inside of the lid was not copper/red/brown with rust, but it was black and murky leading me to believe that it had a similar unhappy reaction to being used as a soap dispenser.

Bottom line, mason jars are a fun way to make soap dispensers…but a little extra care with the lid will make a difference between one that is used for a short while vs. one that is used long term.

If you missed it, you can see our original post on how to make a mason jar soap dispenser with crochet owl cozy we posted a few months ago. Enjoy!

Summer Scarf – Single Stranded Broomstick Cowl

Summer Scarf – Single Stranded Broomstick Cowl

Summer Scarf

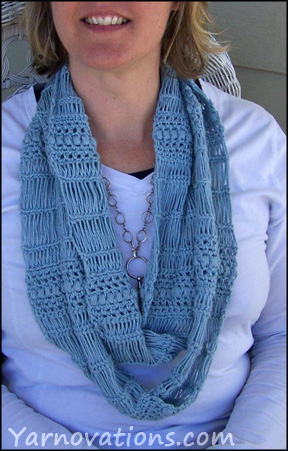
As the temperatures start to rise, a summer scarf project is just the thing. We’ve whipped up our Broomstick Lace and Puff Stitch Cowl in a soft and luxurious Milky Whey yarn.  Oh la la, it’s heavenly!

Broomstick Lace and Puff Stitch Cowl pattern on Etsy.

Not only does the Milky Whey yarn have beautiful drape, it’s extremely soft and comfortable to work with and feels silky and smooth around the neck. It’s my number one go-to scarf these days!

The light and airy single stranded broomstick lace pattern makes this a nice summer scarf. The cowl pictured is extra long…allowing it to wrap around the neck once or twice. For a cooler version (for those really hot summer days) I would recommend crocheting a shorter or thinner piece.

Summer Scarf – The Pattern

milky whey broomstick closeThis summer scarf was made following the Broomstick Lace Scarf Pattern. It’s amazing how different a piece will look when you simply change the yarn!

The Milky Whey pictured has really nice drape. And if you can get your hands on some, I would highly recommend it. You won’t be disappointed, promise! Nice alternatives would be bamboo or silk (or a cotton blend). I think the stitch pattern really stands out with a yarn that has little elasticity.

The repeat in this pattern is easy to memorize. This is a great project to toss in a bag and take with you as you run errands. It uses only a few stitches – chain, single crochet, puff stitch and broomstick lace.

We have created a couple of quick videos that demonstrate the stitches used in this piece. You can see them on YouTube:

Broomstick Lace and Puff Stitch Cowl pattern on Etsy.

Enjoy!

Administrative Professionals’ Day Gift Idea

Administrative Professionals’ Day Gift Idea

Administrative Professionals Day

We’ve create a fun gift idea for Administrative Professionals’ Day. It’s colorful and cheerful and will look adorable on your Admin’s desk. (Of course, this is a cute gift idea for other special days like Mother’s Day or birthdays. This would also be a fun “just because” gift for a gardening friend…just sayin’).

Flowers were a traditional present back in the day when I was receiving gifts for Secretaries Day. Now that it’s called Administrative Professionals’ Day, I still think flowers make the perfect gift. But this mason jar planter with a crocheted cozy adds a new twist to the gift! Love it!

Administrative Professionals’ Day Gift Idea – Mason Jar Planter

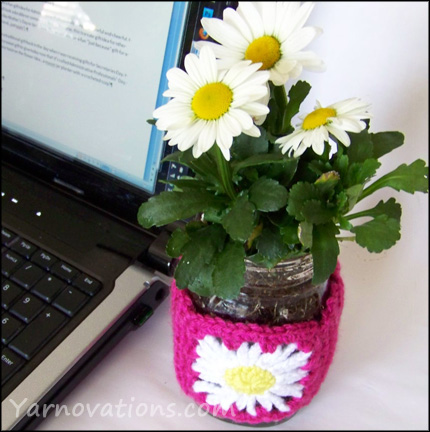
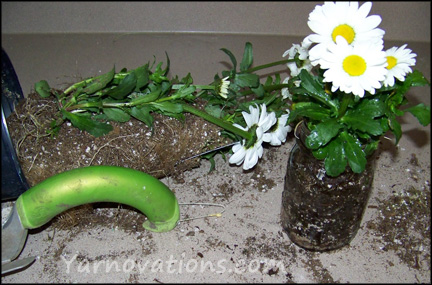
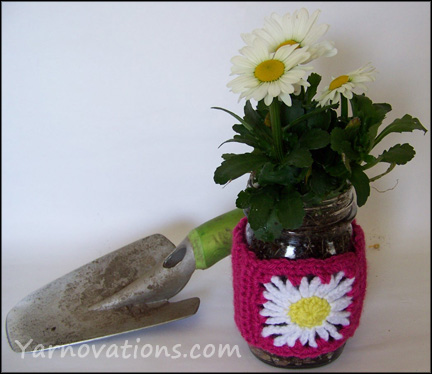
Daisy Mason Jar with ComputerFor those Administrative Professionals who love flowers, you simply can’t go wrong with a mason jar planter! We’ve used daisies in our jar…which could be transplanted right from the jar into the garden. Annuals or herbs would be nice alternatives.
SUPPLIES:

  • 1 mason jar
  • 1 plant or herb
  • A few rocks or glass beads
  • Potting soil
  • Charcoal (optional)

A note about container gardening:

Charcoal is often used in container gardening to cut down on bacteria. It is also an additive that helps plants thrive. Please note that charcoal used in gardening is not the same as charcoal used for grilling. Visit your local gardening center for charcoal to use in container gardening. Charcoal is only needed for those plants that will be staying in the jar long term.

Container Gardening

DIRECTIONS:

  1. Place 1” of rocks or glass beads in bottom of jar.
  2. Place ½” of charcoal on top of rocks (optional).
  3. Fill jar with dirt and flower.
  4. Water the plant just enough that water reaches the bottom of the jar but does not pool.

Administrative Professionals’ Day Gift Idea – Daisy Mason Jar cozy

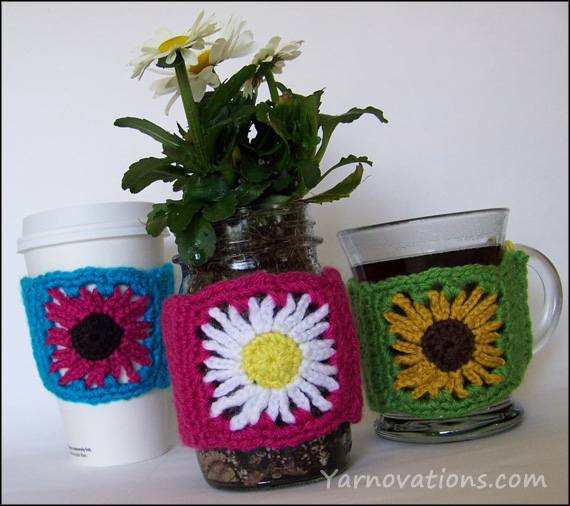
Mason Jar PlanterThe potted plant is a beautiful Administrative Professionals’ Day gift item all by itself. We think a colorful daisy cozy will add more pizzazz to the gift…and this cozy doubles as a cup cozy!
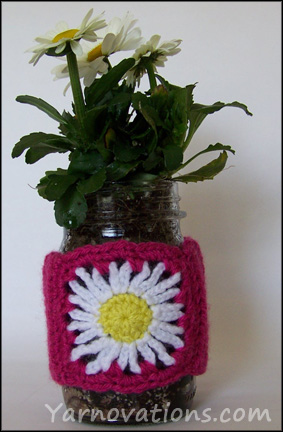
This project is a great way to use up your yarn stash. We’ve used Vanna’s Choice. She has lots of bright and beautiful color options.

Skill Level: Easy

Techniques Used: Crochet in Rows and Rounds.

Stitches Used: Chain, Single Crochet, Half Double Crochet

SUPPLIES:

  • Vanna’s Choice Yarn: RASPBERRY, RADIANT YELLOW, WHITE
    (Yellow Flower: CHOCOLATE, MUSTARD, FERN)
    (Pink Flower: AQUA, RASPBERRY, ESPRESSO)
  • Crochet Hook: C,F,H
  • Yarn Needle

COZY INSTRUCTIONS

Crochet Mason Jar CozyRadiant Yellow

Hook: F

Ch 3

Rnd 1: 12 hdc in 3rd ch from hook. Join with a sl st. (12)

Rnd 2: Sc around. Join with a sl st. (12)

Finish off and weave in ends.

Attach White to any st.

Use Hook: C

Rnd 3: Ch 14. Sl st in same st from Rnd 2 (14th ch from hook). Sl st. (corner petal made) *Ch 9, sl st into same st from Rnd 2 (9th ch from hook). Sl st.* Twice. (2 petals made). Ch 14. Sl st in same st from Rnd 2 (14th ch from hook). Sl st. (corner petal made) *Ch 10, sl st into same st from Rnd 2 (10th ch from hook). Sl st.* Twice. (2 petals made). Repeat from beginning to make a total of 12 petals. Sl st into base of 1st petal made. Finish off and weave in ends. (164)

Note: The ch-9 petals are the top and bottom of the flower.

Attach Raspberry around corner petal (Ch-14 space). Attach it to the corner that has two ch-9 petals to the left.

Use Hook: F

Rnd 4: Work sc, ch 1, sc around corner petal. Ch 2. *2 sc around next petal, ch 2.* Twice. Repeat from beginning 3 more times to work around flower. Join with a sl st. (52)

Rnd 5: Work sc, ch 1, sc in ch-1 corner space. Skip a st. *3 sc around ch-2 space, skip 2 sts* 3 times. Repeat from beginning to work around the flower.
Join with a sl st. (48)

Use Hook: H

Row 6: Sl st into ch-1 space. Ch 2 (count as 1st st), turn. 10 hdc, hdc dec (into sc and ch-1 space). (12)

Row 7-23: Ch 2 (count as first st), hdc across. (12)

Finish off and weave in ends.

Join ends with whip st across.

More Cozies in Store

coffee cup cozy patterns ebookLove this daisy cozy? There are more seasonal, holiday and just for fun cozies in the store in our Crochet Cup Cozy eBook. We’ve created an entire collection with 28 designs one ebook.

Looking for the cup and mug version? They’re in the ebook.

Each design in the ebook has instructions to fit Mugs, Cups and Mason Jars. Every design has a delicious recipe or fun craft.

All 3 daisies pictured at the beginning of this post are in this ebook! AND the ebook includes 4 new designs – Dracula, Vampire, Mummy and Blue Jeans.

Available in the StoreRead more about the set:

Blog: Coffee Cup Cozy Collection

Store: Coffee Cup Cozy Collection

Happy Easter – Bunnies, Bunnies and More Bunnies

Our Bunny Cup Cozies Have Proliferated – Just in Time for Easter!

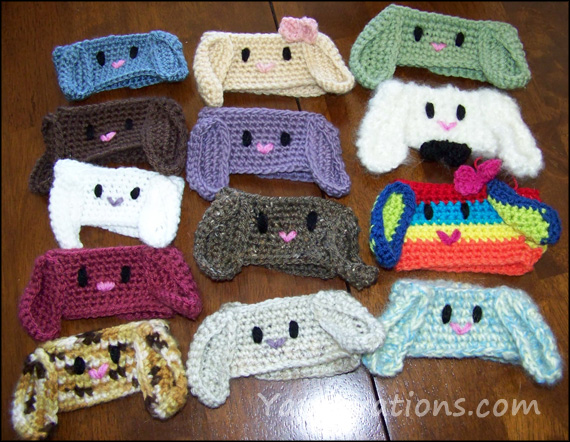
Bunnies are known to multiply rapidly. And our cup cozies are no exception. Our 4 bunny cozies have turned into a multitude of bunnies!

lots of bunny cozies

bunny bracletInstead of using wine charms at our Easter gathering, we created cup cozies! Not only were these a cheerful table decoration, they also helped people identify their drinks!

The cozies are cute as bracelets and sleeve catchers, too!

This crochet bunny is a free pattern as part of our mason jar series. We love it!

Hoppy Easter!

Dirt and Worms Recipe with Leaf Cozy for Earth Day

Dirt and Worms Recipe with Leaf Cozy – an Earth Day Activity

This Dirt and Worms Recipe is a delicious way to celebrate a lot of special days. It is particularly scrumptious for Earth Day, but would be a fun snack for the first day of Spring or Fall, April Fool’s Day, or any rainy day when worms appear from the ground. It’s kid friendly to make and to eat!

Dirt and Worms Recipe

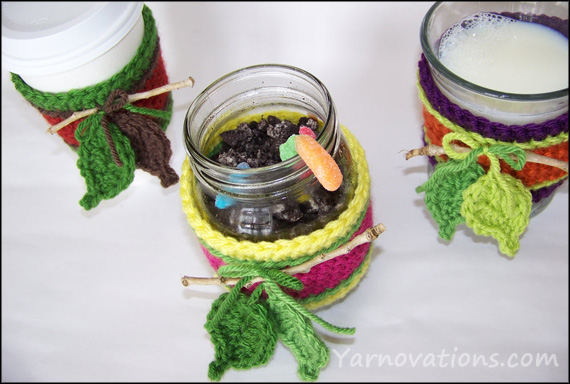
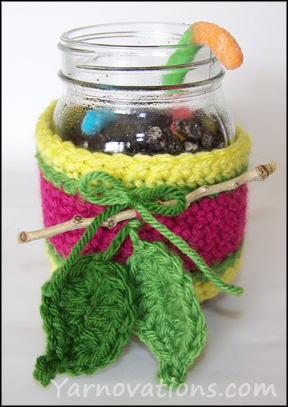
To further dress up the snack, we’ve crocheted a twig and leaf cozy. Change the colors to match the special holiday you’re celebrating. Use bright colors for Spring or Earth tones for Fall. Earth Day calls for the use of recycled yarn…in any color!

Let’s start with the snack. While it sets up we can crochet a leaf cozy.

Dirt and Worms Recipe

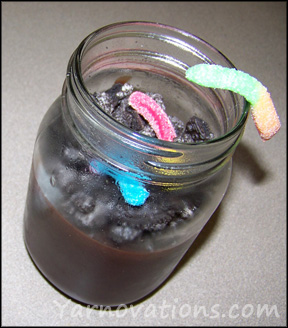
dirt and worms in mason jarOur versions of the Dirt and Worms Recipe is a chocolate lovers delight. We’re not diluting the pudding with whipped cream. We want a nice rich dark chocolate colored dirt. This is a quick and simple recipe for kids in the kitchen.
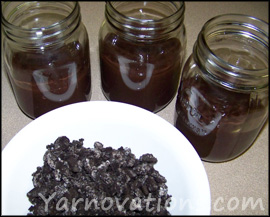
Supplies:

  • 1 – 5.9 oz Instant Pudding and Pie filling – Chocolate (Jello Brand pictured)
  • 3 cups cold milk
  • 1 package Oreo cookies (Double Stuffed pictured)
  • 1 package gummy worms (sour worms pictured)
  • 3 Mason Jars

Pudding and Oreo CrumblesDirections:

  1. Mix pudding according to box.
  2. Pour approximately 1 cup of pudding into each mason jar.
  3. Set aside (or refrigerate if needed) to setup – refrigerate if not using right away.
  4. Place 9 Oreo cookies (3 per serving) into resealable bag and crush with rolling pin or hammer.
  5. Just before serving pudding, sprinkle Oreo crumbs on top of pudding and top with gummy worms.

Earth Day Activity – Crochet Leaf Cozy

Leaf CozyThis leaf cozy is a cute Earth Day activity. Not only is the cozy fun to crochet, but the twig and crocheted leaves are a great reminder of how awesome our planet is. Using recycled yarn makes this an earth friendly activity. Using this cozy instead of disposable coffee cup sleeves is also earth friendly.
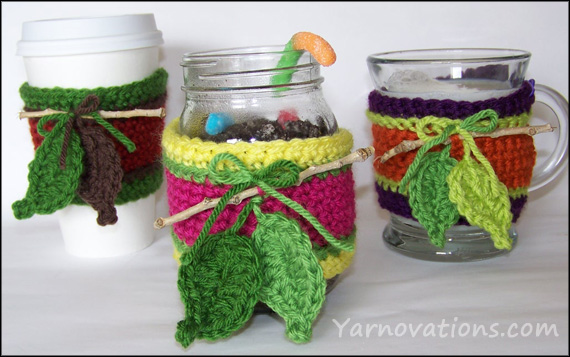
This is a great stash buster…which is very earth friendly. We’ve used Vanna’s Choice. There really are too many colors to choose from! We reigned ourselves in with only three cozies.

Skill Level: Easy +

Stitches Used: Chain, slip stitch, single crochet, half double crochet, double crochet

Techniques Used: Crochet in Rows, Crochet in the Round, Crochet in Back Loop, Crochet in Both Loops

Supplies:

  • Vanna’s Choice: RADIANT YELLOW, RASPBERRY, FERN, KELLY GREEN
  • (Autumn Cozy: Kelly Green, Brick, Chocolate)
  • (Fall Cozy: Eggplant, Terracotta, Fern, Radiant Lime)
  • Mason Jar
  • Twig (4” Length)

Leaf Cozy Instructions

Radiant Yellow

Hook: H

Ch 34, join with a sl st.

Rnd 1: Sc around. (34)

Rnd 2: Sc around. Join and change color to Fern with a sl st. (34)

Rnd 3: Sc around. Join and change color to Raspberry with a sl st into back loop of first st made in this Rnd. (34)

Rnd 4: Work in back loops only. Sc around. (34)

Rnd 5-8: Work in both loops. Sc around. (34)

Rnd 9: Work in both loops. Sc around. Join and change color to Fern with a sl st. (34)

Rnd 10: Sc around. Join and change color to Radiant Yellow with a sl st into back loop of first st made in this Rnd. (34)

Rnd11: Work in back loops only. Sc around. (34)

Rnd 12: Work in both loops. Sc around. (34)

Sl St. Finish off and weave in ends.

Insert twig under any st of Rnd 9.

leaf cup cozies

Leaf Instructions (make 2)

One Fern and One Kelly Green (or colors desired)

Hook: H

Ch 7

Rnd 1: 3dc in 3rd ch from hook (count first two as the first dc), 2 dc in next st, hdc, sc, sl st in last st, ch 3, sl st in third ch from hook. Continue working on the other side of the foundation ch. Sl st in the firs st, sc, hdc, 2 dc in next st, 4 dc in last st. Join with the first dc of this Rnd. (one leaf made)

Finish off leaving a long tail for attaching to cozy.

Attach to twig by tying a bow with the tails from the leaves.

More Cozies in Store

coffee cup cozy patterns ebookLove this leaf cozy? There are more seasonal, holiday and just for fun cozies in the store in our Crochet Cup Cozy eBook. We’ve created an entire collection with 28 designs one ebook.

Looking for the cup and mug version? They’re in the ebook.

Each design in the ebook has instructions to fit Mugs, Cups and Mason Jars. Every design has a delicious recipe or fun craft.

All 3 leaf cozies pictured at the beginning of this post are in this ebook! AND the ebook includes 4 new designs – Dracula, Vampire, Mummy and Blue Jeans.

Available in the StoreRead more about the set:

Blog: Coffee Cup Cozy Collection

Store: Coffee Cup Cozy Collection