Baby Photo Shoot with Aviator Hat by Traci Locke

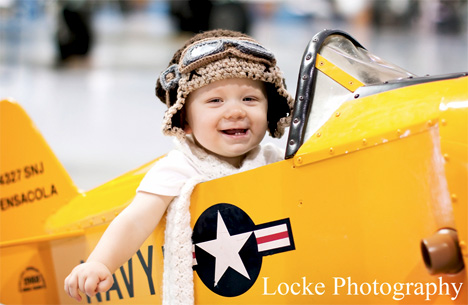
A recent baby photo shoot featured our Aviator Hat. Traci Locke sent us this adorable photo taken in a plane museum in Phoenix, AZ.

Baby Photo Shoot with Aviator Hat by Locke

This little guy is ready to take to the skies in this Aviator Hat with scarf flying in the wind! “Hey little guy, be sure to put your goggles on before you take off!”

Thanks, Traci! We love this photo.

You can learn more about Locke Photography on Traci’s facebook page.

Want to make the Aviator Hat for your own photo shoot? The Aviator Set, including the hat, goggles and scarf is available in our store.

Aviator Set pattern on Etsy.
Crochet Monkey, Banana and Palm Tree Pattern

Create your own jungle with this fun crochet monkey, banana, and palm tree pattern.

Perfect for a jungle themed nursery, a Hawaiian luau party, a tropical paradise or a desert oasis. Kids will enjoy feeding the monkey bananas while adults will be impressed with the your large scale crochet project, the palm tree(s).

Crochet monkey, banana and palm tree

Mix and match the parts and pieces and colors to best meet your needs. Whether you’re looking only for a furry monkey, a sweet snack or a tall bit of shade, this pattern has it all.

Skill Level: Intermediate

Crochet Techniques: Crochet in the round, crochet in front and back loop, crochet increase and decrease, loop stitch, crocodile stitch

Crochet Monkey, Banana and Palm Tree Pattern: THE MONKEY

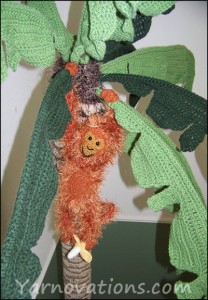
banana in footOur crochet monkey was crocheted with copper Fun Fur which resembles an orangutan (tailless) or Golden Langur (with tail). Mix and match the colors to create your favorite monkey.

Monkeys have many different characteristics. Some have more hair than others. Some have tails. This pattern includes instructions for these optional features.

This crochet pattern includes hands and feet that grip. That’s right. We’ve crocheted pipe-cleaners (fuzzy sticks) into the hands which allows them to grab hold of things…like a banana. Super fun! (Edges of fuzzy sticks can be sharp – do not use in toys for babies or small children).

The monkey has knee and elbow joints, too, making it more fun to play.

Measures: 14″ tall x 4.5″ wide x 4.75″ thick.

Crochet Monkey, Banana and Palm Tree Pattern: THE BANANA

crochet bananaYum. Crochet bananas for your furry little monkey and make playtime deliciously fun. They are easy and quick to make, so why not crochet a bunch?
The edible portion is crocheted in the round, but the peel is crocheted back and forth to simulate the ridges that bananas have.

These fit perfectly into the hands and feet of the crocheted monkey.

Measures: 4″ long x 3.5″ around.

Crochet Monkey, Banana and Palm Tree Pattern: THE PALM TREE

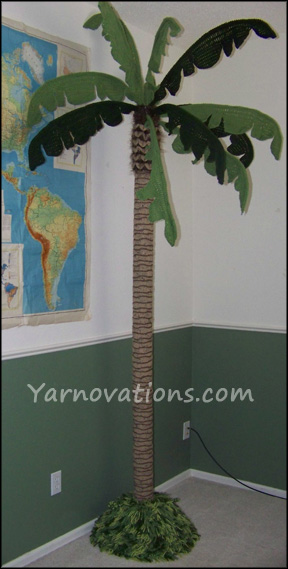
Crochet Palm Tree

Let your monkey swing from the trees with this larger than life crochet project. The palm tree is perfect for decorating the corner of a room or on the patio for a theme’d party.

It’s the details in the crochet that make this palm tree so adorable. The loop stitch grass, crocodile stitch top and fun yarn make this very realistic. And the pieces that help it all take shape (drain pipe, christmas tree stand and floral foam) are easy to find.

Measures: 8.5′ tall x 4′ wide. Can be made shorter or taller as needed.

Crochet Monkey, Banana and Palm Tree Pattern: Now Available

It’s a Jungle crochet pattern is now available!

It’s a Jungle crochet pattern on Etsy.

Create your own oasis. Buy It’s a Jungle today in the store.

Baseball Crochet Hat, Mitts and Bib for Newborn

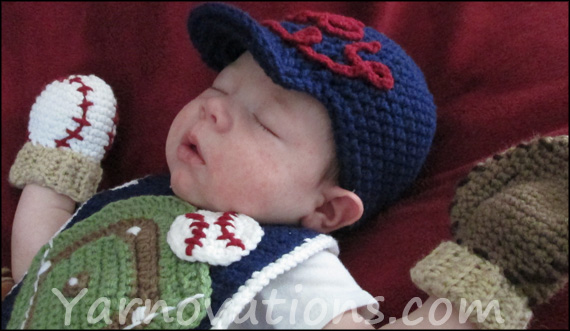
Baseball closeup

Newborns can “get in the game” with this adorable little baseball crochet hat, mitts and bib outfit! They’re never too young to show team spirit. It’s perfect for little boys and little girls. All baseball fans are going to want to add this to their child’s collection.

Whether you’re seeing the game live or going to a party, your little one is sure to steal the show sporting these accessories.

Skill Level: Easy
Crochet Techniques: Crochet in the round, crochet in the front and back loop, front and back post crochet.
Size: Newborn (Make items smaller or larger by changing the hook size.)

Baseball Crochet Hat

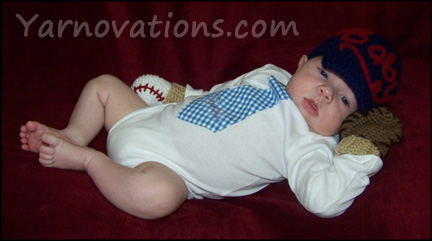
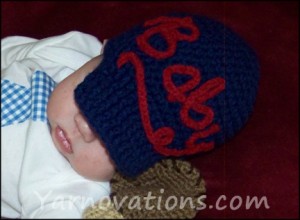
baseball hatWith ears tucked in or untucked, this crochet baseball hat will make your newborn look super cute. Swap out the colors to match your teams colors. We went patriotic with blue and red.
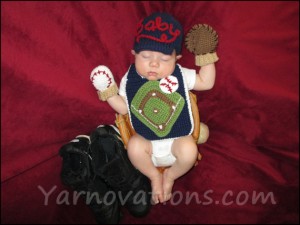
Our cap says “Baby”, but you can personalize your cap by stitching your baby’s name or team chant.

Measured flat: 7 1/4″ x 5. Add brim which measures 1 3/4 x 5.

Baseball Crochet Mitts

Wrap those little hands in some fun crochet baseball mitts. No game is complete without a baseball and catcher’s mitt! With these, your newborn is ready to play ball, too. These mitts fit both right handed and left handed players!

The cuffs are designed to stretch. And, with the elastic sewn inside, they stay snuggly in place no matter how wiggly your newborn is.

Baseball Outfit

Measured flat: Baseball – 2 3/4″ x 3 1/2″
Measured flat: Catcher’s Mitt – 3 1/2″ x 4″

Baseball Diamond Crochet Bib

Your little one can run the bases on this crochet baseball diamond bib. It’s a great accessory for meal time or game time.

The baseball diamond is crocheted separately and sewn to the bib (as is the baseball appliqué). The bib is adjustable with a sewn on button and crocheted button holes.

Measures: 6 1/2″ x 3 1/2″

Get your newborn in the game. Order this “Li’l Slugger” Outfit today.

Li’l Slugger Outfit pattern on Etsy.

Baby Announcement in Crochet

We’re happy to announce the newest member to the Yarnovations family, crochet style! Yarnovator (and husband) welcomed the arrival of their baby boy in May 2012. Naturally, no big event like this would be complete without a little bit of crochet.

It's a Boy Pillar Cozy

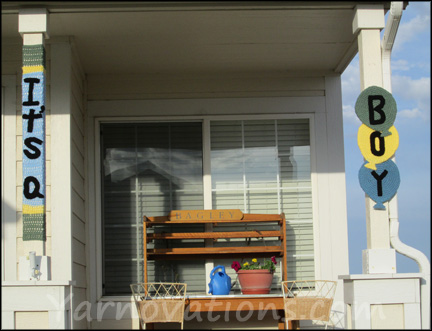
What better way to announce the arrival of a baby or share some big news with your neighborhood than with crocheted pillar cozies! You can custom make cozies to fit any pillar size and announce most any occasion in letters or appliqués.

Utilizing the two pillars in front of her house, Yarnovator used classic colors and large bold letters. These cozies vividly proclaim the arrival of Yarnovator’s newborn son. Here’s how she did it.

The “It’s a” cozy was done in short rows alternating single, half double, and double crochet. The letters were crocheted separately and sewn on.

The “Boy” balloons were crocheted separately in the round using half double crochets. To help the balloons hold their shape, the circles were sewn onto plastic canvas. Like the “It’s a” cozy, the letters were crocheted separately and sewn on. Because the balloons do not wrap around the pillar, separate short cozies were crocheted that match the pillar color. The balloons were then sewn to the cozies at the desired height.

All told, this is a fun, simple and informative project.

Yarnovator Baby

Congratulations, Yarnovator. Welcome, baby!

PS: Newborn Baseball Set coming soon!

How to Make an Abacus with Yarn

How to Make an Abacus with Yarn – Great Craft for Kids

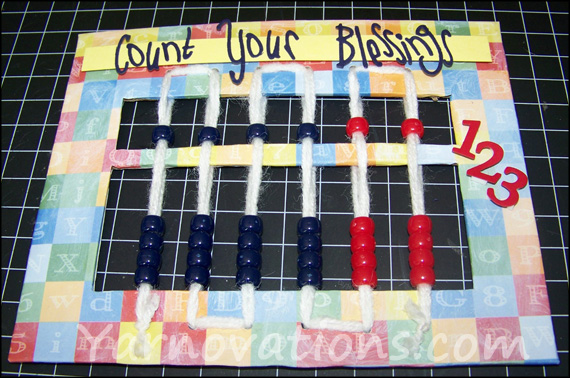
How to make an abacusAn abacus is a great way to make all kinds of calculations. Below we’ll show you how to make an abacus with yarn that’s perfect for kids of all ages. This arts and crafts project has two great math lessons – measurement and addition with an abacus. The colors on this abacus make it versatile. Teach numbers with two decimals such as currency or ignore the colors and teach whole numbers up to the 100,000’s.
We’ve also decorated ours and given it the title, “Count your Blessings.” This abacus can now be used to teach a character building lesson on the value of thankfulness. Psalm 103 would be a great Bible passage to illustrate thankfulness.

Psalm 103:2 says, “Praise the Lord, my soul, and forget not all his benefits.”

How to Make an Abacus with Yarn – Features and Supplies List

Don’t let the simple style of this abacus fool you. This little abacus has a lot of great features:

  • The four strands of yarn keep the beads in place allowing students to hold up their abaci to show their answers to their teacher.
  • Teach numbers with two decimals or whole numbers to the 100,000’s.
  • Many different lessons can be taught with this one project.
  • Easy to make.
  • Materials are minimal and cheap.
  • It’s thin, small and light weight making it easy to carry and keep with one’s math book.
  • It’s fun to make and use.

We mentioned that the supplies are minimal and cheap. Check around your house for the following:

  • 30 Pony Beads (we used 20 blue and 10 red)
  • cardboard 7 1/4″ x 5 1/4″
  • yarn (4 pieces) 48″ length each
  • whole punch (1/8″)
  • box cutter/knife (use with caution! Supervise kids using these.)
  • pencil
  • standard ruler
  • scissors
  • yarn needle
  • Supplies to decorate (we used paper, glue and tape)

How to Make an Abacus with Yarn – Lesson One: Working with Inches

If your kids need practice using a standard ruler, this is a great project (or you can trace and use this Abacus template).

  1. Start with a piece of cardboard that’s 7 1/4″ x 5 1/4″. (Mine is 1/2″ taller but required a special hole punch. If you are using a standard single hole punch, then you’ll want to cut your abacus to 7 1/4″ x 5 1/4″).
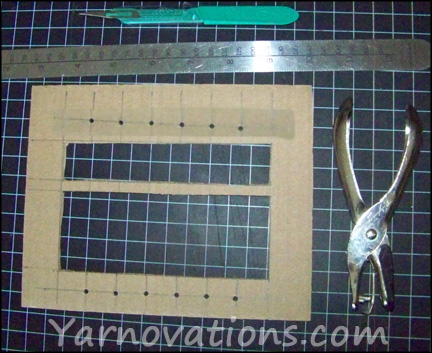
  2. With the long side of the cardboard horizontal in front of you, draw a vertical line at 1″, 1 3/4″, 2 1/2″, 3 1/4″, 4″, 4 3/4″, 5 1/2″, 6 1/4″. See image below.
  3. With the short side of the cardboard horizontal in front of you, draw a vertical line at 1/2″, 1″, 3″, 3 1/4″, 4 1/4″, 4 3/4″, 5 1/4″. See image below.
  4. Punch holes on the lines that are 1/2″ from the ends where they intersect the lines drawn in step 2. There will be 6 on each side (12 total). See image below.
  5. Cut out 2 rectangles leaving a thin horizontal bar in the middle. See image below.
  6. Cut 4 strands of yarn to 48″ each.
  7. Thread two pieces of yarn on your needle.
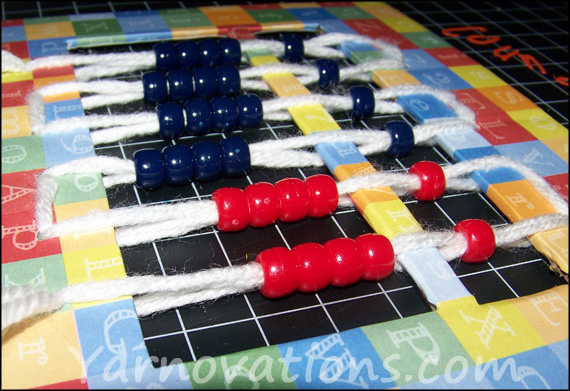
  8. Start at the bottom left corner, insert yarn into first hole leaving a tail about 5″ long. Thread 5 beads onto yarn. Weave round thin middle bar then weave up and through the hole at the top. (At this point the five beads can move in either section). See image below.
  9. Insert yarn into next hole. Thread 5 beads onto yarn. Again, weave around middle bar and weave to and through the hole on the bottom.
  10. Repeat step 9 until all 6 sets of beads have been stranded. Remove needle.
  11. Thread remaining two pieces of yarn on your needle.
  12. Weave this strand in the opposite direction as the first strands of yarn. Wherever you weaved on top of the cardboard, now weave on the bottom. Make sure you thread 4 beads into the bottom section and a single bead into the top section of all 6 sections. *The weaving is what will lock the beads into each section. See image below.
  13. Knot the tails of yarn and trim.
cardboard cutout

Draw lines, punch holes and cut out rectangles.

Decorate cardboard if desired. We glued decorative paper on the front and back.

weaving beads

This is what your abacus will look like after following steps 8-10.

At this point, the beads can float between the top and bottom section. The next step will lock them in their appropriate sections.

fully woven

Beads become trapped when second strand is woven on the opposite side.

Decorate a bit more if desired. We added our title and some numbers to ours at this point. Now the abacus is ready to use!

How to Make an Abacus with Yarn – What Each Row Represents

Now that we’ve learned how to make an abacus, let’s take a look at what the different colors and columns of beads mean.

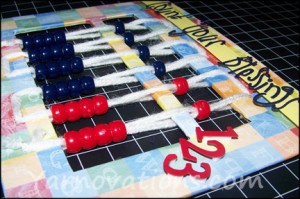
Side view of finished abacus

Side view of finished abacus

Using the Colors
If you attribute value to the colors, then the abacus has four whole numbers (the blue beads on the left) followed by two decimal places (the red on the right). From left to right you have: Thousands, Hundreds, Tens and Ones in blue. Then Tenths and Hundredths in red.

Ignoring the Colors
If you ignore the fact that the beads have color, then you have six columns of whole numbers. From right to left you have: Ones, Tens, Hundreds, Thousands, Ten Thousands, Hundred Thousands.

How to Make an Abacus with Yarn – How to Count and Add

We could write pages and pages of content on how to understand and add with an abacus. Instead, we recommend that you watch this great video tutorial.

Deborah’s (Yarnovator) 5th grade class thought these homemade abaci were amazing. Yes, the abacus is amazing. Yes, she’s a great teacher for giving them each their own abacus. Want to be your kids’ hero? Give it a try. Your kids are going to love them and they’ll think you’re amazing, too!

Starry Night Yarn Craft

Starry Night Yarn Craft for Kids

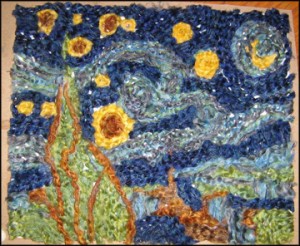
Starry Night in yarnMy sister and I are considering teaching a break-out session for a small group of kids and naturally we are discussing yarn crafts. Is there any other other type of craft? Not in our humble opinions.
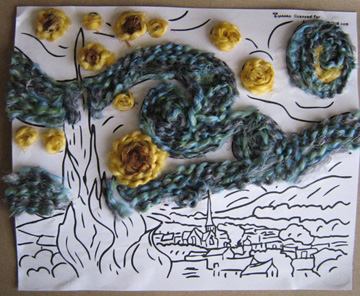
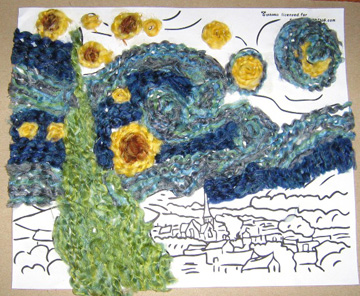
There will be four one-hour sessions…which isn’t a lot of time. So we have decided that crochet is out. We are considering other crafts using yarn. The first and most interesting possibility we discussed was recreating Starry Night in yarn.

Read further for:

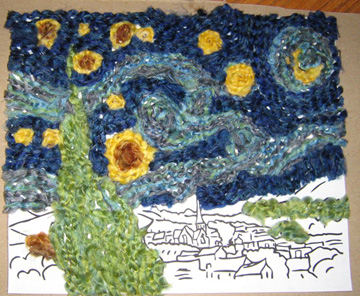
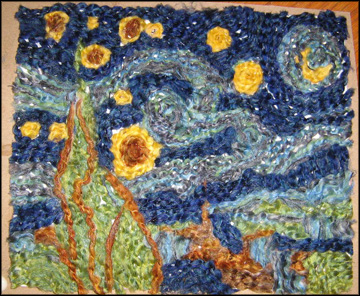
  • Step by Step photos of Deborah’s creation.
  • Links to the coloring page used as the base.
  • Link to the website that provided some inspiration.
  • Tips for creating your own Starry night.

Starry Night 1st peek

Starry Night sneak peek 2

Starry Night sneak peek 3

Starry Night sneak peek 4

Starry Night completed

Starry Night Yarn Craft for Kids – Coloring Page

The coloring page makes a great backdrop for creating your own Starry Night in yarn. We did a Google Search focused on images of Starry Night coloring pages. We used a page from SuperColoring.com. Feel free to browse the internet for one that inspires you.

Starry Night Yarn Craft for Kids – Our Inspiration

This project was inspired by a very talented gal by the name of Regina. You must check out the work she has done with kids. Unfortunately she doesn’t appear to be updating her site. But we can still be inspired by her previous work!

Starry Night Yarn Craft for Kids – Some Tips and Thoughts

I spoke with Deborah and asked her for her thoughts. Here are a few:

  • Spread glue in small portions of the coloring page so you can work in small portions a little at a time.
  • Bulky yarn makes it easier to cover more space more quickly.
  • Beware of using yarn that separates easily. It will stick to your fingers and be more frustrating to work with. Deborah used Lion Brand Homespun and found it was tricky to work with as she had more and more glue stuck to her fingers. The yarn separated too easily.
  • Have a wide range of colors available. Deborah wished she had more colors for her project.
  • This particular picture actually took quite a bit of time to complete. If time is an issue, you will probably want to choose a more simple coloring page.

So, after completing the prototype Deborah decided that this project won’t make it into the breakout session. I guess it’s back to the drawing board…so to speak.

National Crochet Month 2012 Postcard

National Crochet Month 2012 – Postcard

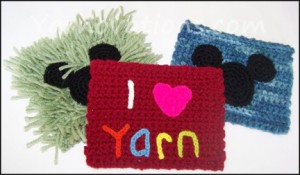
To celebrate National Crochet Month 2012 we have designed a FREE crochet postcard! This March, we’re letting the world know that we love yarn. We’re surprising friends and family with hand crocheted mail….delivered by the United States Post Office! Want to join us?

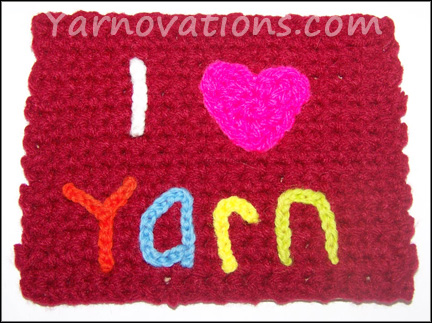
I Heart Yarn Postcard

National Crochet Month 2012 – FREE Patterns

All Free PostcardsNational Crochet Month 2012 is a great time to consider projects that use up our stash. This FREE pattern will do just that. And it’s a good excuse for using wild colors and crazy materials!
This FREE pattern includes the “I [Heart] Yarn” postcard and an extra Bonus: Mickey Mouse Ears! Mickey is sure to bring smiles to many faces. It will look fun in traditional colors as well as wild and crazy ones!

I [Heart] Yarn pattern:

  • It measures 10″ x 5 1/2″.
  • Skill Level: Easy
  • Stitches: Single Crochet, Chain
  • Stitches for Heart Applique: Single Crochet, Half Double, Double, Treble (triple)

BONUS: Mickey Mouse Ears pattern:

  • It measures 10″ x 5 1/2″
  • Skill Level: Easy
  • Stitches: Single crochet, Single Crochet Increase (Loop Stitch optional)
  • Crochet in the Round

National Crochet Month 2012 – Multi-Purpose Postcards

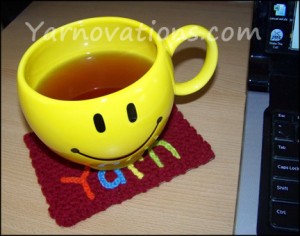
Postcard as CoasterNational Crochet Month 2012 is a great time to spread the word about our love of the hobby. These postcards can be used for more than just postcards by the recipient. These make great decorations for a craft room (bulletin board). They can also be used as coasters and are a great size for coffee mugs. Or how about using this as a granny square in a larger project?
But perhaps the best and most novel idea would be to reuse it as…a postcard! By simply removing the cardboard piece and attaching a new cardboard piece, this can be reused again as a postcard! I’ve seen crafters reuse greeting cards before, but never like this!

National Crochet Month 2012 – Join Us

FREE Crochet Patterns

Free Patterns Page: Download the pattern from the FREE Crochet Patterns page.
Store: Add the Postcard Free to your cart in the Store.

Tarn Soap Saver

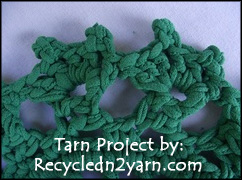
Tarn Crown by Recycledn2yarn.comOk, the results are in. The FREE soap saver made using the t-shirt yarn is complete. Check out how beautiful the little sachet turned out.

To the right is a sneak peak. This is a close up of the crown edging. Nice!

Here is the article and pictures to the finished  Tarn Soap Saver.

For those that want to see more fabulous recycled projects, here is the blog for Recycled Into Yarn.

Love it!

Crochet Along – TARN the Free Soap Saver

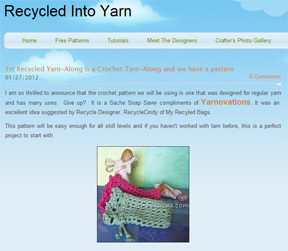
Recycled Into Yarn Crochet AlongCrochet Along with Recycled Into Yarn

We are pleased and honored to announce that Recycled Into Yarn will be using our FREE Crochet Sachet for their first Crochet Along.

The Crochet Along begins January 29, 2012.

They will be using T-shirt Yarn.

This pattern is great for beginners.

For complete details, and to participate in the Crochet Along, visit Recycled Into Yarn.

Have Fun!

Pig Crochet Pattern

Pig Crochet Pattern – Affectionally named “Pork Chop”

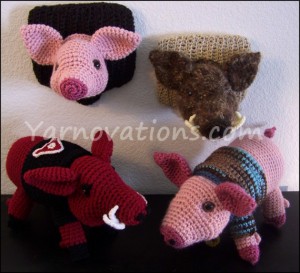
Pig Crochet PatternWe have affectionately named the pig in our Pig Crochet Pattern, “Pork Chop”. He is deliciously fun and easy to crochet! He’s super cute when crocheted in a couple shades of pinks. Have you seen the little extra details this crocheted pig includes? There are dew claws on the feet, puffy checks and a curly tail, just to name a few.

For the hunters in our lives, we’ve modified “Pork Chop” and mounted his head! Yep, this pattern includes instructions on how to make a Mounted Boar’s Head! It’s a little crazy, but it’s so real looking when crocheted in Brown Angel Hair and with the addition of tusks. This would be perfect in a man’s office, study or library. Since it’s crocheted, it would even be fun in your craft room! Be sure to name him!

This pig crochet pattern includes the following instructions:

  • “Pork Chop” as the stuffed animal.
  • The head of “Pork Chop” mounted.
  • Mounted Boar’s Head.
  • Boar as a stuffed animal.

Pig Crochet Pattern – “Pork Chop” as a Famous Pig
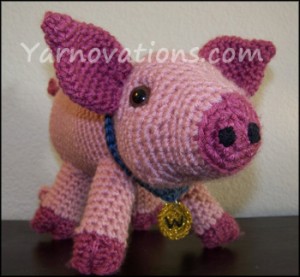
pig with collar

This Pig Crochet Pattern can be modified and used to represent a number of famous pigs. As is, “Pork Chop” is a great farm animal. But with a few tweaks, he can be a book character or famous movie star. Here’s a short list of famous pigs:

  • Maxwell, the Geico Pig – give him a pinwheel and watch him squeal “weeeeee” all the way home.
  • Napoleon from Animal Farm – have him stand on his hind feet and give him some clothes.
  • Piglet from Winnie the Pooh – dress him in a striped pink shirt and have him stand on his hind feet.
  • Porky Pig from Looney Tunes – dress him in a blue shirt and red tie and have him stand on his hind feet.
  • Tusk, the Arkansas Razorbacks mascot – crochet him in red with a black sweater.
  • Wilbur from Charlotte’s Web – give him an award winning collar.

Pig Crochet Patter – The Details

Like our other patterns, this Pig Crochet Pattern includes lots of photos, detailed written instructions, checkboxes to mark your progress, materials list, gauge info and more.

Skill Level: Easy

“Pork Chop” measures 10″ in length x 5 1/2″ tall x 3 3/4″ wide.

Pork Chop Pig pattern available on Etsy.

Available in the Store

Pig Crochet Pattern – Available in the Store

The Pig Crochet Pattern is available now in the store. Purchase your pattern today and you can be making a pig tonight! Weeeeee….what fun!

FREE accessories and modifications are available in the store as well!