Turtle Family Crochet Pattern

Turtle Crochet Pattern – Mommy and Baby Turtle Rattle

Crochet Turtles Pattern

This turtle family crochet pattern is a whole lot of fun! The little guy is crocheted around a small plastic Easter egg to create a baby rattle! As baby gets a little older, he or she can shake the rattle and dance to some music.

Pattern includes:

  • Mommy Turtle Stuffed Animal
  • Baby Turtle Rattle
  • Pentagon Pattern
  • Hexagon Pattern

This Turtle Crochet Pattern PDF also includes instructions on how to crochet the spike stitch.

Turtle Stuffed Animal and Rattles pattern available on Etsy.

We label this project as intermediate because of the spike stitch. But if you’ve crocheted pentagons and hexagons before, then you should have no problem with this pattern.

When your kids ask you for a pet…crochet them one of these!
Available in the Store

Photo: Love of Crochet Magazine

Photo: Love of Crochet Magazine

Coordinates with Published Set

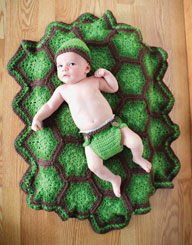
These little stuffed animals coordinate with the “Teensy Turtle Baby Set” that was published in “Love of Crochet” magazine Fall 2014! The Teensy Turtle Baby Set in the magazine includes a baby blanket, hat, diaper cover and cape.

Turtle Blanket, Diaper Cover, Hat, Rattle, and Stuffed Animal pattern available on Etsy.

Winner in 2014 CGOA Design Contest

 -Winner at the Crochet Guild of America 2014 Design Competition

Congrats to Deborah for her winning entry at the CGOA 2014 Design Competition. That’s two years in a row! (See her owl bean bag chair winning entry from 2013 – on Etsy) I may be a little bias since she’s my sister…but I think she totally ROCKS!

3rd Place in the Afghan and Home Decor Category

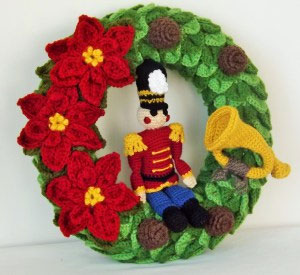
Toy-Soldier-Christmas-Wreath

Photo: Doris Chan

Title: A Soldier’s Christmas

Soldier’s Christmas Wreath pattern now available on Etsy!

Do you want one of these on your front door this Christmas as much as I do? I (Dana) was blown away with this crocheted Christmas wreath. I really wish you could see it in person it’s so rich in color and texture.

There are a lot of fun details that make this so breathtaking. I love the texture that the crocodile stitch leaves add to the base of the wreath. I’m in love with the soldier (don’t tell my husband) and all the detailing on his jacket. And I adore the scales on the pine cones. I can hardly wait for Deborah to write up this pattern so I can make one of these for my home!

Special Thanks & Links to Other Winners and Entries

cgoa-20

A big thank you once again to Doris Chan for organizing a fabulous design competition. We are super thankful for all the work Doris puts into this annual competition. (And I’m sure she’s thanking Deborah for not sending in another bean bag chair like last year!)

And thank you to the judges: Jenny KingSusan Lowman and Karen Manthey. I’m sure it was a challenge to pick just three winners in each category.

It’s the 20th anniversary of the Crochet Guild of America and some of the designers incorporated that theme into their designs which was fun to see.

Visit Doris Chan’s website for all the winners and entries:

Deborah had two more entries in the competition that didn’t place. See if you can spot them in the slide show!

Soldier Christmas Wreath pattern now available on Etsy!

Published in Crochet More 2014

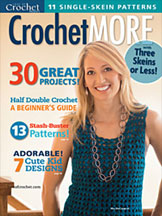
Crochet-More-2014-CoverPublished in Love of Crochet – Crochet More 2014

Love of Crochet magazine has a summer issue called Crochet More where every project in the issue uses 3 skeins of yarn or less. We have several fun items published in this special issue.

This is also the first time we’ve written an article for a publication. I say we, but it was all Deborah. She highlights the half double crochet (hdc) stitch and the myriad of textures that can be created with that stitch. My personal favorite is the hdc in the round in the back bar.

Spinner Greeting Cards

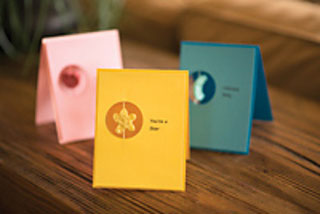
Spinner-Greeting-Cards

Photo: Love of Crochet Magazine

Send smiles across the miles with some fun spinner cards.

Here, I (Dana) have combined my old love of paper crafting with my new love of crochet and created some fun peek-a-boo greeting cards. If you spin the crocheted element before stuffing in an envelope, they will spin when the recipient opens them!

There is a star, heart and moon applique. The simple design of the card really lets the crocheted pieces shine! This is a fabulous project for your scraps of crochet thread.

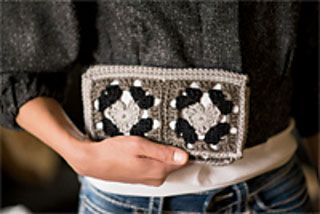
Cute and Classic Clutch – Heart in Granny Square

Photo: Love of Crochet Magazine

Photo: Love of Crochet Magazine

The heart in this granny square makes this a clutch you’re going to love to use. It’s the perfect size for storing crochet hooks and tools. Deborah added magnetic snaps to the corners of her bag and uses this bag to store her crochet hooks, scissors and sewing needles.

This is a great stash buster project. It looks fun in mono-chromatic color schemes as well as vivid rainbow colors.

Heart Granny Square Clutch pattern available on Etsy.

HDC Sampler Bag

HDC-Sampler-Bag

Photo: Love of Crochet Magazine

This bag is actually a half double crochet (hdc) stitch sampler! Each section is crocheted with a different technique to create a different texture only using the hdc stitch.

Techniques include: crocheting in the round; crocheting in both loops, back loop, and front loop; crocheting in back bar from the front and from the back.

Crocheting in the back bar is sometimes referred to as the 3rd loop or camel crochet (often created using a single crochet).

Deborah crocheted several swatches that showcase the different textures that can be created using just the hdc. The different textures are created by crocheting in rows vs rounds and by inserting your hook in different places on the stitch. It’s a great tutorial.

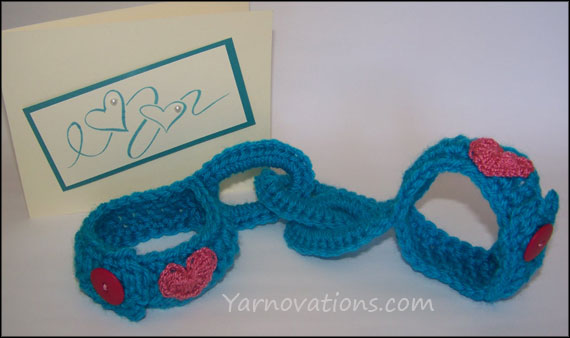
Bridal Shower Gift – Crochet Handcuffs

Bridal Shower Gift – Crochet Handcuffs

Bridal showers are a great time to gift practical items for  kitchen and bath to a soon to be wed young couple. It’s also a fun time to embarrass them with items a bit more playful like lingerie and toys.

love slave handcuffs

I crocheted the bride-to-be a pair of handcuffs (using a similar color to one in the upcoming wedding) in addition to getting her something from her registry.

I also stamped a card and wrote a suggestive message inside…which I encouraged the bride-to-be to read to out loud to everyone (we can’t miss the opportunity to embarrass her a little!):

Dear Bride,

I crocheted you something you can use to make him your LOVE SLAVE.

Enjoy!

PS: They are adjustable in case you want to be the slave to his love.

FREE Crochet Patterns for Handcuff and Hearts

The free crochet patterns for these are found in a couple older blog posts:

  • Handcuffs (pictured above: Vanna’s Choice in Aqua and  J/10/6.00mm hook)
  • Heart – (pictured above: Bernat Handicrafter Cotton Thread (5) in Rosy Rose and a 3.5 mm steel hook)

Enjoy, you young lovers!

Published in Love of Crochet Magazine Summer 2014

Published in Love of Crochet Magazine, Summer 2014

Pattern 1: Mulberry Stitch Sampler – page 51

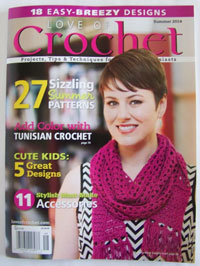
Summer 2014 Love of Crochet MagazineThe cover girl is wearing one of two designs I (Dana) have featured in “Love of Crochet” magazine, Summer 2014. I am thrilled!

The scarf is named “Mulberry Stitch Sampler” because it features several techniques like vertical and horizontal cables, star stitch and the shell stitch.

This was crocheted in Milky Whey by Kollage Yarns. This yarn is super soft, making it a dream to wear. It blocks well and has delightful drape.

We love extra long scarves…and as you can see, this one has been draped around the neck of this slender model several times.

Mulberry Stitch Sampler pattern available on Etsy.

Pattern 2: Victorian Lace Card Holder – page 22

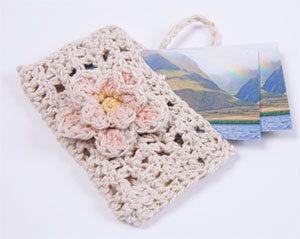
Victorian Lace Card HolderI needed a gift for a friend who loves everything Victorian. So I created this Victorian Lace gift card holder for her, which she raved over, then promptly started using for her business cards.

This design was crocheted with two strands of crochet thread held together allowing the use of a D hook instead of a steel hook.

Color is added to the floral button with colored chalk.

New Crochet Patterns in the Store

Several patterns we had published in magazines are now available here on the website. Check out what’s here:

As seen in Love of Crochet magazine, Holiday 1013

Pet-Lovers

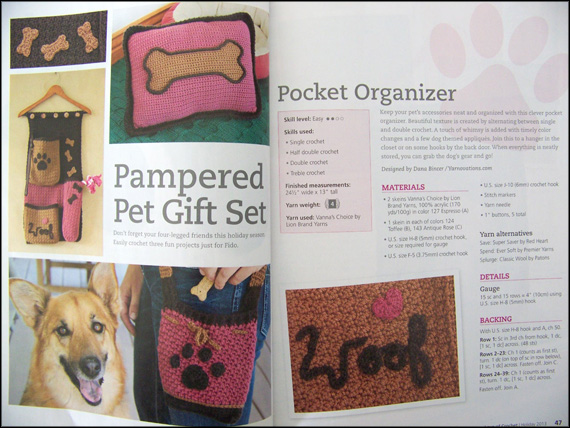
This Pampered Pet Gift Set is now available in our Shop as the Dog Days Trio.

The three items are available as a set or for purchase individually.

___________________________

As seen in Love of Crochet, Fall 2013

Crimson Cowl Love of CrochetThis Broomstick Lace Crimson Cowl is now available for free in our shop!

This is a simple broomstick pattern, perfect for those new to the technique.

Get the free Crimson Cowl pattern.

Flower Yard Picks

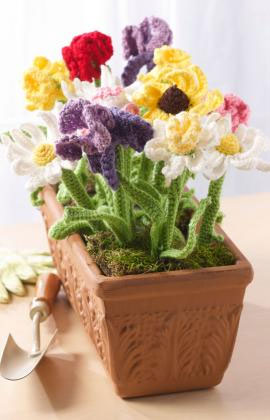
Crochet Flower Yard Picks – Beautiful Mother’s Day Bouquet

Flower Yard Picks

Photo by Red Heart

These crochet flowers are bright, cheerful and fun!

The pattern for these lovelies is free at RedHeart.com. This is the first design we’ve created for Red Heart. The flowers use Red Heart Super Saver yarn.

The stems are crocheted as cozies around chopsticks making these perfect as yarn bombs in friends’ gardens or in floral arrangements.

They would be wonderful “Thinking of You” gifts as well as birthday and Mother’s Day gifts. You could also stick a pen in the stem and create a bouquet for your office!

One row of the leaves are crocheted around chenille fuzzy sticks (pipe cleaners) which allow them to be shaped.

Create a bouquet of only one type of flower or create an assortment with this pattern.

The pattern includes several flowers:

  • Carnation
  • Daffodil
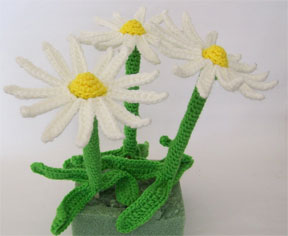
  • Daisy / Black Eye’s Susan
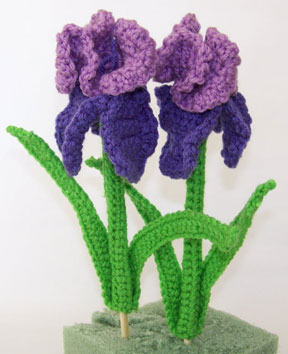
  • Iris

Get the Free Pattern at Redheart.com

We’ve taken some photos of each type of flower. Let’s take a closer look:

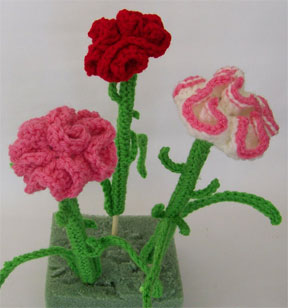
Carnation – Crochet Flower

carnation yard picks

The carnation is crocheted in a technique similar to wiggle crochet meaning rows of crochet are worked on top of a grid.

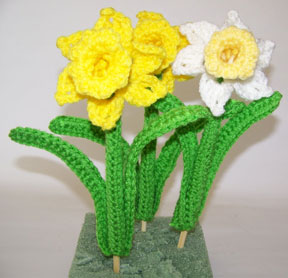
Daffodil – Crochet Flower

daffodil yard picks

The design of the stem allows the flower to face forward like a real daffodil!

Daisy – Crochet Flower

daisy yard picks

Change the colors and this could be a Black Eyed Susan or Gerber Daisy!

Iris – Crochet Flower

iris yard picks

The petals naturally drape like a real iris! Some petals drape down and others up.


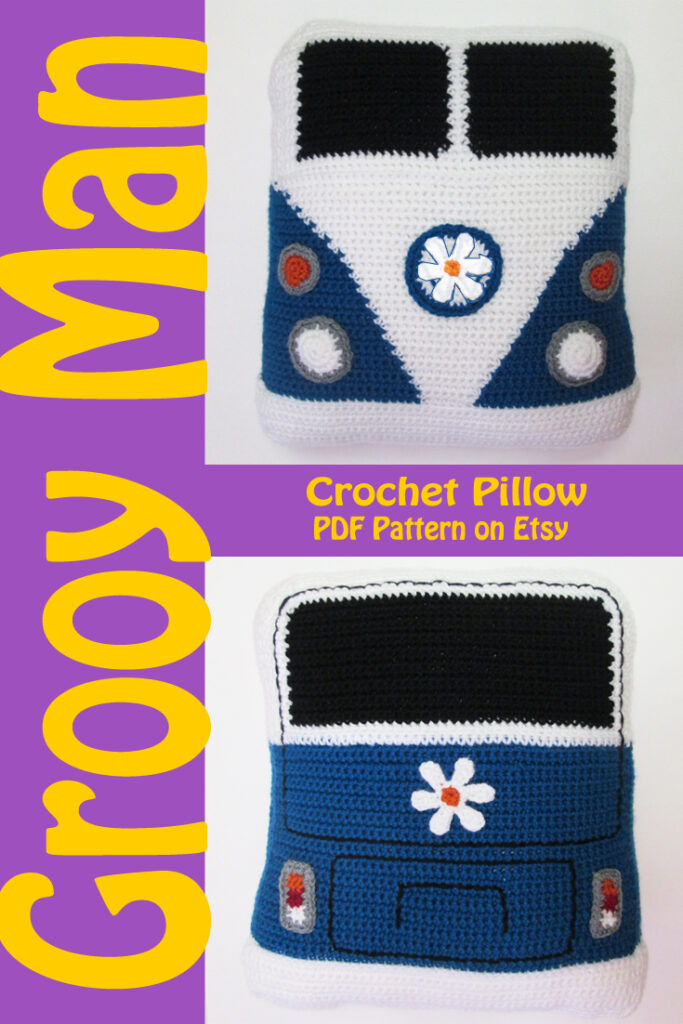
VW Van Pillow – Free Crochet Pattern

VW Van Pillow – Free Crochet Pattern

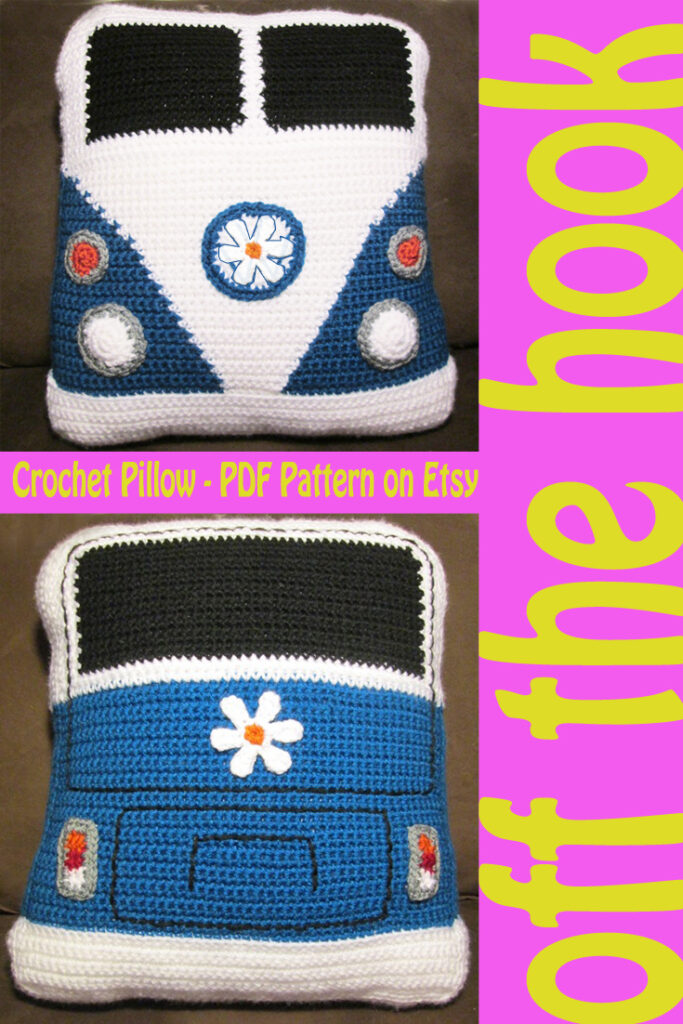
Love VW Van’s? Here’s our groovy interpretation on the campervan. We picked some of our favorite shapes for the lights and turn signals, etc. so this doesn’t match any particular model.

This free crochet pattern off the hook! It’s written in USA terms as a fair isle project so you’ll pick up and drop colors as you need them. Although it is a fairly easy project, the use of multiple colors per row can make it a tiny bit more challenging. But the majority of the project is single crochet, so crocheters of all experience levels will be able to tackle it.

PDF Download Available on Etsy

If you’d like the printer friendly version Groovy Campervan Pillow, it’s available in our Etsy Shop.

Available now on Etsy.

Buy Now on Etsy

Information Before You Begin the VW Campervan Pillow Crochet Pattern

Is this pattern right for you? We rate this as easy because it’s mostly single crochet worked in rows or rounds…but if you’ve never crocheted before, it may be challenging. If you know how to chain, slip stitch, single crochet, half double crochet and double crochet, then this is a piece of cake. Most of the project is worked in rows. The accent pieces are stitched in rounds. Here are some other stats:

  • Skill Level:        Easy 
  • Project Type:   Pillow
  • Size:                  13 1/2″ wide x 16″ tall
  • Gauge:              7 sc and 8 rows = 2″

Since this is a pillow, gauge isn’t super important. We used medium worsted weight (4) yarn and the size hook recommended on the label. We also used a smaller hook for the accent pieces like the lights, turn signals and flower.

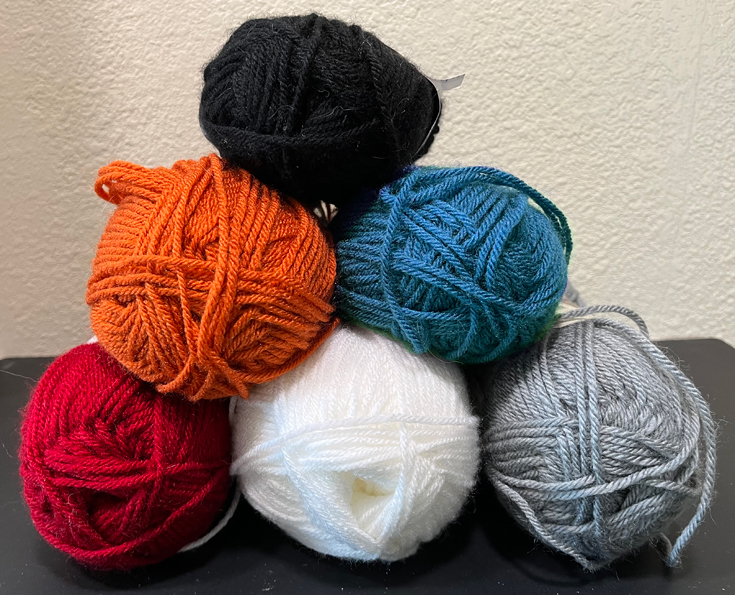
Belowis a quick picture of the colors of yarn used in this project. It’s amazing how a skein of yarn can be transformed into a huggable couch cushion. Or maybe this is going in your vehicle. We’ve had people tell us they made this for their kid’s college dorm room. This VW campervan is just so happy.

Here’s a list of items we used to make the pillow:

  • Yarn:      Lion Brand Vanna’s Choice  –Worsted Weight (4)
  •                BLACK  – 1 skein
  •                SAPPHIRE  – 2 skeins
  •                WHITE  – 1 skein
  •                SILVER GRAY  – 1 skein
  •                CRANBERRY – remnant
  •                TERRACOTTA – remnant
  • Hook:     J / 10 . 6.00 mm
  • Hook:    H / 8 / 5.00 mm
  • Needle: Yarn Needle for sewing
  • Stuffing

Crochet Abbreviations and Meanings

Almost all patterns are written with abbreviations to cut down on space. Here is the key to the abbreviations you’ll see in this VW Van Pillow Crochet Pattern:

  • Ch = chain
  • DC = double crochet
  • Dec = decrease; crochet two stitches together
  • Hdc = half double crochet
  • Inc = increase; work two stitches in the next stitch
  • Rnd = round; work in the round
  • Sc = single crochet
  • Sl st = slip stitch
  • St(s) = stitch(es)
  • *instructions* = repeat the instructions written between the ** the number of times indicated after the second *

There is no standard for pattern writing for crochet. This particular pattern may be a bit more brief than others you’ve seen.

How to Read the VW Van Pillow Pattern

Let me give you an example of how to read a row of this pattern. As you stitch it, you’ll really like it because you can get all the information you need with just a quick glance.

The pattern reads:

Row 12: Turn, 19 Sapphire sc, 9 White sc, 20 Sapphire sc.

How to work the row:

Row 12: Turn your work, pick up the Sapphire yarn from previous row, work 1 sc in each of the next 19 sts, drop the Sapphire yarn, pick up the White yarn from the row below, work 1 sc in each of the next 9 sts, drop the White yarn, pick up the Sapphire yarn from the row below, work 1 sc in each of the next 20 sts.

Wow, we sure saved a lot of space…and we “assume” all sorts of things with our condensed version. Check out the next section for tips and tricks.

Tips and Tricks to Fair Isle

If this is your first fair isle pattern, here are a couple of tips:

  • You do not cut the yarn after each row. Instead you drop it to use in the following row.
  • Always drop your yarn to the same side of the pillow. This will be the back of your work. You do this because there will be little “floats” of yarn. Particularly on sections where you pick up a color earlier or later than you did in the previous row. No one will see the floats if you always drop the yarn to the same side. One Row the floats will be on the back of the work. When you turn your work, then the floats seem to be on the front. So when you drop the yarn, drop it to the front of the work that row. The trick is to be consistent.
  • You may want to put a stitch marker on one side of your work to help remind you which side is the back. Then always drop the yarn to side that has the stitch marker.

We’ve included all this information in the printer friendly version of the Groovy Campervan Pillow Crochet Pattern on Etsy as well.

Buy Now on Etsy

VW Campervan Pattern Notes

  • We recommend that you read through the entire pattern before you begin so are familiar with techniques used.
  • Pillow is made two panels that will be sewn together.
  • Sew accessories such as lights, to panels before joining front and back panels together.

How to Change Color

You will change color in the middle of the last stitch of the old color.

Start working the stitch of the old color. Stop just before the last yarn over, drop the old color, pick up the new color, yarn over with the new color and finish the stitch with the new color.

Check Out These Bean Bag Chairs!

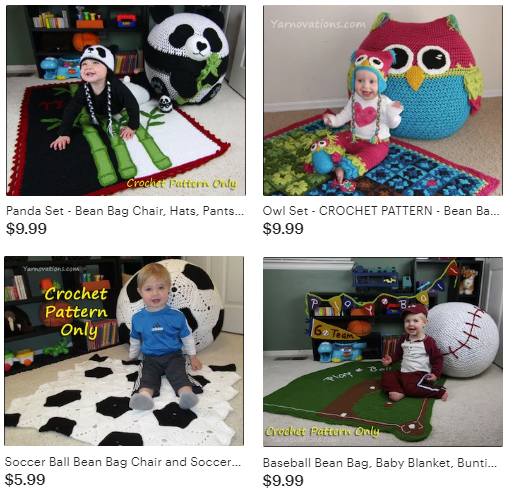
I know you’re right in the middle of your cushion, but these bean bag chairs make me so happy, I couldn’t resist sharing them with you. You can see more pictures on our Etsy Shop.

These sets include bean bag and blanket. Some include baby clothes, too!

Campervan Crochet Pattern

FRONT PANEL INSTRUCTIONS
White
Hook: J
Ch 51
Row 1: Sc in second ch from hook and in each st across. (50)
Rows 2-8: Turn, sc across.
Finish off. Cut yarn; weave in end.
Skip the first st. Attach Sapphire to the second st.
Row 9: Work in back loops only. 21 Sapphire sc, 6 White sc, 21 sc Sapphire. (48)
Row 10: Turn, 20 Sapphire sc, 7 White sc, 21 Sapphire sc.
Row 11: Turn, 20 Sapphire sc, 8 White sc, 20 Sapphire sc.
Row 12: Turn, 19 Sapphire sc, 9 White sc, 20 Sapphire sc.
Row 13: Turn, 19 Sapphire sc, 10 White sc, 19 Sapphire sc.
Row 14: Turn, 18 Sapphire sc, 11 White sc, 19 Sapphire sc.
Row 15: Turn, 18 Sapphire sc, 12 White sc, 18 Sapphire sc.
Row 16: Turn, 17 Sapphire sc, 13 White sc, 18 Sapphire sc.
Row 17: Turn, 17 Sapphire sc, 14 White sc, 17 Sapphire sc.
Row 18: Turn, 16 Sapphire sc, 15 White sc, 17 Sapphire sc.
Row 19: Turn, 16 Sapphire sc, 16 White sc, 16 Sapphire sc.
Row 20: Turn, 15 Sapphire sc, 17 White sc, 16 Sapphire sc.
Row 21: Turn, 15 Sapphire sc, 18 White sc, 15 Sapphire sc.
Row 22: Turn, 14 Sapphire sc, 19 White sc, 15 Sapphire sc.
Row 23: Turn, 14 Sapphire sc, 20 White sc, 14 Sapphire sc.
Row 24: Turn, 13 Sapphire sc, 21 White sc, 14 Sapphire sc.
Row 25: Turn, 13 Sapphire sc, 22 White sc, 13 Sapphire sc.
Row 26: Turn, 12 Sapphire sc, 23 White sc, 13 Sapphire sc.
Row 27: Turn, 12 Sapphire sc, 24 White sc, 12 Sapphire sc.
Row 28: Turn, 11 Sapphire sc, 25 White sc, 12 Sapphire sc.
Row 29: Turn, 11 Sapphire sc, 26 White sc, 11 Sapphire sc.
Row 30: Turn, 10 Sapphire sc, 28 White sc, 10 Sapphire sc.

Row 31: Turn, 9 Sapphire sc, 30 White sc, 9 Sapphire sc.
Row 32: Turn, 8 Sapphire sc, 32 White sc, 8 Sapphire sc.
Row 33: Turn, 7 Sapphire sc, 34 White sc, 7 Sapphire sc.
Row 34: Turn, 6 Sapphire sc, 36 White sc, 6 Sapphire sc.
Row 35: Turn, 5 Sapphire sc, 38 White sc, 5 Sapphire sc.
Row 36: Turn, 4 Sapphire sc, 40 White sc, 4 Sapphire sc.
Row 37: Turn, 2 Sapphire sc, 44 White sc, 2 Sapphire sc.
Row 38: Turn, 48 White sc. Cut Sapphire yarn; weave in ends.
Row 39: Turn, working in back loops only, sc across.
Row 40: Turn, working in both loops, sc across.
Row 41: Turn, 4 White sc, 18 Black sc, 4 White sc, 18 Black sc, 4 White sc.
Row 42-56: Turn, 4 White sc, 19 Black sc, 2 White sc, 19 Black sc, 4 White sc.
Row 57: Turn, White sc dec, 3 sc, 17 Black sc, 4 White sc, 17 Black sc, 3 White sc, White sc dec. (46)
Cut Black; weave in ends.
Row 58: Turn, use White all across, sc dec, 42 sc, sc dec. (44)
Row 59: Turn, sc dec, 40, sc dec. (42)
Row 60: Turn, sc dec, 38 sc, sc dec. (40)
Row 61: Turn, sc dec, 36 sc, sc dec. (38)
With right side facing, attach White to the first unused stitch left on row 8.
Row 62: 2 sc in the unused stitch, continue working around the white area, 1 sc on the end of every white row, turn and continue working on the foundation ch, sc inc in the first st, sc across, sc inc in the last st, turn and work on the ends of each row, 1 sc on the end of each row, turn, 2 sc in the 1 unused st. Continue with the Sapphire, 1 sc on the end of every Sapphire row, continue on the White using White, 1 sc on the end of every row, continue along the top, 1 sc in each st, turn, 1 sc in the end of every White row. Continue with Sapphire, 1 sc in the end of every Sapphire row. Join with a sl st.
Row 63: Working in the back loops only, sc around using the same color as each section.
Row 64-65: Working in both loops, sc around using the same color as each section. Finish off. Cut yarn; weave in ends.

Share The Love

Share the love; pin one of VW Campervan images to Pinterest.

Also, consider buying the VW Campervan Crochet Pattern from Etsy. It’s only a couple bucks and it encourages us to keep making groovy patterns.

You’ve made your first panel. Now it’s time for the magic…the addition of the lights. Be sure to notice that we are using a smaller hook size here. We recommend that you make each of these front side accessories ahead of time, then place them on the pillow to see how they all work together. Refer to the pictures for placement recommendation.

HEADLIGHTS INSTRUCTIONS (make 2)
White
Hook: H
Ch 2
Rnd 1: 8 sc in second ch from hook. (8)
Rnd 2: Sc inc around. (16)
Rnd 3: Sc, sc inc around. Finish off. Cut yarn; weave in end. (24)
Attach Silver Gray to any stitch.
Rnd 4: 2 sc, sc inc around. Finish off. Cut yarn; weave in end. (32)
Stuff lightly. Sew to the lower right and left of the front of the pillow. See pillow for placement.

Beginner Friendly Sewing Patterns

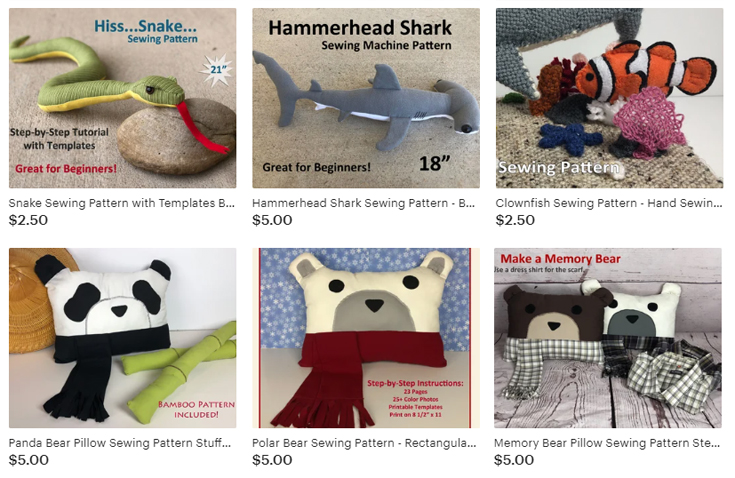
We also have fun beginner friendly sewing patterns. Great for new sewists! These are fun to make and fun to give as gifts. Many of these are Step-by-Step tutorials and include templates you can trace.

These are available on Etsy, too!

FRONT BUTTON/EMBLEM INSTRUCTIONS
White
Hook: H
Ch 2
Rnd 1: 7 sc in second ch from hook. (7)
Rnd 2: Sc inc around. (14)
Rnd 3: Sc, sc inc around. Finish off. Cut yarn; weave in end. (21)
Rnd 4: 2 sc, sc inc around. Finish off. Cut yarn; weave in end. (28)
Attach Sapphire to any stitch.
Rnd 5: 3 sc, sc inc around. Finish off. Cut yarn leaving long tail for sewing. (35)
Embroider logo on front or stitch a second flower (pattern below) and whip stitch to emblem. Sew to front center of pillow. See photo for placement.

FRONT TURN SIGNAL INSTRUCTIONS (make 2)
Terracotta
Hook: H
Ch 2
Rnd 1: 7 sc in second ch from hook. (7)
Rnd 2: Sc inc around. Finish off. Cut yarn; weave in end. (14)
Attach Grey to any st.
Rnd 3: Sc, sc inc around. Finish off. Cut yarn; weave in end. (21)
Stuff lightly. Sew to the front of the pillow slightly above the headlights and offset to the side. See photo for placement.

Have You Tried Pin Loom Weaving?

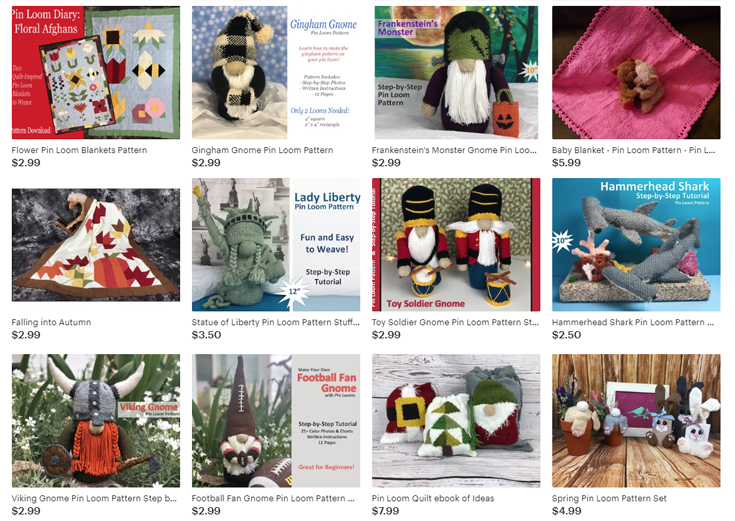
Another great craft for using your yarn is pin loom weaving. It’s fun and easy. You can make a 4″ woven square with only 8 yards of yarn! And there are a ton of things you can make with pin loom woven squares. And many of these patterns include step-by-step photos/instructions.

Learn how to Pin Loom Weave on our website.

Check out these pin loom patterns on our Etsy Shop.

BACK PANEL INSTRUCTIONS
White
Hook: J
Ch 51
Row 1: Sc in second ch from hook and in each st across. (50)
Row 2-8: Turn, sc across.
Finish off. Cut yarn; weave in end.
Skip the first st. Attach Sapphire to the second st.
Row 9: Working in back loops only, sc in the same st as the attached, 47 sc. (48)
Row 10-37: Turn ,sc across.
Attach White to first st.
Row 38: Turn, sc across.
Row 39: Turn, working in back loop only, sc across.
Row 40: Turn, working in both loops, sc across.
Row 41-56: Turn, 4 White sc, 40 Black sc, 4 White sc.
Row 57: Turn, White sc dec, 3 White sc, 38 sc, 3 White sc, White sc dec. (46)
Cut Black; weave in end.

Wild and Wacky Cup Cozy Patterns

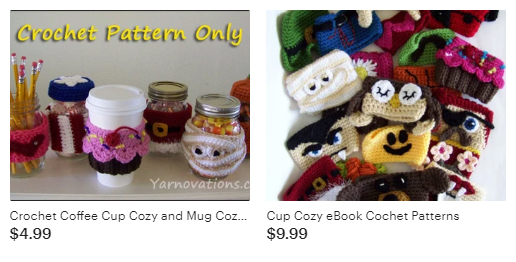
Impress your friends with a new cup cozy every week! The eBook has over 26 designs including cup cozies for major holidays. The ebook includes recipes and crafts so you can make gifts to go along with the cozies.

Go to Etsy for the Cup Cozy Patterns.

Row 58: Turn, sc dec, 42, sc dec. (44)
Row 59: Turn, sc dec, 40 sc, sc dec. (42)
Row 60: Turn, sc dec, 38, sc dec. Finish off. Cut yarn; weave in end. (40)
With right side facing, attach White to the first unused stitch left on row 8.
Row 61: 2 sc in the unused stitch, continue working around the white area, 1 sc on the end of every white row, turn and continue working on the foundation ch, sc inc in the first st, sc across, sc inc in the last st, turn and work on the ends of each row, 1 sc on the end of each row, turn, 2 sc in the 1 unused st. Continue with the Sapphire, 1 sc on the end of every Sapphire row, continue on the White using White, 1 sc on the end of every row, continue along the top, 1 sc in each st, turn, 1 sc in the end of every White row. Continue with Sapphire, 1 sc in the end of every Sapphire row. Join with a sl st.
Row 62: Working in the back loops only, sc around using the same color as each section.
Row 63-65: Working in both loops, sc around using the same color as each section. Finish off. Cut yarn; weave in ends.
Stuff and sew front and back panels together with a whip stitch.

More Fun Crochet Patterns

If you’ve been enjoying this VW Campervan crochet pattern, take a look at these other fun crochet patterns on our Etsy Shop.

REAR TURN SIGNAL INSTRUCTIONS
Terracotta
Hook: H
Ch 4
Row 1: Sc in second ch from hook, 2 sc. (3)
Row 2: Turn, 3 sc. Finish off. Cut yarn; weave in end.
Attach Cranberry to first st.
Row 3: 3 sc.
Row 4: Turn, 3 sc. Finish off. Cut yarn; weave in end.
Attach White to first st.
Row 5: 3 sc.
Row 6: Turn, 3 sc. Finish off. Cut yarn; weave in end.
Attach Silver Gray to first st.
Row 7: Sc around. Finish off. Cut yarn leaving a long tail for sewing.
Sew turn signal to back panel. See picture for placement.

FLOWER INSTRUCTIONS
Terracotta
Hook: H
Ch 2
Rnd 1: 6 sc in second ch from hook. Join with a sl st. Finish off. Cut yarn; weave in ends.
Attach White to the back loop of any stitch.
Rnd 2: Ch 6, dc in third ch from hook, hdc, sc, sl st, sl st into the same terracotta st, sl st into next back loop of next terracotta st six times. Finish off. Cut yarn leaving a long tail for sewing.
Sew to center back of van.

You’ve Made It!

You are one groovy crocheter. You have just completed your VW Campervan crochet pillow. Good job.

We enjoyed making this pattern and hope you enjoyed it as much as we did. We love encouragement, so share the love.

  • Heart this project on Ravelry
  • Pin one of the pictures above to Pinterest
  • Buy another pattern from our Etsy Shop.

Learn a New Stitch with Our Dishcloth+ Series

Learn a new stitch or two with our fun Dishcloth + Series. Each pattern includes a beautiful dishcloth + another kitchen or dining room item.

Dishcloth+ Series available on Etsy.

Baseball Bean Bag, Blanket & Flags Crochet Pattern

Baseball Play Set: Bean Bag, Baby Blanket, Bunting and Pennant – Crochet Pattern

Baseball Bean Bag Play Set

If you’re a big time baseball fan, you’ll love this crochet pattern.

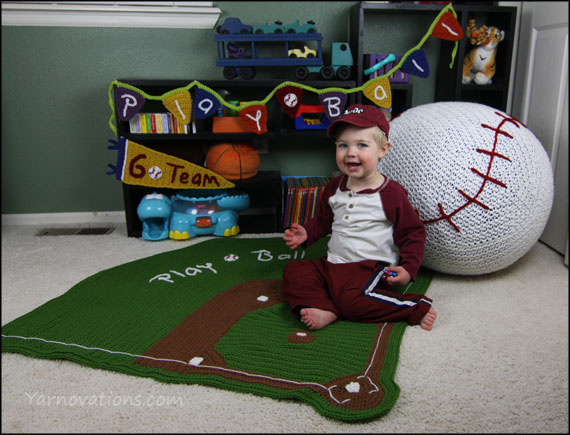
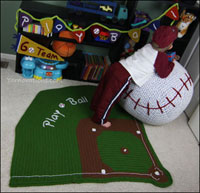
This Super Sized baseball is a bean bag chair! Yep, we crocheted a cozy to fit around a standard bean bag chair (we picked up at Walmart).

And of course, we couldn’t stop there. We created a matching baby blanket. It’s the perfect size to use as a lapghan or play mat.

To set it all off, we created some decorative flags. Create your own bunting and pennants in the colors of your favorite team.

Pattern Includes:

  • Baseball Bean Bag Chair
  • Ball Diamond Baby Blanket
  • “Play Ball” Bunting
  • “Go Team” Pennant
  • Baseball Applique

Baseball Set Crochet Pattern Available in the Store

Available on Etsy: Here

Learn more about the crochet pattern for the Baseball Set in the store.

Available in the Store

baseball set backYou can buy the whole set or individual pieces. Learn more:

Hiking Buddy Crochet Pattern

Hiking Buddy (a.k.a. Perfect Purse) Crochet Pattern

Hiking Buddy Mini Purse Crochet Pattern

Remember the Perfect Purse from the Winter 2012 Love of Crochet magazine? If you missed that issue, then we have good news for you. You can get the pattern here!

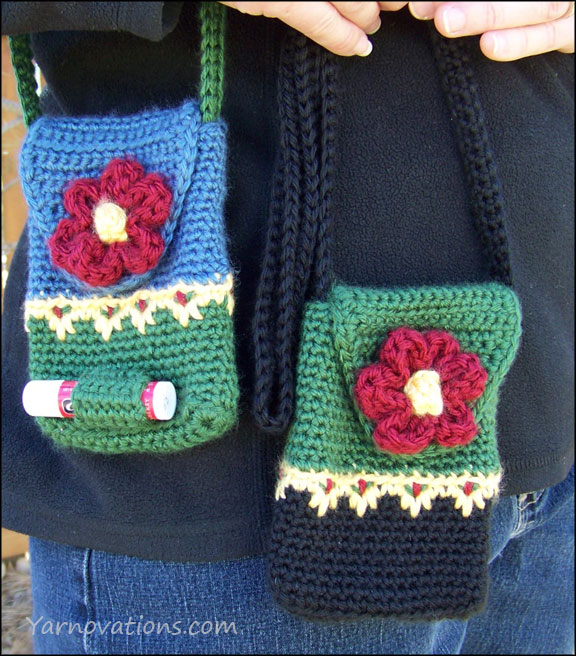
We designed this mini purse as a hiking buddy…one that’s just large enough to stow your smart phone, ID and car keys. Your personal items will stay nice and secure with this beautiful flower button closure.

Crochet it with a strap and it’s a purse. Attach the belt loop and you can wear it at your hip. Oh, and there’s a chapstick holder, too!

Pattern Includes:

  • Purse
  • Flower Button
  • Shoulder Strap
  • Belt Loop
  • Chapstick Holder

Available in the Store

Learn more about the Hiking Buddy. It’s available now in the store.

Hiking Buddy pattern available on Etsy.