How to Make a Center-Pull Ball of Yarn by Hand
How to Make a Center-Pull Ball of Yarn by Hand

how to make a center pull ball of yarn by hand

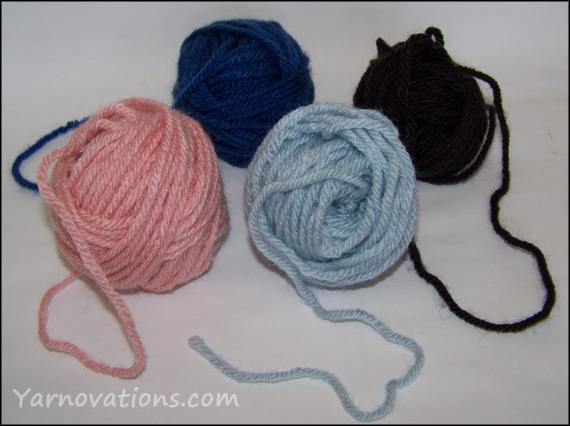
We’ll show you how to make a center pull ball of yarn by hand…no tools or special gadgets required. This simple technique will keep your yarn stash neat and your yarn tangle free.
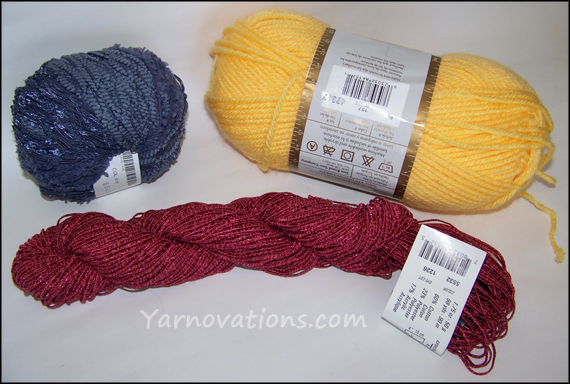
yarn wound in various forms

A center pull means that the yarn can be pulled from the center of the ball or skein. The ball stays stationary and does not flop around like it does when yarn is pulled from the outside of the skein.

Yarn comes packaged in several different ways.

Ball – Yarn wound in a round shape that has a center pull (purple ball top left in photo above).
Hank – A loose coil of yarn wound in a large circle with no center pull (red hank bottom in photo above).
Skein – An oblong ball of yarn with a center pull (yellow skein top right in photo above).
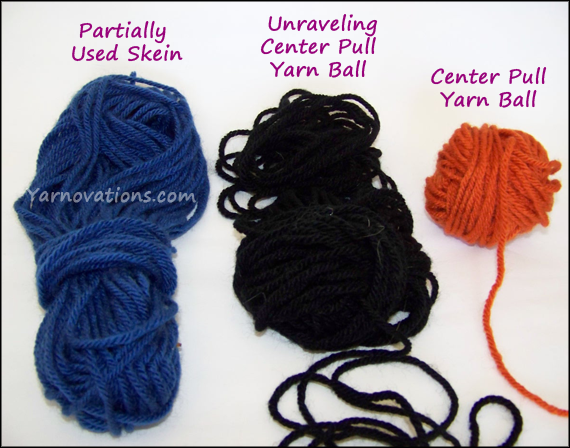
yarn in various states

There are several reasons for making a ball of yarn:

  • The skein is 3/4 used up and its shape is floppy and starting to turn into a tangled mess.
  • The hank is easier to work with as a ball of yarn.
  • A project has been frogged (ripped out) and needs to be turned into a ball.
  • A previous ball of yarn is starting to unravel.

How to Make a Center Pull Ball of Yarn by Hand
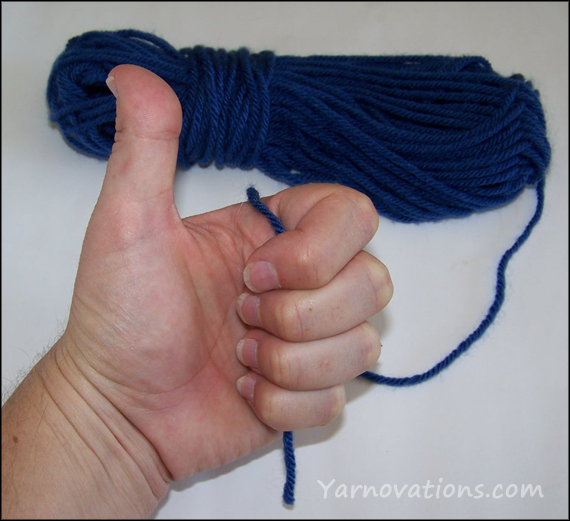
thumbs up for making a ball of yarn

1. Lay a yarn tail across your fingers with your thumb pointed up and the tail of the yarn dangling below your little finger. Close your fingers around the yarn. You’ve now got a thumbs up to go ahead with the yarn ball.
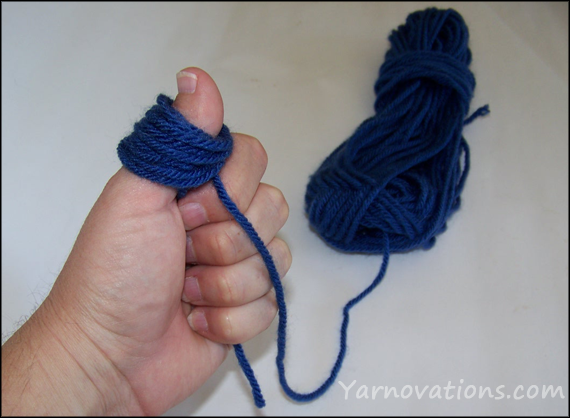
first wrap

2. Wrap yarn around your thumb at and angle…I usually wrap it on an \ angle. Wrap the yarn around approximately 10 times.

3. Twist that group of yarn about 1/4 turn to the left (clockwise).
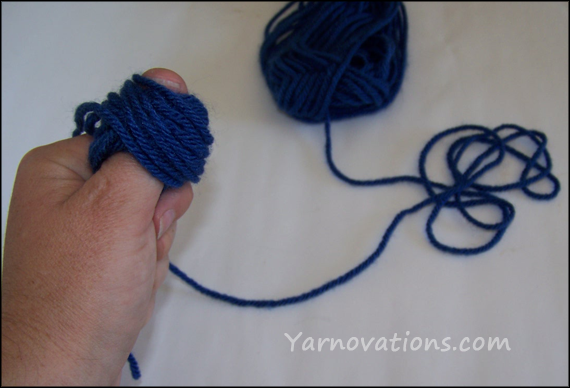
2nd wrap

4. Wrap yarn around your thumb at the same angle \ as you did in step 2, again wrapping the yarn around your thumb about 10 times.
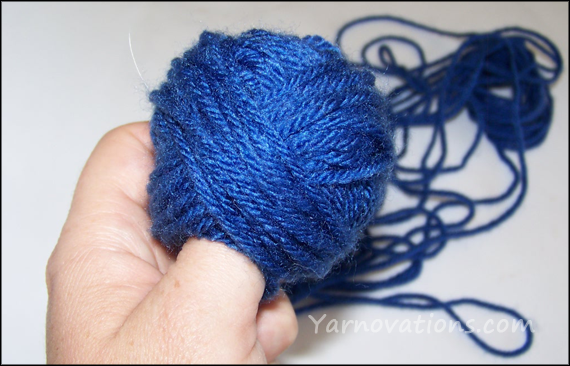
almost done wrapping yarn

5. Repeat steps 3 and 2 alternately until your ball of yarn is made.
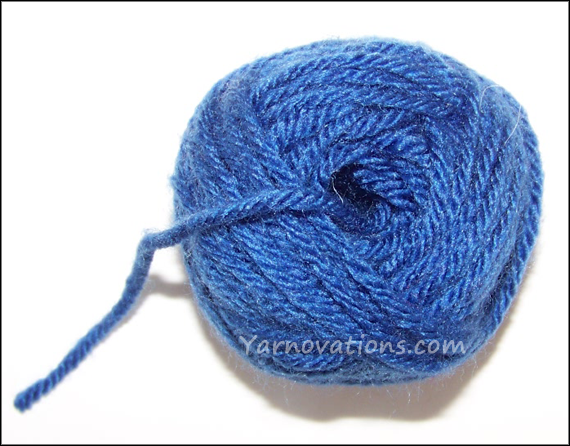
how to make a center pull ball of yarn by hand

6. Remove your thumb from the center of the ball and that is where your center pull is.

Note: There are a lot of alternatives for this method of making a center pull ball of yarn.

  • You can wrap around two or three fingers instead of your thumb.
  • You can wrap around a knitting needle or crochet hook instead of your fingers or thumb.
  • You can twist your hand/thumb instead of twisting the yarn.
  • You can wrap the yarn around a piece of cardboard or plastic bobbin.

We use this center pull ball of yarn method ALL the time. We often find that after the center pull ball of yarn has been used a while, we will need to remake it. The partially used center pull ball tends to collapse and tangle (as seen in the black ball in the photo above).
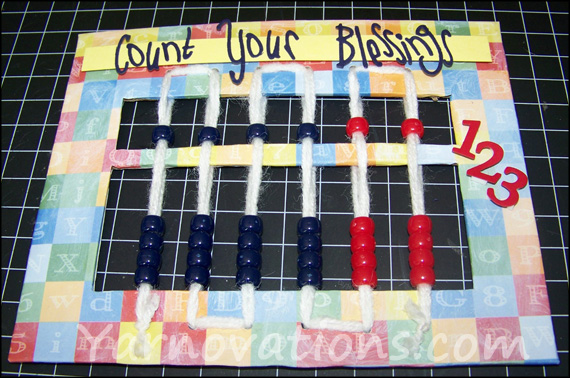
 

How to Make an Abacus with Yarn

How to Make an Abacus with Yarn – Great Craft for Kids

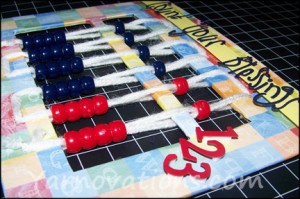
How to make an abacusAn abacus is a great way to make all kinds of calculations. Below we’ll show you how to make an abacus with yarn that’s perfect for kids of all ages. This arts and crafts project has two great math lessons – measurement and addition with an abacus. The colors on this abacus make it versatile. Teach numbers with two decimals such as currency or ignore the colors and teach whole numbers up to the 100,000’s.
We’ve also decorated ours and given it the title, “Count your Blessings.” This abacus can now be used to teach a character building lesson on the value of thankfulness. Psalm 103 would be a great Bible passage to illustrate thankfulness.

Psalm 103:2 says, “Praise the Lord, my soul, and forget not all his benefits.”

How to Make an Abacus with Yarn – Features and Supplies List

Don’t let the simple style of this abacus fool you. This little abacus has a lot of great features:

  • The four strands of yarn keep the beads in place allowing students to hold up their abaci to show their answers to their teacher.
  • Teach numbers with two decimals or whole numbers to the 100,000’s.
  • Many different lessons can be taught with this one project.
  • Easy to make.
  • Materials are minimal and cheap.
  • It’s thin, small and light weight making it easy to carry and keep with one’s math book.
  • It’s fun to make and use.

We mentioned that the supplies are minimal and cheap. Check around your house for the following:

  • 30 Pony Beads (we used 20 blue and 10 red)
  • cardboard 7 1/4″ x 5 1/4″
  • yarn (4 pieces) 48″ length each
  • whole punch (1/8″)
  • box cutter/knife (use with caution! Supervise kids using these.)
  • pencil
  • standard ruler
  • scissors
  • yarn needle
  • Supplies to decorate (we used paper, glue and tape)

How to Make an Abacus with Yarn – Lesson One: Working with Inches

If your kids need practice using a standard ruler, this is a great project (or you can trace and use this Abacus template).

  1. Start with a piece of cardboard that’s 7 1/4″ x 5 1/4″. (Mine is 1/2″ taller but required a special hole punch. If you are using a standard single hole punch, then you’ll want to cut your abacus to 7 1/4″ x 5 1/4″).
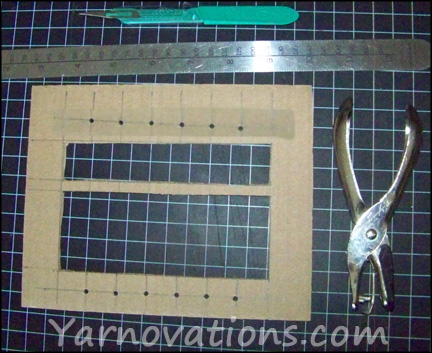
  2. With the long side of the cardboard horizontal in front of you, draw a vertical line at 1″, 1 3/4″, 2 1/2″, 3 1/4″, 4″, 4 3/4″, 5 1/2″, 6 1/4″. See image below.
  3. With the short side of the cardboard horizontal in front of you, draw a vertical line at 1/2″, 1″, 3″, 3 1/4″, 4 1/4″, 4 3/4″, 5 1/4″. See image below.
  4. Punch holes on the lines that are 1/2″ from the ends where they intersect the lines drawn in step 2. There will be 6 on each side (12 total). See image below.
  5. Cut out 2 rectangles leaving a thin horizontal bar in the middle. See image below.
  6. Cut 4 strands of yarn to 48″ each.
  7. Thread two pieces of yarn on your needle.
  8. Start at the bottom left corner, insert yarn into first hole leaving a tail about 5″ long. Thread 5 beads onto yarn. Weave round thin middle bar then weave up and through the hole at the top. (At this point the five beads can move in either section). See image below.
  9. Insert yarn into next hole. Thread 5 beads onto yarn. Again, weave around middle bar and weave to and through the hole on the bottom.
  10. Repeat step 9 until all 6 sets of beads have been stranded. Remove needle.
  11. Thread remaining two pieces of yarn on your needle.
  12. Weave this strand in the opposite direction as the first strands of yarn. Wherever you weaved on top of the cardboard, now weave on the bottom. Make sure you thread 4 beads into the bottom section and a single bead into the top section of all 6 sections. *The weaving is what will lock the beads into each section. See image below.
  13. Knot the tails of yarn and trim.
cardboard cutout

Draw lines, punch holes and cut out rectangles.

Decorate cardboard if desired. We glued decorative paper on the front and back.

weaving beads

This is what your abacus will look like after following steps 8-10.

At this point, the beads can float between the top and bottom section. The next step will lock them in their appropriate sections.

fully woven

Beads become trapped when second strand is woven on the opposite side.

Decorate a bit more if desired. We added our title and some numbers to ours at this point. Now the abacus is ready to use!

How to Make an Abacus with Yarn – What Each Row Represents

Now that we’ve learned how to make an abacus, let’s take a look at what the different colors and columns of beads mean.

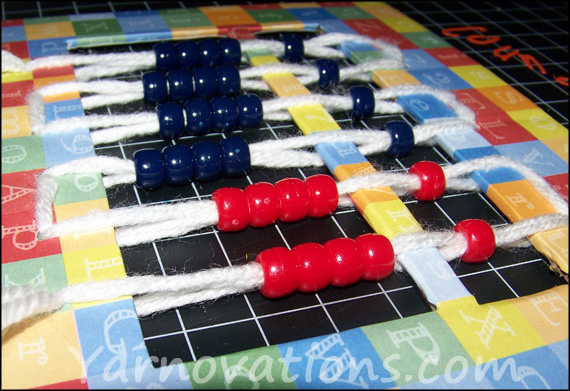
Side view of finished abacus

Side view of finished abacus

Using the Colors
If you attribute value to the colors, then the abacus has four whole numbers (the blue beads on the left) followed by two decimal places (the red on the right). From left to right you have: Thousands, Hundreds, Tens and Ones in blue. Then Tenths and Hundredths in red.

Ignoring the Colors
If you ignore the fact that the beads have color, then you have six columns of whole numbers. From right to left you have: Ones, Tens, Hundreds, Thousands, Ten Thousands, Hundred Thousands.

How to Make an Abacus with Yarn – How to Count and Add

We could write pages and pages of content on how to understand and add with an abacus. Instead, we recommend that you watch this great video tutorial.

Deborah’s (Yarnovator) 5th grade class thought these homemade abaci were amazing. Yes, the abacus is amazing. Yes, she’s a great teacher for giving them each their own abacus. Want to be your kids’ hero? Give it a try. Your kids are going to love them and they’ll think you’re amazing, too!